目录操作几何体新建正方体设置立方体位置选中立方体挪动几何体操作几何体 据说我的世界是三个程序员用一周开发出来的,那一个程序员用半天开发出一个乞丐版的我的世界,讲道理是完全没有问题的。
据说我的世界是三个程序员用一周开发出来的,那一个程序员用半天开发出一个乞丐版的我的世界,讲道理是完全没有问题的。
而众所周知,我的世界就是无数个像素块的集合,而像素块也就是立方体。关于新建立方体,这个大家已经非常熟练了,不仅能新建一个立方体,甚至能新建要多少有多少的立方体。
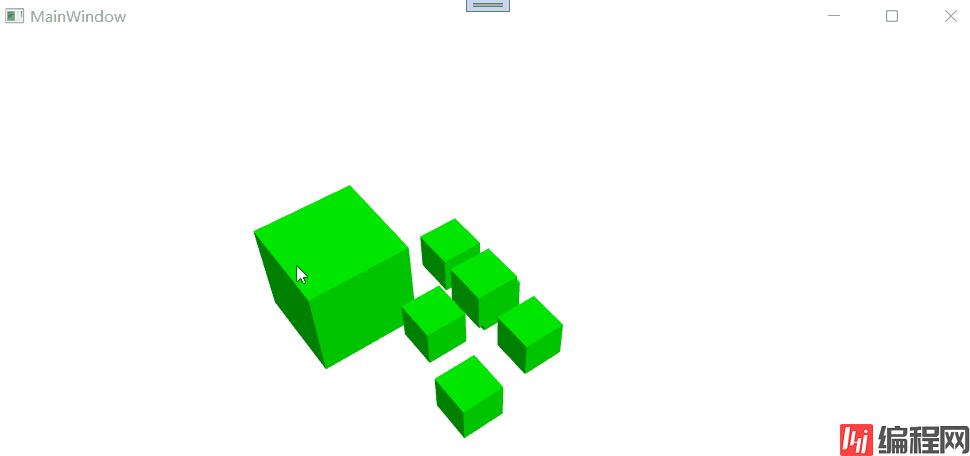
但目前并不能用手新建,所以接下来添加一个快捷方式Ctrl+N来快速创建立方体。当按下Ctrl+N时效果为

这对于已经能生成一排立方体的人来说绝对是小意思了,首先在构造函数中绑定快捷方式
public MainWindow()
{
    InitializeComponent();
    KeyDown += MainWindow_KeyDown;
}
MainWindow_KeyDown定义为
private void MainWindow_KeyDown(object sender, KeyEventArgs e)
{

    if ((Keyboard.IsKeyDown(Key.LeftCtrl) || Keyboard.IsKeyDown(Key.RightCtrl)) && Keyboard.IsKeyDown(Key.N))
    {
        MeshGeometry3D mesh = MakeCubeMesh(0, 0, 0, 1);
        Color color = Color.FromArgb(255, 0, 255, 0);
        DiffuseMaterial material = new DiffuseMaterial(new SolidColorBrush(color));
        GeometryModel3D model = new GeometryModel3D(mesh, material);
        group3d.Children.Add(model);
    }
}
其中MakeCubeMesh为自定义的函数,早在本系列第一篇博客就已经写过了,其他诸如光效等亦然。唯一的区别是这次并不一开始就生成多个立方体,所以无需DefineModel函数。
刚刚虽然新建了一个立方体,但并不能确定立方体的位置,接下来就要新建一个对话框,用以设置新建立方体的位置。
右键项目,新建窗口,名为ParaDialog,其xaml为
<Window x:Class="MyWord.ParaDialog"
xmlns="Http://schemas.microsoft.com/winfx/2006/xaml/presentation"
xmlns:x="http://schemas.microsoft.com/winfx/2006/xaml"
Title="输入参数" Height="180" Width="300">
<DockPanel LastChildFill="True">
<StackPanel DockPanel.Dock="Bottom"
Orientation="Horizontal" HorizontalAlignment="Right">
<Button Content="设置" Click="okButton_Click" Margin="5" Width="60" Height="25"/>
<Button Content="取消" IsCancel="True" Margin="5" Width="60" Height="25"/>
</StackPanel>
<UnifORMGrid Columns="1" Margin="5" x:Name="ufgLabel"/>
<UniformGrid Columns="1" Margin="5" x:Name="ufgTextBox"/>
</DockPanel>
</Window>
其cs的核心代码为
public partial class ParaDialog : Window
{
    static readonly string[] labels = new string[4] { "x坐标", "y坐标", "z坐标", "边长" };
    List<TextBox> paraBoxes = new List<TextBox>();
    public double[] para;
    public ParaDialog(double[] para)
    {
        this.para = para;
        InitializeComponent();
        string tmp;
        for (int i = 0; i < 4; i++)
        {
            //向UniformGrid中欧给填充文字块
            ufgLabel.Children.Add(new TextBlock() { Text = labels[i] });
            paraBoxes.Add(new TextBox());
            ufgTextBox.Children.Add(paraBoxes[i]);
        }
    }

    private void okButton_Click(object sender, RoutedEventArgs e)
    {
        for (int i = 0; i < 4; i++)
            para[i] = double.Parse(paraBoxes[i].Text);
        DialogResult = true;
    }
}
最后,更改Ctrl+N的响应代码
//...前面不用改
if ((Keyboard.IsKeyDown(Key.LeftCtrl) || Keyboard.IsKeyDown(Key.RightCtrl)) && Keyboard.IsKeyDown(Key.N))
{
  double[] para = new double[4];
  ParaDialog pDialog = new ParaDialog(para);
  pDialog.ShowDialog();
  if (pDialog.DialogResult != true)
      return;
  MeshGeometry3D mesh = MakeCubeMesh(para[0],para[1],para[2],para[3]);
  //...后面不用改
}

若想操作几何体,前提是选中它,接下来就绑定一个鼠标动作,来完成选中的操作,先更改xaml代码,将Viewport3D放到一个border中
<Border Name="mainBorder" Background="White" MouseDown="mainBorder_MouseDown">
    <Viewport3D x:Name="v3dMain">
    </Viewport3D>
</Border>
然后新建mainBorder_MouseDown函数
private void mainBorder_MouseDown(object sender, MouseButtonEventArgs e)
{
    if (e.LeftButton == MouseButtonState.Released) return;

    Color color = Color.FromArgb(255, 0, 255, 0);
    var material = new DiffuseMaterial(new SolidColorBrush(color));

    //获取鼠标在对象中的位置
    Point mousePos = e.GetPosition(v3dMain);

    // 执行点击操作
    HitTestResult result = VisualTreeHelper.HitTest(v3dMain, mousePos);

    //此即鼠标点击到曲面上的结果
    var meshResult = result as RayMeshGeometry3DHitTestResult;
    GeometryModel3D model = null;
    if ((meshResult != null) && (meshResult.ModelHit is GeometryModel3D))
        model = meshResult.ModelHit as GeometryModel3D;

    //如果刚才选了别的模型,则使之恢复绿色
    if (SelectedModel != null)
        SelectedModel.Material = material;
    //选择新的模型
    SelectedModel = model;
    if (model != null)
        model.Material = new DiffuseMaterial(Brushes.Fuchsia);
}
其效果为

既然已经可以选中了,那么挪动什么的绝对就是小意思了。
回顾此前的鼠标操作摄像机,其基本流程是,鼠标点击之后,绑定另一个函数,当松开鼠标时解绑。
在WPF 3D中,提供了Tranform成员,可用于移动几何体,所以在新建几何体时,务必注意添加一行
//MainWindow_KeyDown函数
model.Transform = new TranslateTransform3D(0, 0, 0);
然后添加全局变量用以保存旧的位置
private Point3D oldPoint;
然后修改mainBorder_MouseDown,其实只需在末尾添加
mainBorder.CaptureMouse();
mainBorder.MouseMove += MainBorder_MouseMove;
mainBorder.MouseUp += MainBorder_MouseUp;
接下来是鼠标挪动和弹起时的动作,其中弹起时非常简单,无非是解绑鼠标动作;而鼠标挪动时,则需更改几何体的变化参数。
private void MainBorder_MouseUp(object sender, MouseButtonEventArgs e)
{
    mainBorder.ReleaseMouseCapture();
    mainBorder.MouseMove -= MainBorder_MouseMove;
    mainBorder.MouseUp -= MainBorder_MouseUp;
}

private void MainBorder_MouseMove(object sender, MouseEventArgs e)
{
    Point newPoint = e.GetPosition(mainBorder);
    var res = VisualTreeHelper.HitTest(v3dMain, newPoint);
    if (res == null) return;
    var newResult = res as RayMeshGeometry3DHitTestResult;

    var deltaPt = newResult.PointHit - oldPoint;
    var trans = SelectedModel.Transform as TranslateTransform3D;
    trans.OffsetX += deltaPt.X;
    trans.OffsetY += deltaPt.Y;
    trans.OffsetZ += deltaPt.Z;
    oldPoint = newResult.PointHit;
}
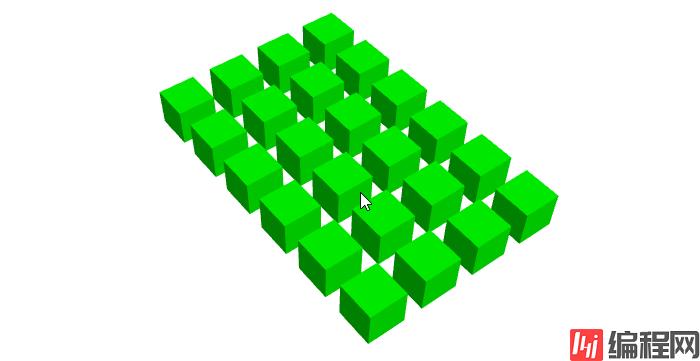
效果为

以上就是C# WPF实现3D操作几何体效果的详细内容,更多关于C# WPF 3D操作几何体的资料请关注编程网其它相关文章!
--结束END--
本文标题: C# WPF实现3D操作几何体效果
本文链接: https://lsjlt.com/news/198239.html(转载时请注明来源链接)
有问题或投稿请发送至: 邮箱/279061341@qq.com QQ/279061341
2024-03-01
2024-03-01
2024-02-29
2024-02-29
2024-02-29
2024-02-29
2024-02-29
2024-02-29
2024-02-29
2024-02-29
回答
回答
回答
回答
回答
回答
回答
回答
回答
回答
0