这篇文章主要讲解了“@RequestBody和@RequestParam注解如何使用”,文中的讲解内容简单清晰,易于学习与理解,下面请大家跟着小编的思路慢慢深入,一起来研究和学习“@RequestBody和@RequestParam注解如何
这篇文章主要讲解了“@RequestBody和@RequestParam注解如何使用”,文中的讲解内容简单清晰,易于学习与理解,下面请大家跟着小编的思路慢慢深入,一起来研究和学习“@RequestBody和@RequestParam注解如何使用”吧!
@RequestParam:接收来自RequestHeader中,即请求头。通常用于GET请求,例如:Http://localhost:8080/hello/name=admin&age=18
@Target({ElementType.PARAMETER})@Retention(RetentionPolicy.RUNTIME)@Documentedpublic @interface RequestParam { @AliasFor("name") String value() default ""; @AliasFor("value") String name() default ""; boolean required() default true; String defaultValue() default "\n\t\t\n\t\t\n\ue000\ue001\ue002\n\t\t\t\t\n";} @GetMapping("/hello") public String hello(@RequestParam(name = "id") Long id){ System.out.println("hello " + id); return "hello message"; }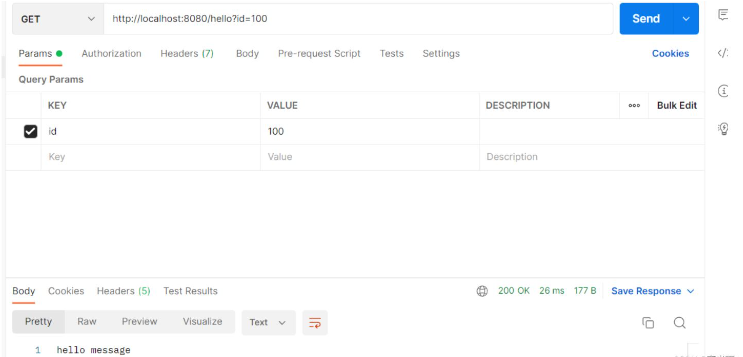
@RequestParam用来处理Content-Type 为 application/x-www-fORM-undencoded编码的内容,Content-Type 默认为该属性
@RequestParam也可用于其它类型的请求,例如:POST、DELETE等请求。
由于@RequestParam是用来处理 Content-Type 为 application/x-www-form-urlencoded 编码的内容的,所以在postman中,要选择body的类型为 x-www-form-urlencoded,这样在headers中就自动变为了 Content-Type : application/x-www-form-urlencoded 编码格式。如下图所示:
@PostMapping("/save") public String hello(@RequestParam(name = "id") Long id, @RequestParam("name") String name, @RequestParam("passWord") String password){ System.out.println(user); return "hello message"; }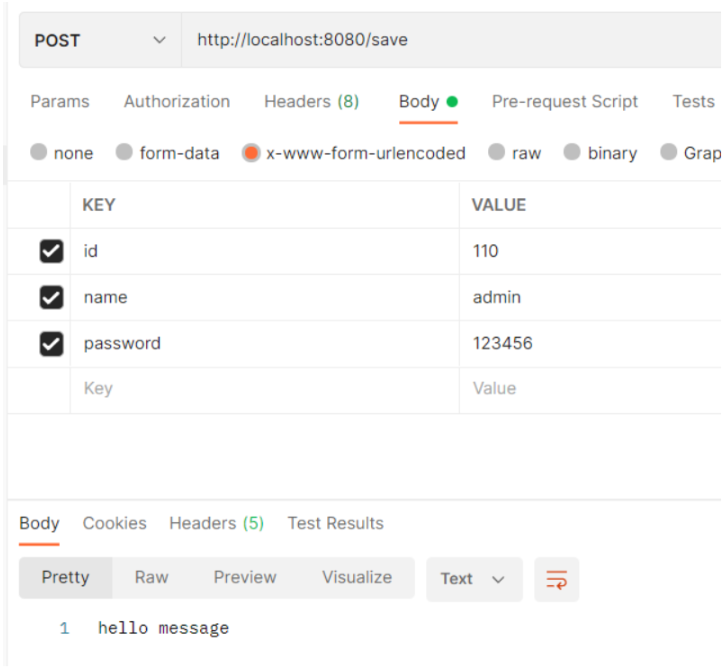
如果前台传递过来的参数不是三个,而是十个,如果继续使用 @RequestParam 的方式来接收请求参数,就需要十个 @RequestParam ,我们的代码可读性将会变得很差,并且当参数类型相同时,十分容易出错。所以使用实体类来接收传递过来的参数,但是 @RequestParam 不支持直接传递实体类的方式
@Datapublic class User { @NotNull(message = "id不能为空") private Long id; @NotBlank(message = "名字不能为空") private String name; @NotBlank(message = "密码不能为空") private String password;}// @RequestParam 不支持直接传递实体类的方式,所以可以在实体类中做数据校验,使用 @Validated 注解使得作用在实体类属性上的注解生效@PostMapping("/save")public String save(@Validated User user){ System.out.println(user); return "hello success";}// console result: User(id=110, name=admin, password=123456)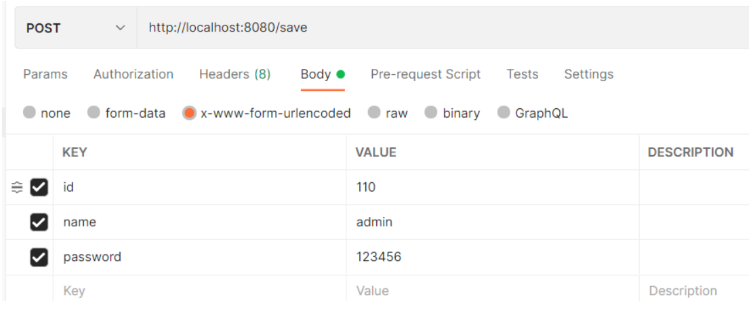
如果改用 JSON 字符串来传值的话,类型设置为 application/json,点击发送的话,会报错,后台接收不到值,为 null

// console result: User(id=null, name=null, password=null)注解@RequestBody接收的参数是来自requestBody中,即请求体。一般用于处理非 Content-Type: application/x-www-form-urlencoded编码格式的数据,比如:application/json、application/xml等类型的数据。
就application/json类型的数据而言,使用注解@RequestBody可以将body里面所有的json数据传到后端,后端再进行解析。
@PostMapping("/saveBatch")public String saveBatch(@RequestBody @Validated List<User> list){ list.forEach(System.out::println); return "saveBatch success";}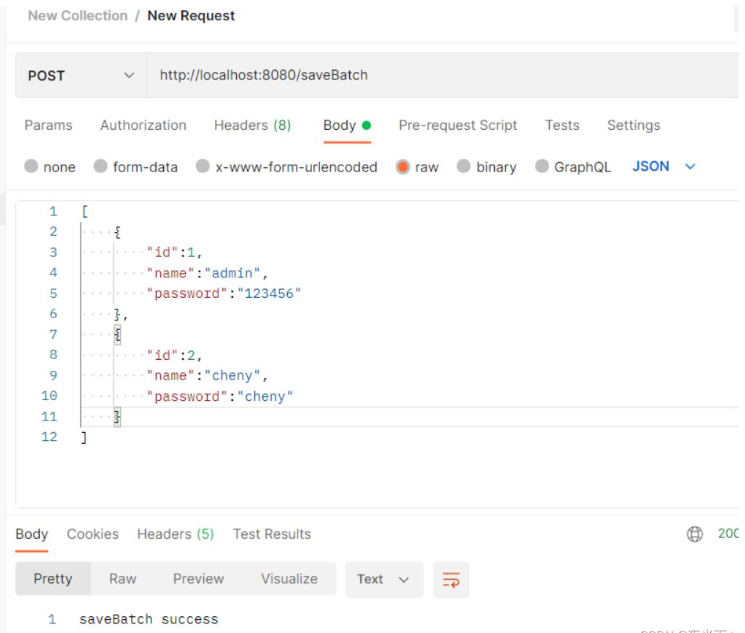
// console result: // User(id=1, name=admin, password=123456)// User(id=2, name=cheny, password=cheny)@PostMapping("/listMap")public String saveMap(@RequestBody List<Map<String, String>> listMap){ for (Map<String, String> map : listMap) { System.out.println(map); } return "listMap success";}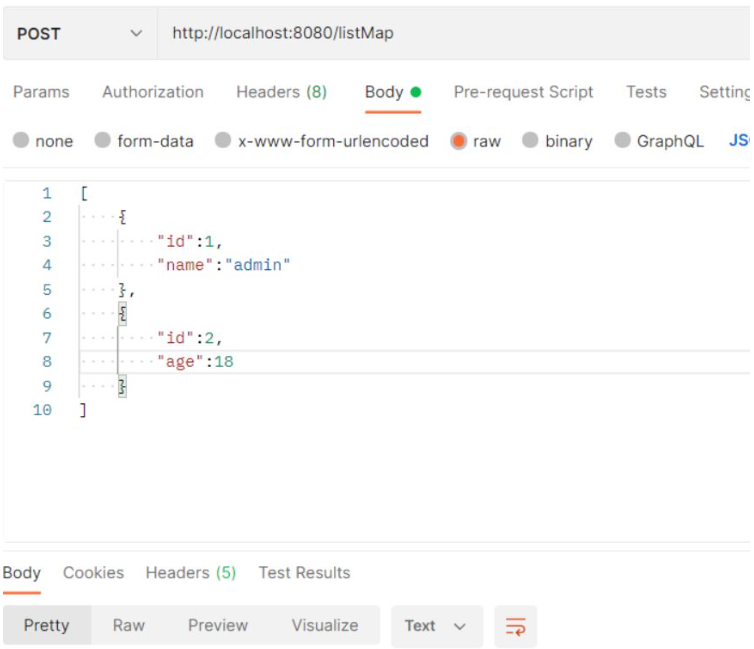
// console result:// {id=1, name=admin}// {id=2, age=18}感谢各位的阅读,以上就是“@RequestBody和@RequestParam注解如何使用”的内容了,经过本文的学习后,相信大家对@RequestBody和@RequestParam注解如何使用这一问题有了更深刻的体会,具体使用情况还需要大家实践验证。这里是编程网,小编将为大家推送更多相关知识点的文章,欢迎关注!
--结束END--
本文标题: @RequestBody和@RequestParam注解如何使用
本文链接: https://lsjlt.com/news/353213.html(转载时请注明来源链接)
有问题或投稿请发送至: 邮箱/279061341@qq.com QQ/279061341
2024-05-24
2024-05-24
2024-05-24
2024-05-24
2024-05-24
2024-05-24
2024-05-24
2024-05-24
2024-05-24
2024-05-24
回答
回答
回答
回答
回答
回答
回答
回答
回答
回答
0