Python 官方文档:入门教程 => 点击学习
目录一 sentinel的概念1.1 sentinel二 sentinel的安装2.1 sentinel的安装三 sentinel的各种用途3.1 实时监控3
Sentinel是分布式系统流量控制的哨兵,阿里开源的一套服务容错的综合性解决方案。
主要用来处理:
服务降级
服务熔断
超时处理
流量控制
sentinel 的使用可以分为两个部分:
核心库(Java 客户端):不依赖任何框架/库,能够运行于 Java 8 及以上的版本的运行时环境,同时对 dubbo / spring cloud 等框架也有较好的支持。
控制台(Dashboard):Dashboard 主要负责管理推送规则、监控、管理机器信息等。基于 Spring Boot 开发,打包后可以直接运行。
中文文档:
quick-start | Sentinel
程序包下载:
Releases · alibaba/Sentinel · GitHub

启动jar包
F:\>java -jar sentinel-dashboard-1.7.2.jar
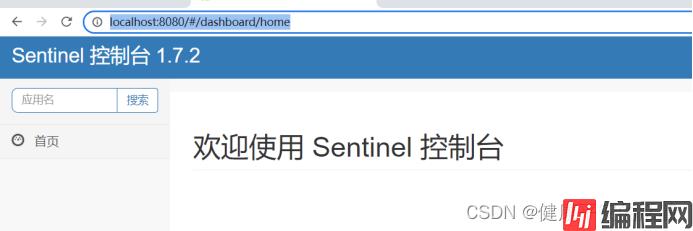
页面访问: sentinel / sentinel
输入地址: Http://localhost:8080/
1.pom
<dependencies>
    <dependency>
      <groupId>junit</groupId>
      <artifactId>junit</artifactId>
      <version>4.13</version>
      <scope>test</scope>
    </dependency>
    <!--SpringCloud ailibaba Nacos -->
    <dependency>
      <groupId>com.alibaba.cloud</groupId>
      <artifactId>spring-cloud-starter-alibaba-nacos-discovery</artifactId>
      <version>2021.1</version>
    </dependency>
    <!--SprinGCloud ailibaba sentinel-datasource-nacos 后续做持久化用到-->
    <dependency>
      <groupId>com.alibaba.csp</groupId>
      <artifactId>sentinel-datasource-nacos</artifactId>
      <version>1.5.2</version>
    </dependency>
    <!--SpringCloud ailibaba sentinel -->
    <dependency>
      <groupId>com.alibaba.cloud</groupId>
      <artifactId>spring-cloud-starter-alibaba-sentinel</artifactId>
      <version>2021.1</version>
    </dependency>
    <!--openfeign-->
    <dependency>
      <groupId>org.springframework.cloud</groupId>
      <artifactId>spring-cloud-starter-openfeign</artifactId>
    </dependency>
    <!-- SpringBoot整合WEB组件+actuator -->
    <dependency>
      <groupId>org.springframework.boot</groupId>
      <artifactId>spring-boot-starter-web</artifactId>
    </dependency>
    <dependency>
      <groupId>org.springframework.boot</groupId>
      <artifactId>spring-boot-starter-actuator</artifactId>
    </dependency>
    <!--日常通用jar包配置-->
    <dependency>
      <groupId>org.springframework.boot</groupId>
      <artifactId>spring-boot-devtools</artifactId>
      <scope>runtime</scope>
      <optional>true</optional>
    </dependency>
    <dependency>
      <groupId>cn.hutool</groupId>
      <artifactId>hutool-all</artifactId>
      <version>4.6.3</version>
    </dependency>
    <dependency>
      <groupId>org.projectlombok</groupId>
      <artifactId>lombok</artifactId>
      <optional>true</optional>
    </dependency>
    <dependency>
      <groupId>org.springframework.boot</groupId>
      <artifactId>spring-boot-starter-test</artifactId>
      <scope>test</scope>
    </dependency>
  </dependencies>
2.application配置文件
server:
  port: 7005

spring:
  application:
    name: mscloud-sentinel-consumer
  cloud:
    nacos:
      discovery:
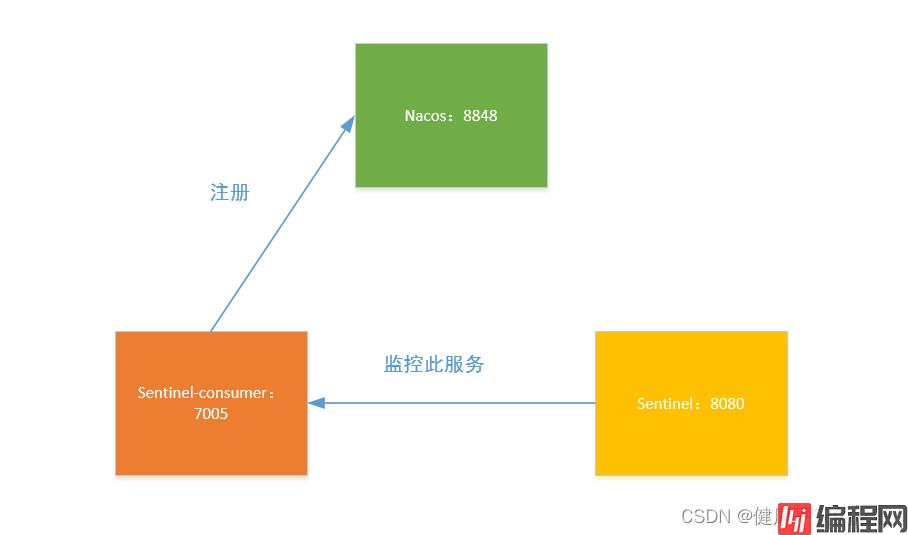
        server-addr: localhost:8848 #Nacos服务注册中心地址
    sentinel:
      transport:
        dashboard: localhost:8080 #配置Sentinel dashboard地址
        port: 8719

management:
  endpoints:
    web:
      exposure:
        include: '*'
3.业务类
@RestController
@Slf4j
public class DataLimitController {
        @GetMapping("/testA")
        public String testA()
        {
            return "------testA";
        }

        @GetMapping("/testB")
        public String testB()
        {
            log.info(Thread.currentThread().getName()+"\t"+"...testB");
            return "------testB";
        }
}
4.启动类
@EnableDiscoveryClient
@SpringBootApplication
public class App
{
    public static void main( String[] args )

    {
        SpringApplication.run(App.class, args);
    }
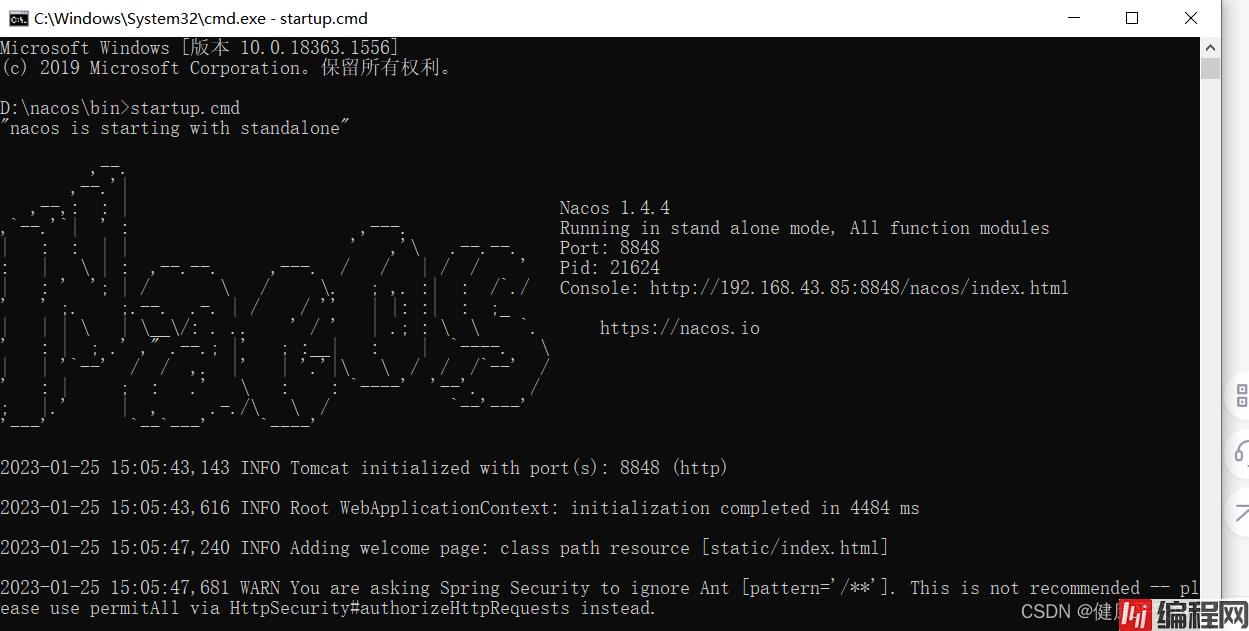
}1.启动nacos
2.启动sentinel服务
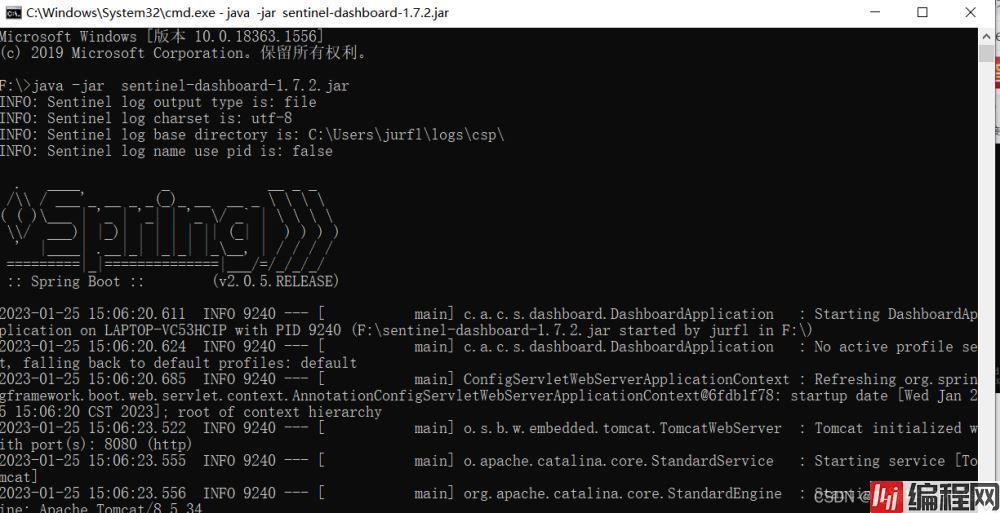
3.启动sentinel消费服务
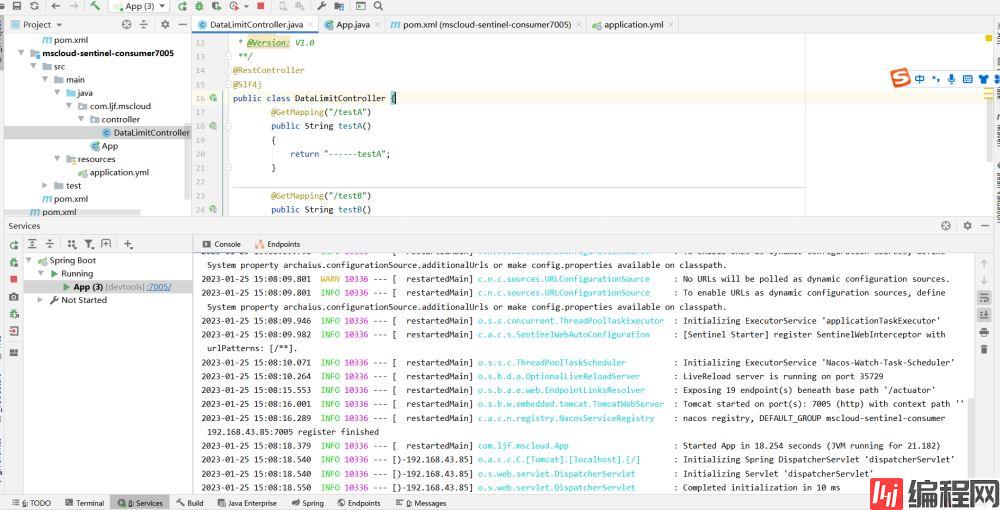
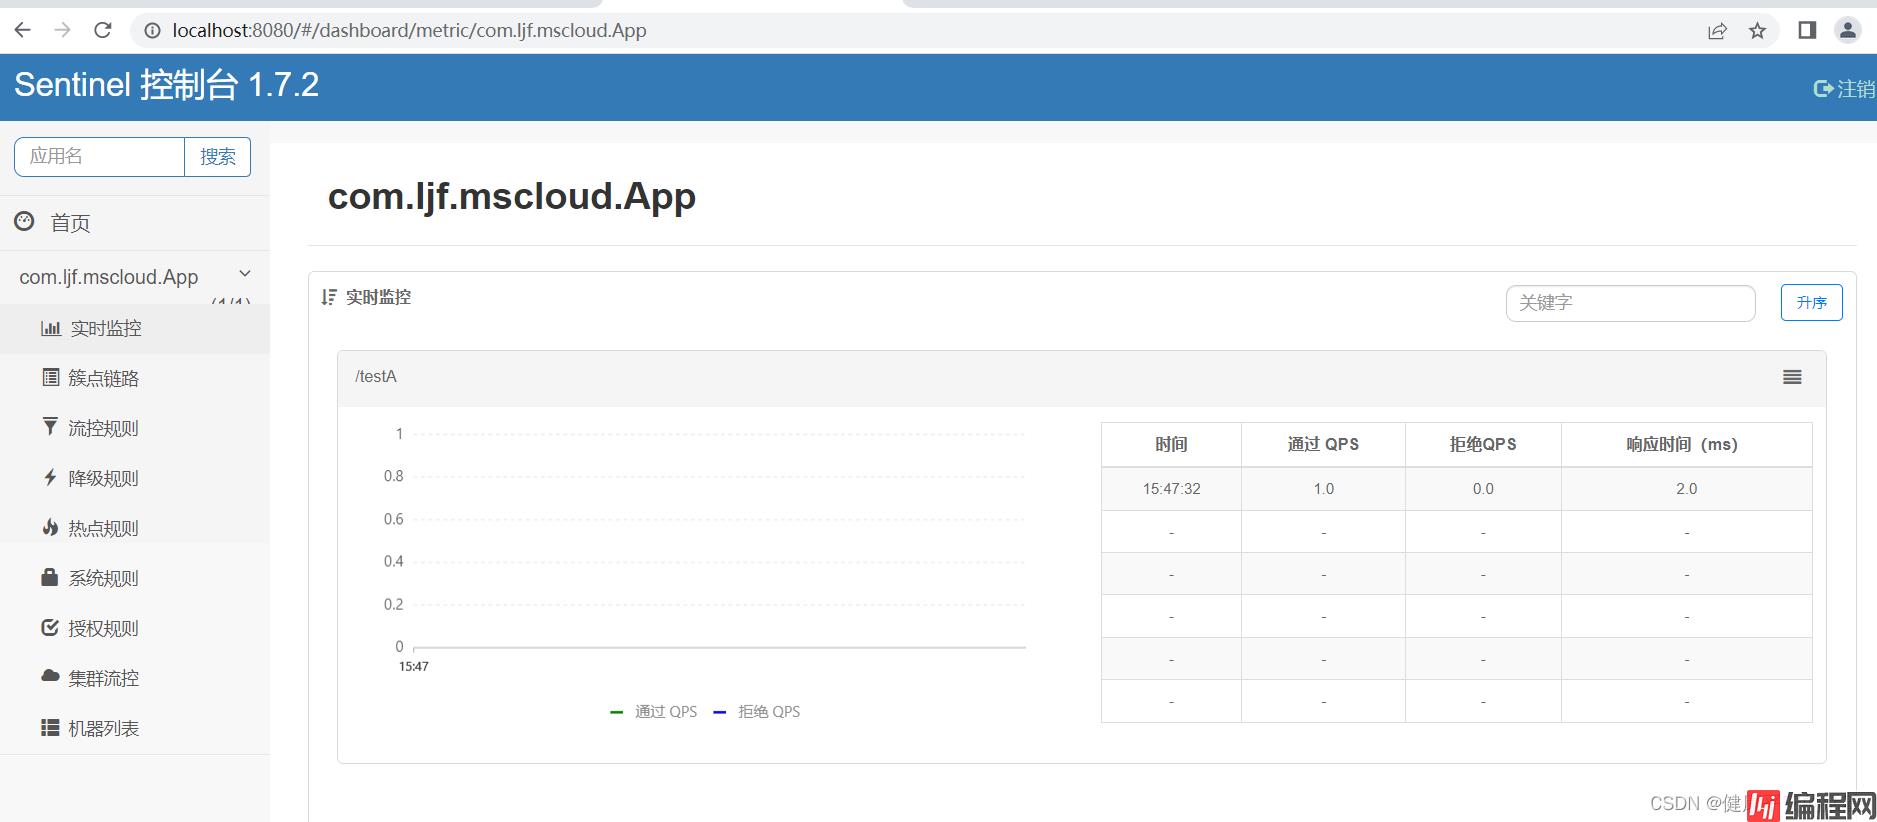
访问地址: http://localhost:7005/testA 多次刷新访问几次

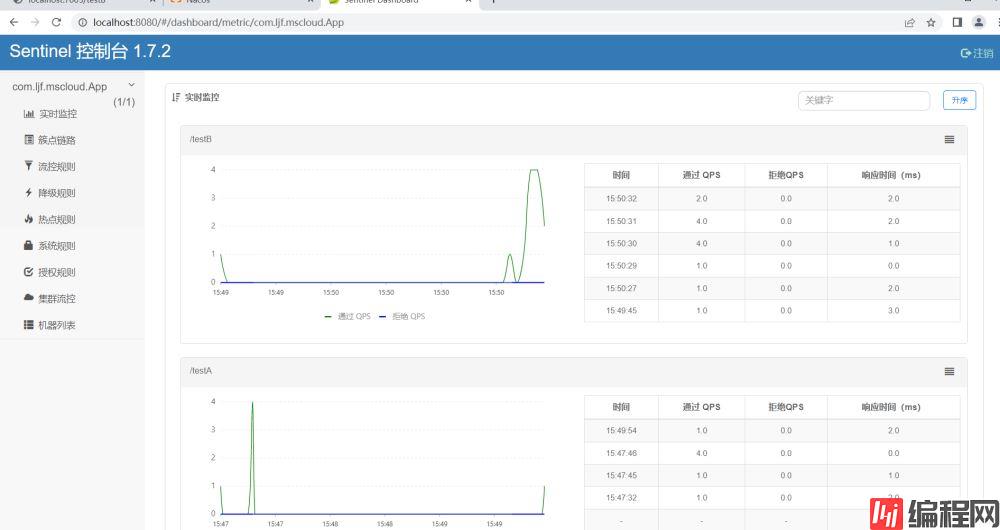
2.查看监控
访问地址: http://localhost:7005/testB 多次刷新访问几次
1.查看资源,针对资源进行流控

2.设置配置
1秒钟qps的阈值为3,一秒钟请求大于3,则容错提示。
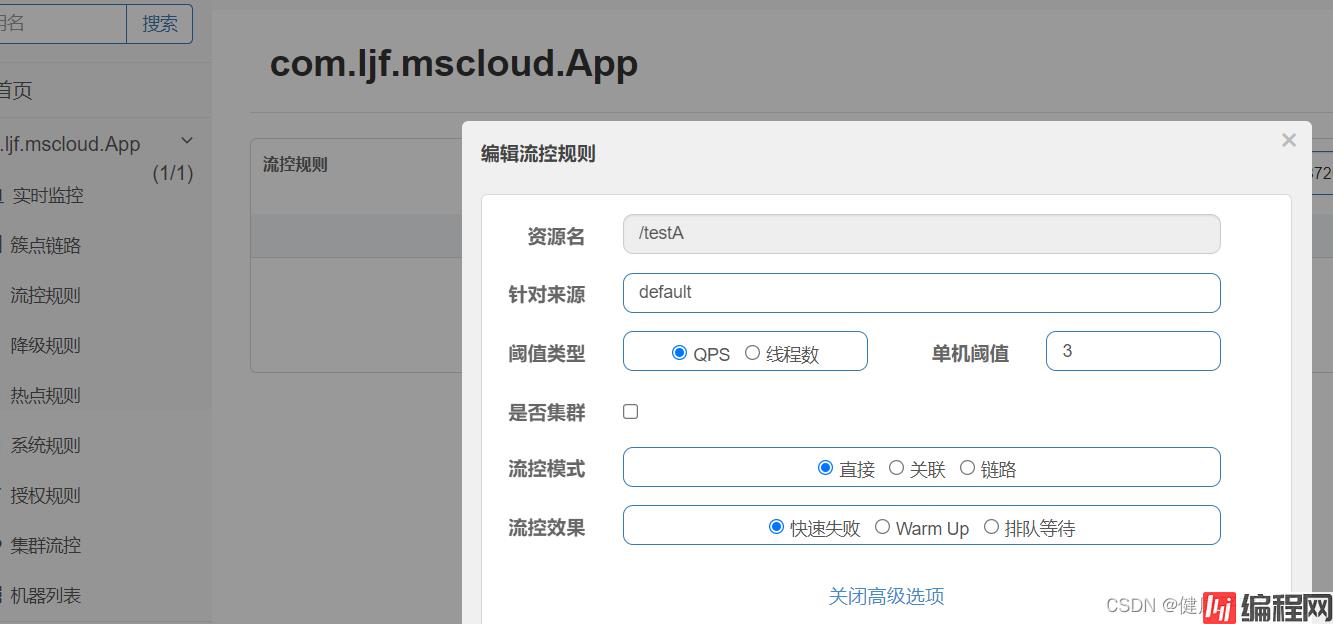
联系请求大于3次,则 给出如下提示:

当线程数达到阈值后,进行限流提示。
1.设置
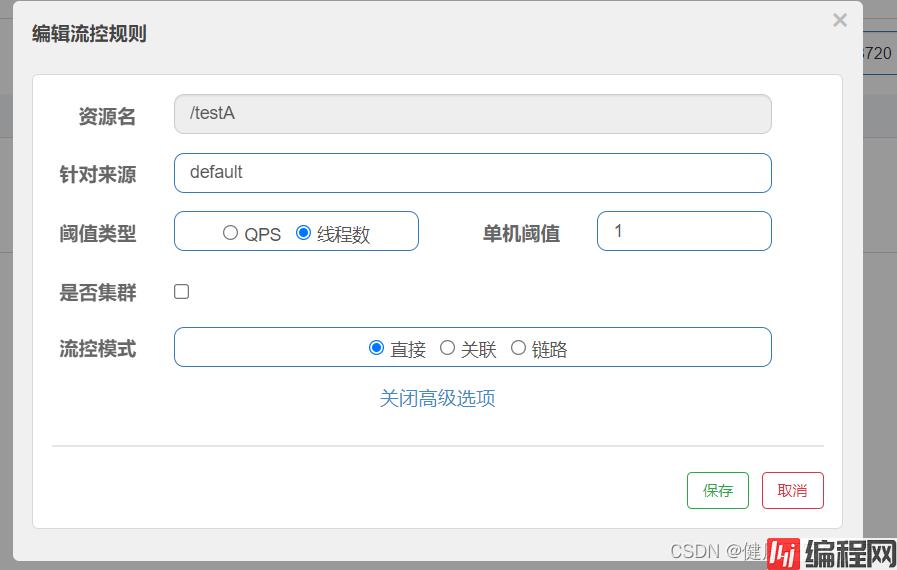
2.访问验证

1.通过资源A关联的资源B,资源B发生qps超过规定的阈值,则导致资源A进行限流提示。
2.设置
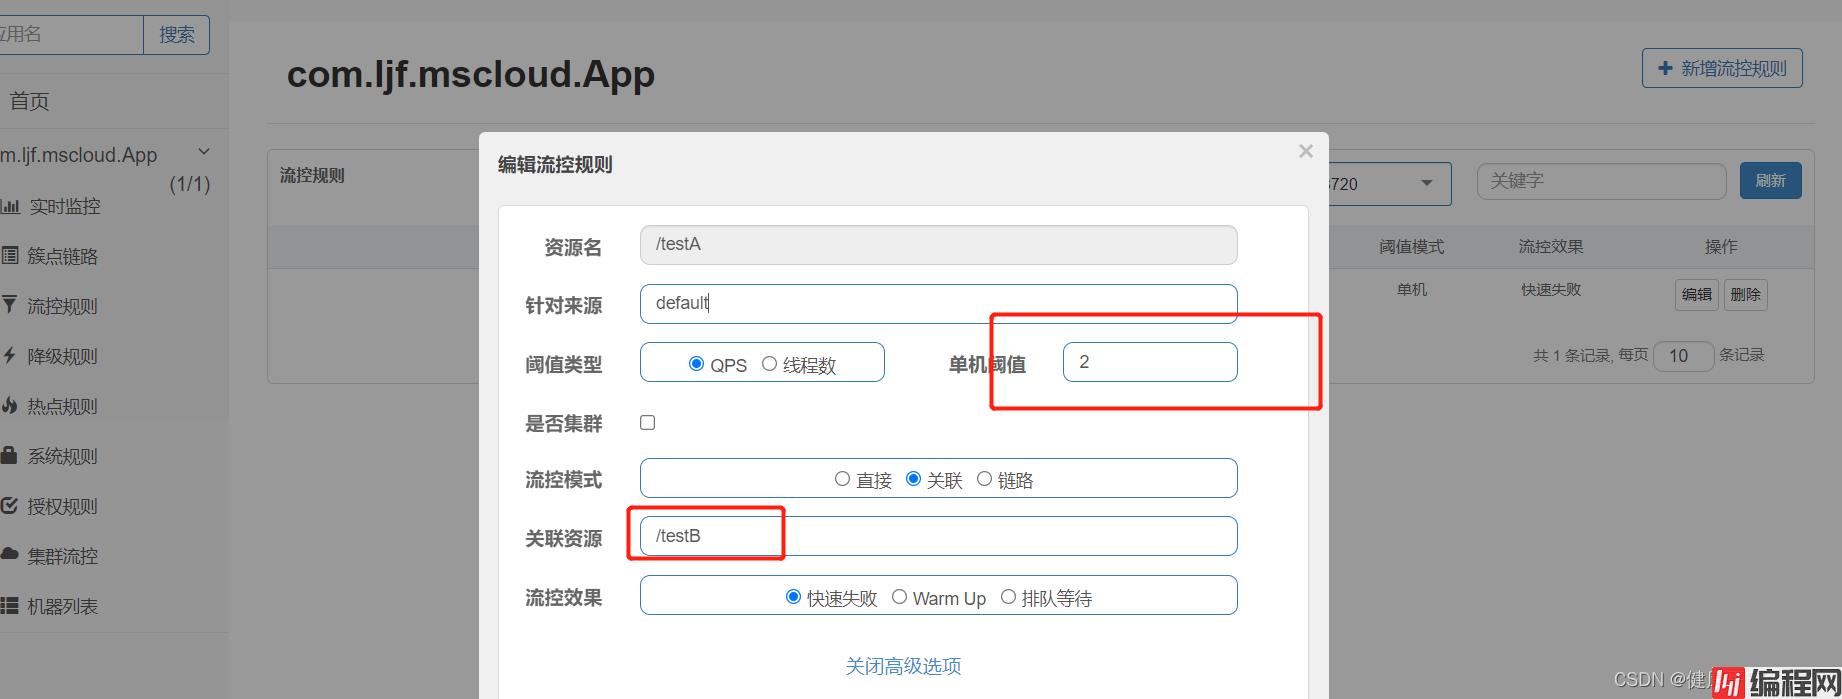
3.postman定时这是
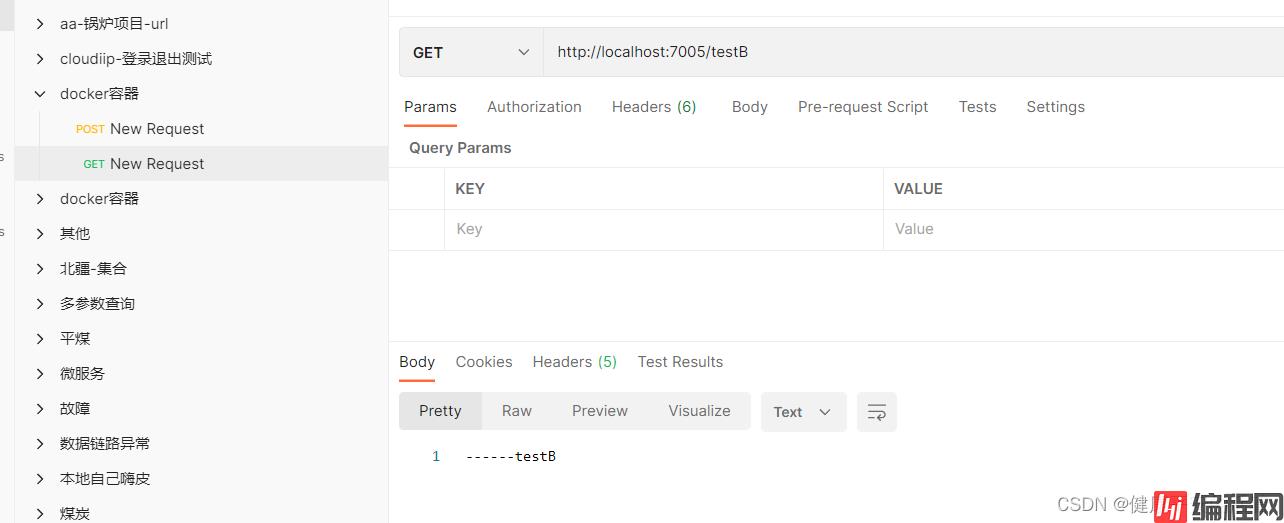
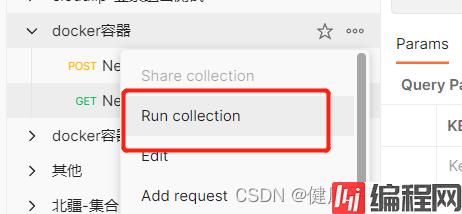
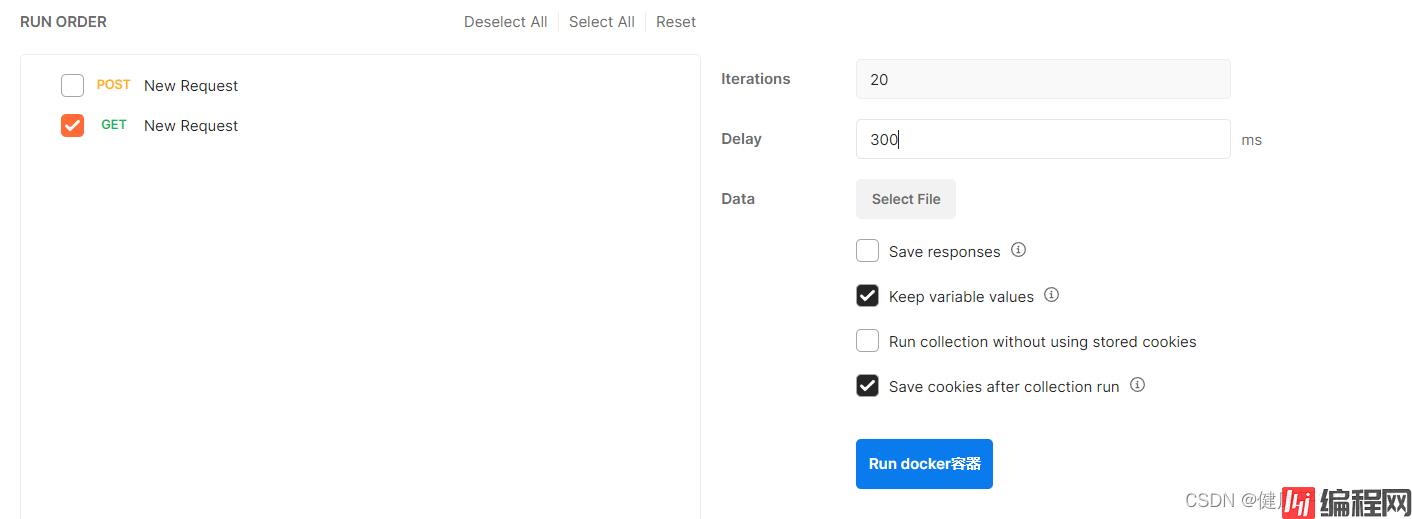
4.查看访问资源A:http://localhost:7005/testA

1.说明:
默认的colorfactor为3,QPS是从(threshold/3)开始,即
系统初始化的阈值为:12/3约等于4,,即阈值初始化为4,经过5秒后阈值才升到设定的12.
2.配置
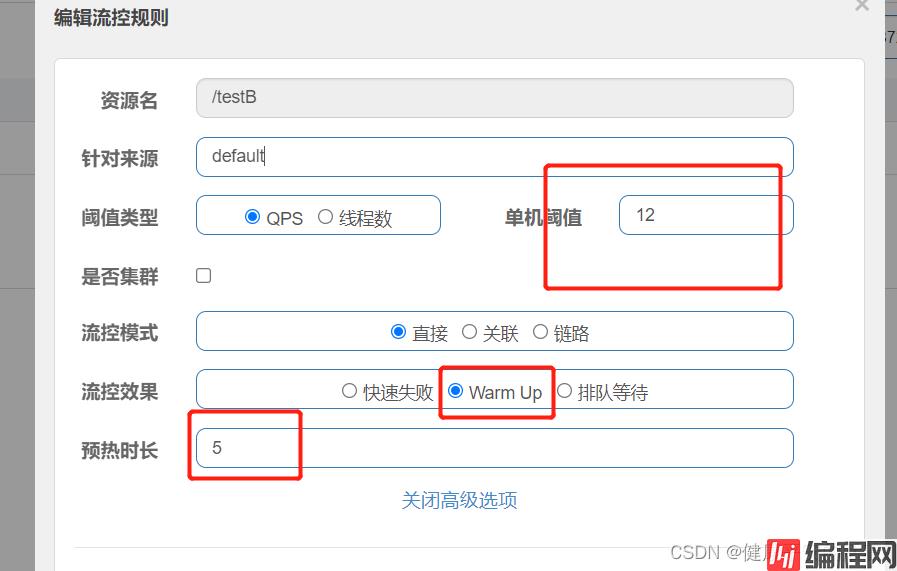
3.访问
前5秒,不停刷新会提示限流信息,

5秒过后,不停刷新(手工不停刷新达不到设定的阈值12),所以不再限流

1.说明
匀速排队:让请求以均匀的速度通过,阈值类型必须设置成QPS,否则无效。
设置含义:/testB 每秒3次请求,超过阈值后就进行排队,等待大于20秒则满足超时时间,进行请求。
2.配置
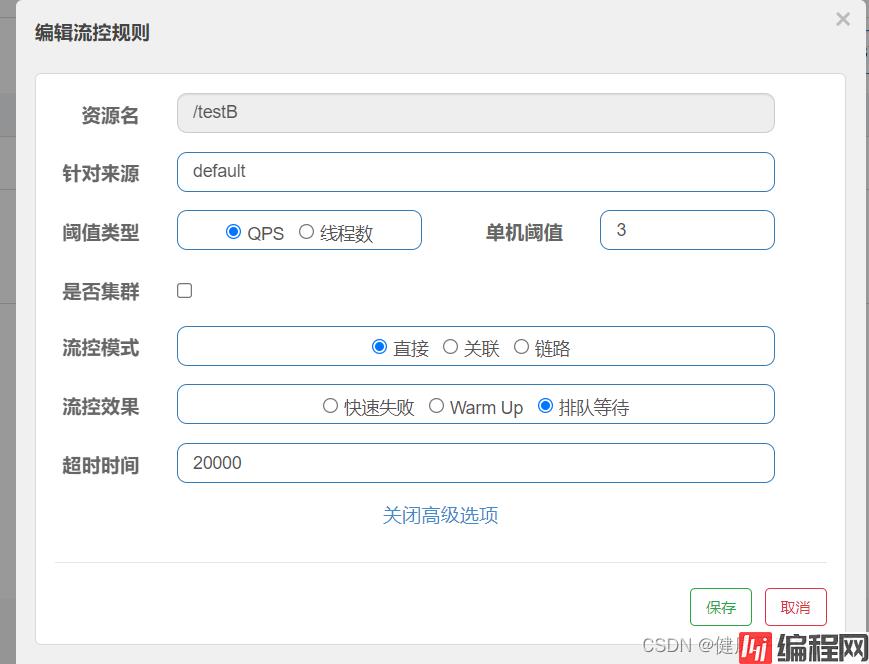
3.查看效果
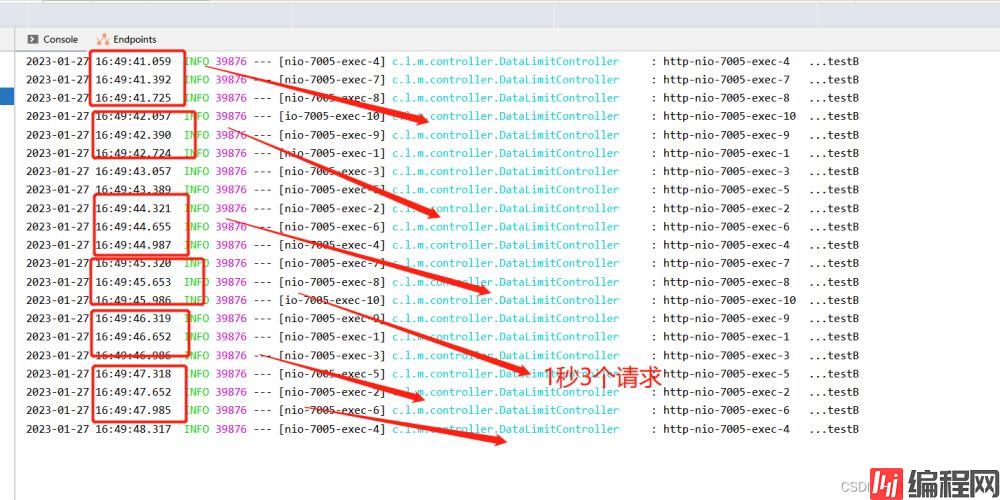
到此这篇关于springcloud3 Sentinel的搭建以及案例操作的文章就介绍到这了,更多相关springcloud3 Sentinel搭建内容请搜索编程网以前的文章或继续浏览下面的相关文章希望大家以后多多支持编程网!
--结束END--
本文标题: springcloud3Sentinel的搭建及案例操作方法
本文链接: https://lsjlt.com/news/178535.html(转载时请注明来源链接)
有问题或投稿请发送至: 邮箱/279061341@qq.com QQ/279061341
2024-03-01
2024-03-01
2024-03-01
2024-02-29
2024-02-29
2024-02-29
2024-02-29
2024-02-29
2024-02-29
2024-02-29
回答
回答
回答
回答
回答
回答
回答
回答
回答
回答
0