目录正文htmlCSSjs实现效果 正文 我个人而言还是挺喜欢Material UI这套设计风格的。一些细节方面做的还不错。就比如今天要给大家分享的点击涟漪效果。Mater
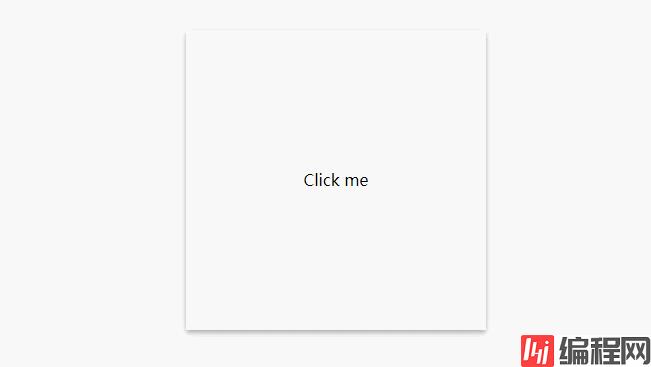
我个人而言还是挺喜欢Material UI这套设计风格的。一些细节方面做的还不错。就比如今天要给大家分享的点击涟漪效果。Material UI里面叫做Ripples。好了,话不多说,开始吧。
<div class="example">Click me</div>
.example {
    position: relative;
    width: 300px;
    height: 300px;
    line-height: 300px;
    text-align: center;
    margin-top: 30px;
    box-shadow: 0 2px 4px -1px #0003, 0 4px 5px #00000024, 0 1px 10px #0000001f;
    overflow: hidden;
    cursor: pointer;
    user-select: none;
    -WEBkit-tap-highlight-color: transparent;
}
.ripple {
    position: absolute;
    border-radius: 50%;
    background-color: #0000001a;
    animation: ripple 225ms cubic-bezier(0, 0, .2, 1) forwards;
    transfORM: scale3D(0, 0, 0);
    pointer-events: none;
}
@keyframes ripple {
    from {
        transform: scale3d(0, 0, 0);
    }
    to {
        transform: scale3d(1, 1, 1);
    }
}
const exampleEl = document.querySelector('.example');
// 移动端触发顺序 touchstart => touchend => mousemove => mousedown => mouseup => click
// 文档https://w3c.GitHub.io/touch-events/#mouse-events
let rippleEl = null, startTime, isMouseup = false;
// touchstart
function handleTouchstart(e) {
    createRipple(e);
}
// touchend
function handleTouchend(e) {
    removeRipple(e);
    // 阻止mouse事件触发
    e.preventDefault();
}
// touchcancel
function handleTouchcancel(e) {
    removeRipple(e);
}
// mousedown
function handleMousedown(e) {
    // 避免mouseup,mouseleave重复执行
    isMouseup = false;
    createRipple(e);
}
// mouseup
function handleMouseup(e) {
    isMouseup = true;
    removeRipple(e);
}
// mouseleave
function handleMouseleave(e) {
    if (isMouseup || rippleEl === null) {
        return;
    }
    removeRipple(e)
}
// 创建ripple
function createRipple(e) {
    startTime = e.timeStamp;
    const current = { x: e.clientX, y: e.clientY }
    if (e.type === 'touchstart') {
        current.x = e.touches[0].clientX;
        current.y = e.touches[0].clientY;
    }
    const rect = exampleEl.getBoundinGClientRect();
    const vertex = {
        nw: { x: rect.left, y: rect.top },
        ne: { x: rect.left + rect.width, y: rect.top },
        se: { x: rect.left + rect.width, y: rect.top + rect.height },
        sw: { x: rect.left, y: rect.top + rect.height }
    }
    let max = 0;
    for (const key in vertex) {
        // ripple半径
        const radius = getDistance({ x: current.x, y: current.y }, vertex[key]);
        max = Math.max(max, radius);
    }
    rippleEl = document.createElement('div');
    rippleEl.className = 'ripple';
    rippleEl.style.left = (current.x - rect.left - max) + 'px';
    rippleEl.style.top = (current.y - rect.top - max) + 'px';
    rippleEl.style.width = (max * 2) + 'px';
    rippleEl.style.height = (max * 2) + 'px';
    exampleEl.appendChild(rippleEl);
}
// 移除ripple
function removeRipple(e) {
    if (e.timeStamp - startTime > 225) {
        rippleEl.remove();
        rippleEl = null;
    } else {
        // 采用animation属性实现动画效果。相比transition的好处在于不用手动触发重绘
        rippleEl.addEventListener('animationend', function () {
            this.remove();
            if (this === rippleEl) {
                rippleEl = null;
            }
        });
    }
}
// 绑定事件
exampleEl.addEventListener('mousedown', handleMousedown);
exampleEl.addEventListener('mouseup', handleMouseup);
exampleEl.addEventListener('mouseleave', handleMouseleave);
exampleEl.addEventListener('touchstart', handleTouchstart);
exampleEl.addEventListener('touchend', handleTouchend);
exampleEl.addEventListener('touchcancel', handleTouchcancel);

function getDistance(a, b) {
    const x = a.x - b.x;
    const y = a.y - b.y;
    return Math.hypot(x, y); // Math.sqrt(x * x + y * y);
}
以上就是js 实现Material UI点击涟漪效果示例的详细内容,更多关于js Material UI点击涟漪效果的资料请关注编程网其它相关文章!
--结束END--
本文标题: js实现MaterialUI点击涟漪效果示例
本文链接: https://lsjlt.com/news/168076.html(转载时请注明来源链接)
有问题或投稿请发送至: 邮箱/279061341@qq.com QQ/279061341
2024-01-12
2023-05-20
2023-05-20
2023-05-20
2023-05-20
2023-05-20
2023-05-20
2023-05-20
2023-05-20
2023-05-20
回答
回答
回答
回答
回答
回答
回答
回答
回答
回答
0