Python 官方文档:入门教程 => 点击学习
界面跳转,很常见的一个功能,在桌面程序中,可以多窗口跳转,也可以在一个窗口中跳转。不同方式对应不同场景。下面简单介绍一下,JavaFX中单窗口界面跳转方式。 BorderPane 跳
界面跳转,很常见的一个功能,在桌面程序中,可以多窗口跳转,也可以在一个窗口中跳转。不同方式对应不同场景。下面简单介绍一下,JavaFX中单窗口界面跳转方式。
利用BorderPane的setCenter重新设置中心节点进行界面跳转。

好处是其他区域的节点不会更新,只会更新center中的节点,并且可以控制是每个页面是否可以重新加载,方便。
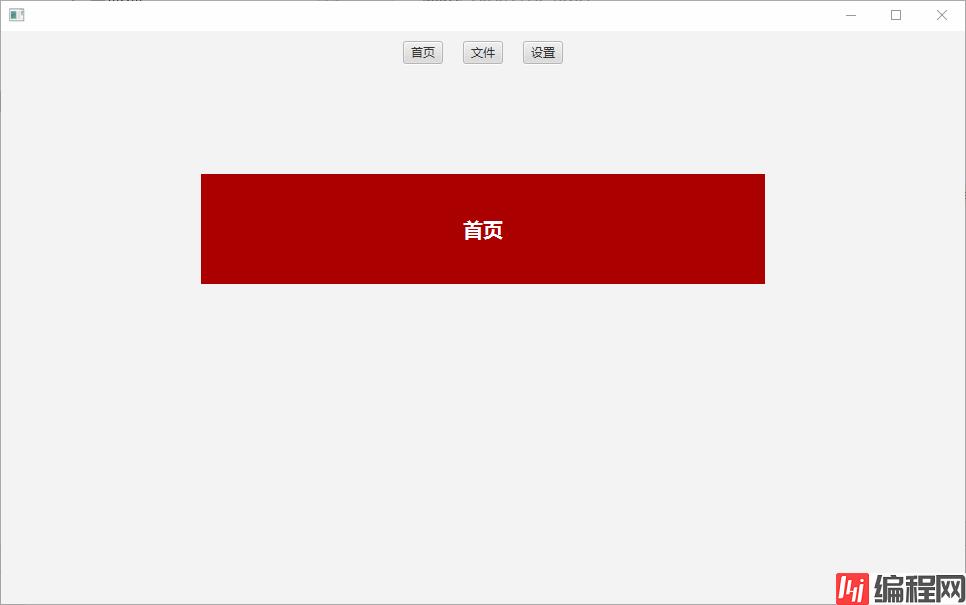
scene节点如下,在BorderPane的top中设置按钮事件,更新center。
fxml
<BorderPane prefHeight="200.0" prefWidth="200.0" fx:id="container">
         <top>
            <HBox alignment="CENTER" spacing="20.0" BorderPane.alignment="CENTER">
               <children>
                  <Button mnemonicParsing="false" text="首页" onAction="#toHome" />
                  <Button mnemonicParsing="false" text="文件" onAction="#toFile"/>
                  <Button mnemonicParsing="false" text="设置" onAction="#toSetting"/>
               </children>
               <padding>
                  <Insets bottom="10.0" top="10.0" />
               </padding>
            </HBox>
         </top>
         <center>
  </center>
</BorderPane>
controller
public class JumpController {

    public BorderPane container;

    public void initialize() {
        URL resource = getClass().getResource("/fxml/jump/home.fxml");
        try {
            setCenter(resource);
        } catch (IOException e) {
            e.printStackTrace();
        }
    }

    private void setCenter(URL url) throws IOException {
        FXMLLoader loader = new FXMLLoader(url);
        loader.load();
        Parent root = loader.getRoot();
        container.setCenter(root);
    }

    public void toHome(ActionEvent event) {
        URL resource = getClass().getResource("/fxml/jump/home.fxml");
        try {
            setCenter(resource);
        } catch (IOException e) {
            e.printStackTrace();
        }
    }

    public void toFile(ActionEvent event) {
        URL resource = getClass().getResource("/fxml/jump/file.fxml");
        try {
            setCenter(resource);
        } catch (IOException e) {
            e.printStackTrace();
        }
    }

    public void toSetting(ActionEvent event) {
        URL resource = getClass().getResource("/fxml/jump/setting.fxml");
        try {
            setCenter(resource);
        } catch (IOException e) {
            e.printStackTrace();
        }
    }
}StackPane也是JavaFX中的一个面板容器,特点是里面的元素是堆叠在一起的,每次只显示最上层元素。利用这个特点,可以把多个界面加载之后作为StackPane的字节的,然后调整StackPane的顶层元素即可。

这种方法比较适合每个页面跳转时不需要重新加载的情况,效率比较高,只是改变字节点的顺序。
fxml
<VBox maxHeight="-Infinity" maxWidth="-Infinity" minHeight="-Infinity" minWidth="-Infinity" prefHeight="529.0" prefWidth="785.0"
      xmlns="Http://javafx.com/javafx/11.0.1" xmlns:fx="http://javafx.com/fxml/1" fx:controller="xyz.yuelai.controller.Jump1Controller">
   <HBox alignment="CENTER" spacing="20.0">
      <children>
         <Button mnemonicParsing="false" onAction="#toHome" text="首页" />
         <Button mnemonicParsing="false" onAction="#toFile" text="文件" />
         <Button mnemonicParsing="false" onAction="#toSetting" text="设置" />
      </children>
      <padding>
         <Insets bottom="10.0" top="10.0" />
      </padding>
   </HBox>
   <StackPane prefHeight="150.0" prefWidth="200.0" VBox.vgrow="ALWAYS" fx:id="container" />

</VBox>
controller
public class Jump1Controller {

    public StackPane container;
    private Parent home;
    private Parent file;
    private Parent setting;

    public void initialize() {
        try {
            URL homeUrl = getClass().getResource("/fxml/jump/home.fxml");
            home = getParent(homeUrl);
            URL fileUrl = getClass().getResource("/fxml/jump/file.fxml");
            file = getParent(fileUrl);
            URL settingUrl = getClass().getResource("/fxml/jump/setting.fxml");
            setting = getParent(settingUrl);

            container.getChildren().addAll(setting, file, home);
        } catch (IOException e) {
            e.printStackTrace();
        }
    }

    private Parent getParent(URL url) throws IOException {
        FXMLLoader loader = new FXMLLoader(url);
        return loader.load();
    }

    public void toHome(ActionEvent event) {
        home.toFront();
    }

    public void toFile(ActionEvent event) {
        file.toFront();
    }

    public void toSetting(ActionEvent event) {
        setting.toFront();
    }
}
三个界面的fxml如下:
首页
<AnchorPane prefHeight="460.0" prefWidth="781.0" xmlns="http://javafx.com/javafx/11.0.1" xmlns:fx="http://javafx.com/fxml/1">
   <children>
      <Label alignment="CENTER" layoutX="297.0" layoutY="131.0" prefHeight="110.0" prefWidth="129.0" style="-fx-background-color: #a00;" text="首页" textFill="WHITE" AnchorPane.leftAnchor="200.0" AnchorPane.rightAnchor="200.0" AnchorPane.topAnchor="100.0">
         <font>
            <Font name="System Bold" size="20.0" />
         </font>
      </Label>
   </children>
</AnchorPane>
文件
<AnchorPane prefHeight="460.0" prefWidth="781.0" xmlns="http://javafx.com/javafx/11.0.1" xmlns:fx="http://javafx.com/fxml/1">
    <children>
        <Label alignment="CENTER" layoutX="297.0" layoutY="131.0" prefHeight="110.0" prefWidth="129.0" style="-fx-background-color: #0a0;" text="文件" textFill="WHITE" AnchorPane.leftAnchor="200.0" AnchorPane.rightAnchor="200.0" AnchorPane.topAnchor="100.0">
            <font>
                <Font name="System Bold" size="20.0" />
            </font>
        </Label>
    </children>
</AnchorPane>
设置
<AnchorPane prefHeight="460.0" prefWidth="781.0" xmlns="http://javafx.com/javafx/11.0.1" xmlns:fx="http://javafx.com/fxml/1">
    <children>
        <Label alignment="CENTER" layoutX="297.0" layoutY="131.0" prefHeight="110.0" prefWidth="129.0" style="-fx-background-color: #00a;" text="设置" textFill="WHITE" AnchorPane.leftAnchor="200.0" AnchorPane.rightAnchor="200.0" AnchorPane.topAnchor="100.0">
            <font>
                <Font name="System Bold" size="20.0" />
            </font>
        </Label>
    </children>
</AnchorPane>
其他跳转方式,比如重新设置scene,这就相当于重新加载当前窗口,如非必要还是不推荐。上面两种方式都是操作的容器里面的节点。实现了视觉上的界面跳转。所以不局限于BorderPane和StackPane,只是这两个容器用起来比较方便。
--结束END--
本文标题: JavaFX实现界面跳转
本文链接: https://lsjlt.com/news/151703.html(转载时请注明来源链接)
有问题或投稿请发送至: 邮箱/279061341@qq.com QQ/279061341
2024-03-01
2024-03-01
2024-03-01
2024-02-29
2024-02-29
2024-02-29
2024-02-29
2024-02-29
2024-02-29
2024-02-29
回答
回答
回答
回答
回答
回答
回答
回答
回答
回答
0