一、环境准备安装包:linux.x64_11gR2_database_1of2.zip linux.x64_11gR2_database_2of2.zip下载地址:Http://downloa
一、环境准备
安装包:
linux.x64_11gR2_database_1of2.zip
linux.x64_11gR2_database_2of2.zip
下载地址:
Http://download.oracle.com/otn/linux/oracle11g/R2/linux.x64_11gR2_database_1of2.zip
http://download.oracle.com/otn/linux/oracle11g/R2/linux.x64_11gR2_database_2of2.zip
二、环境配置
1、系统环境
(1)关闭selinux服务
# sed -i '/^SELINUX=/cSELINUX=disabled' /etc/selinux/config
(2)关闭防火墙
# systemctl disable firewalld.service
# systemctl stop firewalld.service
(3)禁用 NetworkManager
# systemctl disable NetworkManager
# systemctl stop NetworkManager.service
(5)本机解析
# vim /etc/hosts
172.160.20.129 oracle

(5)重启服务
# reboot
2、依赖包
(1)工具
# yum install epel-release
# yum clean all
# yum repolist
# yum makecache fast -y
# yum install vim unzip rlwrap -y
(2)安装 oracle 需要的包
# yum install binutils compat-libcap1 compat-libstdc++-33 compat-libstdc++-33*i686 GCc gcc-c++ glibc glibc*.i686 glibc-devel glibc-devel*.i686 ksh libaio libaio*.i686 libaio-devel libgcc libgcc*.i686 libstdc++ libstdc++*.i686 libstdc++-devel libXi libXi*.i686 libXtst libXtst*.i686 make sysstat unixODBC unixODBC*.i686 unixODBC-devel unixODBC-devel*.i686 -y
3、配置安装环境
(1)创建 oracle 用户
# groupadd oinstall
# groupadd dba
# useradd -g oinstall -G dba oracle
(2)创建 oracle 安装目录
[root@oracle ~]# mkdir -p /opt/oracle/app/product/11.2.0
[root@oracle ~]# mkdir -p /opt/oracle/app/oradata
[root@oracle ~]# mkdir -p /opt/oracle/app/fast_recovery_area
[root@oracle ~]# mkdir -p /opt/oracle/inventory
[root@oracle ~]# chown -R oracle:oinstall /opt/oracle
[root@oracle ~]# chmod -R 775 /opt/oracle
(3)修改 sysctl.conf
cat << EOF >> /etc/sysctl.conf
fs.aio-max-nr = 1048576
fs.file-max = 6815744
#物理内存一半和4G中的较大者
#kernel.shmmax = 4294967296
#shmmax / 4k (getconf PAGESIZE)
#kernel.shmall = 1048576
kernel.shmmni = 4096
kernel.sem = 250 32000 200 200
net.ipv4.ip_local_port_range = 9000 65500
net.core.rmem_default = 262144
net.core.wmem_default = 262144
net.core.wmem_max = 1048586
net.core.rmem_max = 4194304
EOF
sysctl -p
# sysctl -p
(4)修改 limits.conf
cat << EOF >> /etc/security/limits.conf
oracle soft nproc 2047
oracle hard nproc 16384
oracle soft nofile 1024
oracle hard nofile 65536
EOF
(5)修改 login
cat << EOF >> /etc/pam.d/login
session required /lib64/security/pam_limits.so
session required pam_limits.so
EOF
(6)修改 profile
cat << EOF >> /etc/profile
if [ \$USER = "oracle" ] ; then
if [ \$shell = "/bin/ksh" ]; then
ulimit -p 16384
ulimit -n 65536
else
ulimit -u 16384 -n 65536
fi
umask 022
fi
EOF
(7)修改 oracle 用户的 .bash_profile
cat << EOF >> /home/oracle/.bash_profile
export ORACLE_BASE=/opt/oracle/app
export ORACLE_HOME=\$ORACLE_BASE/product/11.2.0
export ORACLE_SID=orcl
export PATH=\$PATH:\$ORACLE_HOME/bin
#export NLS_LANG="SIMPLIFIED CHINESE_CHINA.AL32UTF8"
#export NLS_LANG="SIMPLIFIED CHINESE_CHINA.ZHS16GBK"
EOF
三、安装数据库
1、解压文件
# unzip linux.x64_11gR2_database_1of2.zip -d /home/oracle/
# unzip linux.x64_11gR2_database_2of2.zip -d /home/oracle/
# chown -R oracle.oinstall /home/oracle/database
2、切换到 oracle 用户,后续操作都在该 oracle 用户下执行
# su - oracle
3、创建respon文件
$ cp database/response/*.rsp ./
4、修改 db_install.rsp
sed -i \
-e '/^oracle.install.option=/s#=.*$#=INSTALL_DB_SWONLY#' \
-e '/^UNIX_GROUP_NAME=/s#=.*$#=oinstall#' \
-e '/^INVENTORY_LOCATION=/s#=.*$#=/opt/oracle/inventory#' \
-e '/^SELECTED_LANGUAGES=/s#=.*$#=en,zh_CN#' \
-e '/^ORACLE_HOME=/s#=.*$#=/opt/oracle/app/product/11.2.0#' \
-e '/^ORACLE_BASE=/s#=.*$#=/opt/oracle/app#' \
-e '/^oracle.install.db.InstallEdition=/s#=.*$#=EE#' \
-e '/^oracle.install.db.DBA_GROUP=/s#=.*$#=dba#' \
-e '/^oracle.install.db.OPER_GROUP=/s#=.*$#=dba#' \
-e '/^oracle.install.db.config.starterdb.type=/s#=.*$#=GENERAL_PURPOSE#' \
-e '/^DECLINE_SECURITY_UPDATES=/s#=.*$#=true#' \
/home/oracle/db_install.rsp
#无需修改 netca.rsp
5、修改 dbca.rsp
$ /home/oracle/dbca.rsp
GDBNAME = "orcl"
SID = "orcl"
SYSPASSWord = "123456"
SYSTEMPASSWORD = "123456"
CHARACTERSET = "AL32UTF8"
6、安装 oracle 软件
$ cd /home/oracle/database/
$ ./runInstaller -silent -responseFile /home/oracle/db_install.rsp -ignorePrereq
#安装成功后,系统提示需要在 root 下执行两个脚本
/opt/oracle/inventory/orainstRoot.sh
/opt/oracle/app/product/11.2.0/root.sh

切换到root用户进行执行两个脚本

7、配置监听
切换到oracle用户
$ netca /silent /responseFile /home/oracle/netca.rsp

#启动
$ lsnrctl start
#重启
$ lsnrctl reload
#状态
$ lsnrctl status
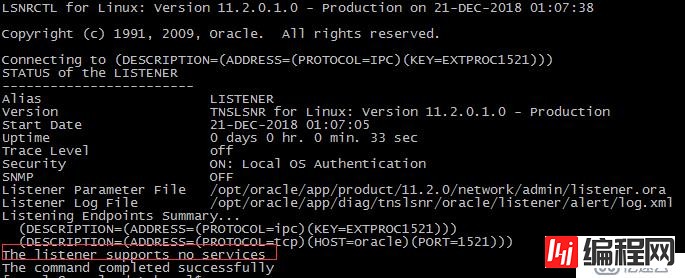
问题原因:数据库实例没注册到listener或没数据库实例
1.sys和system用户
(1)oracle会自动生成sys和system用户
(2)sys 超级管理员、具有最高权限、具有sysdba 角色、具有create database的权限,默认的密码是change_on_install
(3)system普通管理员、权限也很大 、具有sysoper角色、没有create database的权限,默认的密码是manager
2.一般来讲,对数据库维护,使用system用户登录就可以
3.sys和system这两个用户最大的区别是在于有没有create database的权限
4、创建数据库
$ dbca -silent -responseFile /home/oracle/dbca.rsp
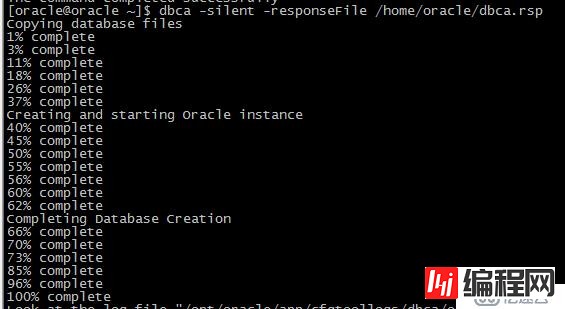
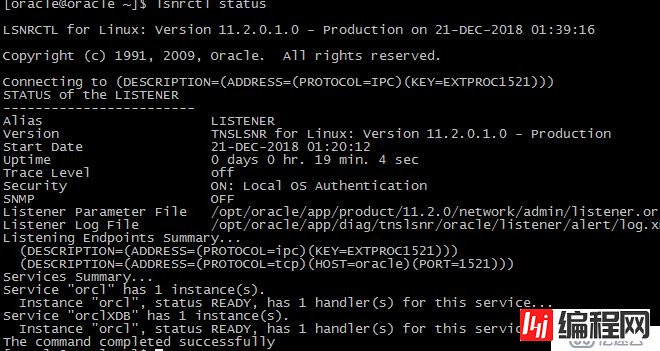
检查oracle状态:
8、登录数据库
打开cmd窗口,输入sqlplus / as sysdba 后回车,以超级管理员身份登录,成功后如图所示(可以看到是oracle 11g 64位的登录成功后显示版本信息,32位则不会)
$ sqlplus / as sysdba

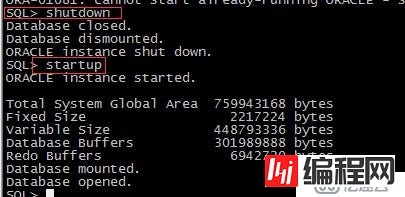
进入sqlplus 启动实例
startup

上图提示是实例已经起来了,无需再次启动。
可以shutdown后在startup
9、登录数据库方式:
方式一:$ sqlplus ;然后再进行用户密码验证

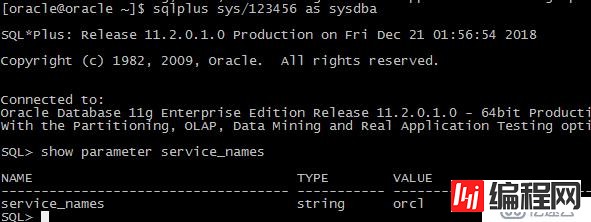
方式二:$ sqlplus sys/123456 as sysdba
注释:sys用户必须以sysdba身份登录。
--结束END--
本文标题: CentOS7 终端静默安装 Oracle 11g R2
本文链接: https://lsjlt.com/news/44225.html(转载时请注明来源链接)
有问题或投稿请发送至: 邮箱/279061341@qq.com QQ/279061341
2024-10-23
2024-10-22
2024-10-22
2024-10-22
2024-10-22
2024-10-22
2024-10-22
2024-10-22
2024-10-22
2024-10-22
回答
回答
回答
回答
回答
回答
回答
回答
回答
回答
0