linux下Mysql的初始化和配置 一、初始准备(一)服务初始化(二)启动MYSQL(三)MYSQL登录 二、设置远程登录(一)确认网络(二)关闭防火墙(三)Linux下修改配置
先去官网把需要的mysql版本下载并安装好,网上具体下载的方法蛮多的,这里就不赘述了。
为了保证数据库目录与文件的所有者为 mysql 登录用户,如果以 root 身份运行 mysql 服务,需要执行下面的命令:
mysqld --initialized --user==mysql说明:–initialize选项默认以“安全”模式来初始化,为 root 用户生成一个密码并将该密码标记为过期 ,登录后需要设置一个新密码。生成的临时密码会往日志中记录一份。
cat /var/log/mysqld.log
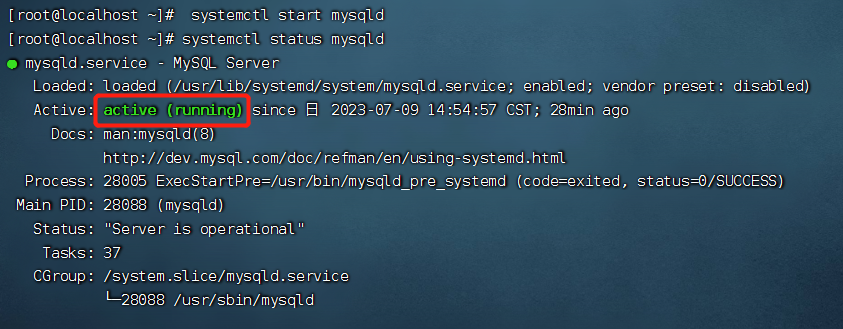
--1.启动:systemctl start mysqld--2.关闭:systemctl stop mysqld--3.重启:systemctl restart mysqld--4.查看状态:systemctl status mysqldmysqld 这个可执行文件就代表着 MySQL 服务器程序,运行这个可执行文件就可以直接启动一个服务器进程。

查看进程:
ps -ef | grep -i mysql
查看mysql服务是否自启动
systemctl list-unit-files|grep mysqld.service
这里默认是enabled。
systemctl enable mysqld.servicesystemctl disable mysqld.service mysql -hlocalhost -P3306 -uroot -p
ALTER USER 'root'@'localhost' IDENTIFIED BY '自定义密码';再次登录
mysql -uroot -p
小编用的是Navicat,具体方法参考网上教程~配置远程连接Mysql数据库时遇到如下报错信息,这是由于Mysql配置了不支持远程连接引起的。
在远程机器上使用ping ip地址 保证网络畅通
ping ip地址在远程机器上使用 telnet命令 保证端口号开放访问
telnet ip地址 端口号service iptables stopsystemctl start firewalld.servicesystemctl status firewalld.servicesystemctl stop firewalld.service//设置开机启动防火墙systemctl enable firewalld.service//设置开机禁用防火墙systemctl disable firewalld.service查看防火墙状态
systemctl status firewalld.service
2.关闭防火墙
systemctl stop firewalld.servicesystemctl disable firewalld.service
进入mysql测试:
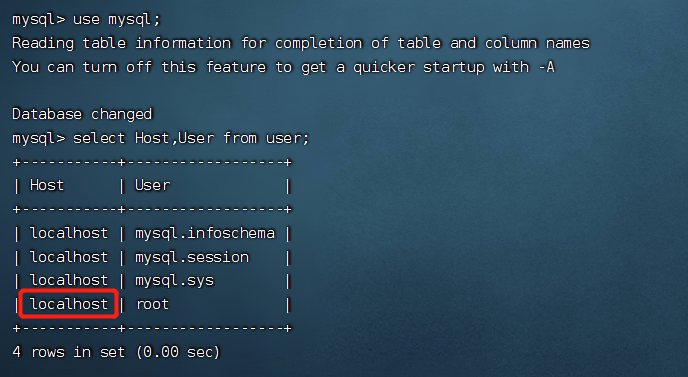
use mysql;select Host,User from user; 可以看到 root用户当前配置为localhost
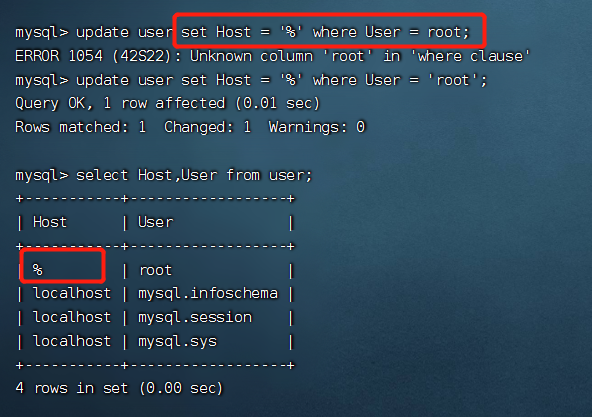
修改Host为通配符%
update user set host = '%' where user = 'root';select Host,User from user;
这样 root就变成不限制连接的主机ip
使配置立刻生效
flush priviledges;
成功连接!!!

来源地址:https://blog.csdn.net/m0_67830223/article/details/131622869
--结束END--
本文标题: 【Linux下MySQL的初始化和配置】
本文链接: https://lsjlt.com/news/402915.html(转载时请注明来源链接)
有问题或投稿请发送至: 邮箱/279061341@qq.com QQ/279061341
2024-10-23
2024-10-22
2024-10-22
2024-10-22
2024-10-22
2024-10-22
2024-10-22
2024-10-22
2024-10-22
2024-10-22
回答
回答
回答
回答
回答
回答
回答
回答
回答
回答
0