Android UI基本组件 给大家介绍一下基本组件,会以代码加图片的形式,让新手更了解。 1.TextView和EditView textvi
给大家介绍一下基本组件,会以代码加图片的形式,让新手更了解。
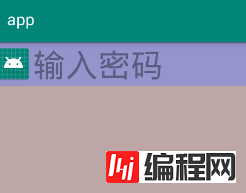
1.TextView和EditView textview
private TextView textView_csdn;
    @Override
    protected void onCreate(Bundle savedInstanceState) {
        super.onCreate(savedInstanceState);
        //绑定布局文件
        setContentView(R.layout.activity_main);
        //根据id查找组件
        textView_csdn=findViewById(R.id.textView_csdn);
    }

layout

mainactivity
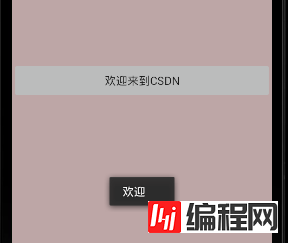
public void CSDN(View view) {
        //参数(上下文,要显示的文本内容,显示的时间(Toast.LENGTH_LONG、Toast.LENGTH_SHORT))
        Toast.makeText(this, "欢迎", Toast.LENGTH_SHORT).show();
    }
最终ui

显示任意的图像,如一个图标。可以加载图像从不同来源,负责计算图像的测量,这样它就可以用于任何布局管理器
android:maxWidth;android:maxHeight;设置最大宽高
android:adjustViewBounds;保持宽高比
private ImageView iv_csdn;
    @Override
    protected void onCreate(Bundle savedInstanceState) {
        super.onCreate(savedInstanceState);
        setContentView(R.layout.activity_main);
        iv_csdn = (ImageView) findViewById(R.id.iv_csdn);
    }
1.应用场景:按钮多,Java一看就懂
//....按钮多 java一看就懂
        Button btn_more_button1 = (Button) findViewById(R.id.btn_more_button1);
        Button btn_more_button2 = (Button) findViewById(R.id.btn_more_button2);
        Button btn_more_button3 = (Button) findViewById(R.id.btn_more_button3);
        btn_more_button1.setOnClickListener(this);
        btn_more_button2.setOnClickListener(this);
        btn_more_button3.setOnClickListener(this);
2.应用场景:测试用 不适合阅读
@Override
    public void onClick(View v) {
        switch (v.getId()){
            case R.id.btn_more_button1:
                Toast.makeText(this, "btn_more_button1", Toast.LENGTH_SHORT).show();
              break;
            case R.id.btn_more_button2:
                Toast.makeText(this, "btn_more_button2", Toast.LENGTH_SHORT).show();
               break;
            case R.id.btn_more_button3:
                Toast.makeText(this, "btn_more_button3", Toast.LENGTH_SHORT).show();
                break;
        }
    }
    private class MyClickListener implements View.OnClickListener{
        @Override
        public void onClick(View v) {        Toast.makeText(MainActivity.this,"innerClass",Toast.LENGTH_SHORT).show();
        }
    }
    //........................测试用 不适合阅读
3.应用场景:按钮多 强调安卓
//***********************按钮多 强调安卓
    public void clickHere(View v){
        switch (v.getId()){
            case R.id.btn1:
            Toast.makeText(this, "btn1", Toast.LENGTH_SHORT).show();
                break;
            case R.id.btn2:
            Toast.makeText(this, "btn2", Toast.LENGTH_SHORT).show();
                break;
            case R.id.btn3:
            Toast.makeText(this, "btn3", Toast.LENGTH_SHORT).show();
                break;
        }
    }
layout
mainactivity
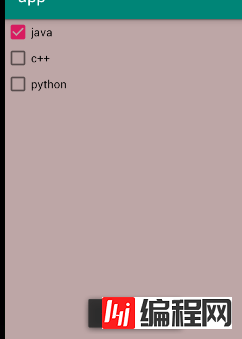
public class MainActivity extends AppCompatActivity implements CompoundButton.OnCheckedChangeListener {
    private CheckBox checkBox_java,checkBox_c,checkBox_python;
    @Override
    protected void onCreate(Bundle savedInstanceState) {
        super.onCreate(savedInstanceState);
        setContentView(R.layout.activity_main);
        checkBox_java=(CheckBox) findViewById(R.id.checkBox_java);
        checkBox_c=(CheckBox) findViewById(R.id.checkBox_c);
        checkBox_Python=(CheckBox) findViewById(R.id.checkBox_python);
        //注册事件
        checkBox_java.setOnCheckedChangeListener(this);
        checkBox_c.setOnCheckedChangeListener(this);
        checkBox_python.setOnCheckedChangeListener(this);
    }
    @Override
    public void onCheckedChanged(CompoundButton buttonView, boolean isChecked) {
        switch (buttonView.getId()){
            case R.id.checkBox_java:
                if (isChecked){
                    Toast.makeText(this,"你选中了java",Toast.LENGTH_SHORT).show();
                }else {
                    Toast.makeText(this,"你取消了java",Toast.LENGTH_SHORT).show();
                }
                break;
            case R.id.checkBox_c:
                if (isChecked){
                    Toast.makeText(this,"你选中了c++",Toast.LENGTH_SHORT).show();
                }else {
                    Toast.makeText(this,"你取消了c++",Toast.LENGTH_SHORT).show();
                }
                break;
            case R.id.checkBox_python:
                if (isChecked){
                    Toast.makeText(this,"你选中了python",Toast.LENGTH_SHORT).show();
                }else {
                    Toast.makeText(this,"你取消了python",Toast.LENGTH_SHORT).show();
                }
                break;
        }
    }
}

RadioButton组件
先加入一个RadioGroup,再在其中设置RadioButton

--结束END--
本文标题: 【小白一看就会】Android UI基本组件 ——新手必看
本文链接: https://lsjlt.com/news/29235.html(转载时请注明来源链接)
有问题或投稿请发送至: 邮箱/279061341@qq.com QQ/279061341
2024-01-21
2023-10-28
2023-10-28
2023-10-27
2023-10-27
2023-10-27
2023-10-27
回答
回答
回答
回答
回答
回答
回答
回答
回答
回答
0