前面文章讲解了Android的蓝牙基本用法,本文讲得深入些,探讨下蓝牙方面的隐藏api。用过Android系统设置(Setting)的人都知道蓝牙搜索之后可以建立配对和解除配对
前面文章讲解了Android的蓝牙基本用法,本文讲得深入些,探讨下蓝牙方面的隐藏api。用过Android系统设置(Setting)的人都知道蓝牙搜索之后可以建立配对和解除配对,但是这两项功能的函数没有在SDK中给出,那么如何去使用这两项功能呢?本文利用JAVA的反射机制去调用这两项功能对应的函数:createBond和removeBond,具体的发掘和实现步骤如下:
1.使用git工具下载platfORM/packages/apps/Settings.git,在Setting源码中查找关于建立配对和解除配对的API,知道这两个API的宿主(BluetoothDevice);
2.使用反射机制对BluetoothDevice枚举其所有方法和常量,看看是否存在:
static public void printAllInform(Class clsshow) {
 try {
 // 取得所有方法
 Method[] hideMethod = clsShow.getMethods();
 int i = 0;
 for (; i < hideMethod.length; i++) {
  Log.e("method name", hideMethod[i].getName());
 }
 // 取得所有常量
 Field[] allFields = clsShow.getFields();
 for (i = 0; i < allFields.length; i++) {
  Log.e("Field name", allFields[i].getName());
 }
 } catch (SecurityException e) {
 // throw new RuntimeException(e.getMessage());
 e.printStackTrace();
 } catch (IllegalArgumentException e) {
 // throw new RuntimeException(e.getMessage());
 e.printStackTrace();
 } catch (Exception e) {
 // TODO Auto-generated catch block
 e.printStackTrace();
 }
}
结果如下:
11-29 09:19:12.012: method name(452): cancelBondProcess
11-29 09:19:12.020: method name(452): cancelPairingUserInput
11-29 09:19:12.020: method name(452): createBond
11-29 09:19:12.020: method name(452): createInsecureRfcommSocket
11-29 09:19:12.027: method name(452): createRfcommSocket
11-29 09:19:12.027: method name(452): createRfcommSocketToServiceRecord
11-29 09:19:12.027: method name(452): createScoSocket
11-29 09:19:12.027: method name(452): describeContents
11-29 09:19:12.035: method name(452): equals
11-29 09:19:12.035: method name(452): fetchUuidsWithSdp
11-29 09:19:12.035: method name(452): getAddress
11-29 09:19:12.035: method name(452): getBluetoothClass
11-29 09:19:12.043: method name(452): getBondState
11-29 09:19:12.043: method name(452): getName
11-29 09:19:12.043: method name(452): getServiceChannel
11-29 09:19:12.043: method name(452): getTrustState
11-29 09:19:12.043: method name(452): getUuids
11-29 09:19:12.043: method name(452): hashCode
11-29 09:19:12.043: method name(452): isBluetoothDock
11-29 09:19:12.043: method name(452): removeBond
11-29 09:19:12.043: method name(452): setPairinGConfirmation
11-29 09:19:12.043: method name(452): setPasskey
11-29 09:19:12.043: method name(452): setPin
11-29 09:19:12.043: method name(452): setTrust
11-29 09:19:12.043: method name(452): toString
11-29 09:19:12.043: method name(452): writeToParcel
11-29 09:19:12.043: method name(452): convertPinToBytes
11-29 09:19:12.043: method name(452): getClass
11-29 09:19:12.043: method name(452): notify
11-29 09:19:12.043: method name(452): notifyAll
11-29 09:19:12.043: method name(452): wait
11-29 09:19:12.051: method name(452): wait
11-29 09:19:12.051: method name(452): wait
3.如果枚举发现API存在(SDK却隐藏),则自己实现调用方法:
static public boolean createBond(Class btClass,BluetoothDevice btDevice) throws Exception {
 Method createBondMethod = btClass.getMethod("createBond");
 Boolean returnValue = (Boolean) createBondMethod.invoke(btDevice);
 return returnValue.booleanValue();
}

static public boolean removeBond(Class btClass,BluetoothDevice btDevice) throws Exception {
 Method removeBondMethod = btClass.getMethod("removeBond");
 Boolean returnValue = (Boolean) removeBondMethod.invoke(btDevice);
 return returnValue.booleanValue();
}
此处注意:SDK之所以不给出隐藏的API肯定有其原因,也许是出于安全性或者是后续版本兼容性的考虑,因此不能保证隐藏API能在所有Android平台上很好地运行。
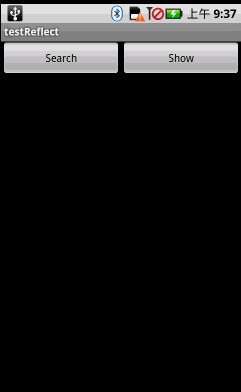
本文程序运行效果如下图所示:

main.xml源码如下:
<?xml version="1.0" encoding="utf-8"?>
<LinearLayout xmlns:android="Http://schemas.android.com/apk/res/android"
 android:orientation="vertical" android:layout_width="fill_parent"
 android:layout_height="fill_parent">
 <LinearLayout android:id="@+id/LinearLayout01"
 android:layout_height="wrap_content" android:layout_width="fill_parent">
 <Button android:layout_height="wrap_content" android:id="@+id/btnSearch"
  android:text="Search" android:layout_width="160dip"></Button>
 <Button android:layout_height="wrap_content"
  android:layout_width="160dip" android:text="Show" android:id="@+id/btnShow"></Button>
 </LinearLayout>
 <LinearLayout android:id="@+id/LinearLayout02"
 android:layout_width="wrap_content" android:layout_height="wrap_content"></LinearLayout>
 <ListView android:id="@+id/ListView01" android:layout_width="fill_parent"
 android:layout_height="fill_parent">
 </ListView>
</LinearLayout>
工具类ClsUtils.java源码如下:
package com.testReflect;
import java.lang.reflect.Field;
import java.lang.reflect.Method;
import android.bluetooth.BluetoothDevice;
import android.util.Log;
public class ClsUtils {

 static public boolean createBond(Class btClass,BluetoothDevice btDevice) throws Exception {
 Method createBondMethod = btClass.getMethod("createBond");
 Boolean returnValue = (Boolean) createBondMethod.invoke(btDevice);
 return returnValue.booleanValue();
 }

 static public boolean removeBond(Class btClass,BluetoothDevice btDevice) throws Exception {
 Method removeBondMethod = btClass.getMethod("removeBond");
 Boolean returnValue = (Boolean) removeBondMethod.invoke(btDevice);
 return returnValue.booleanValue();
 }

 static public void printAllInform(Class clsShow) {
 try {
  // 取得所有方法
  Method[] hideMethod = clsShow.getMethods();
  int i = 0;
  for (; i < hideMethod.length; i++) {
  Log.e("method name", hideMethod[i].getName());
  }
  // 取得所有常量
  Field[] allFields = clsShow.getFields();
  for (i = 0; i < allFields.length; i++) {
  Log.e("Field name", allFields[i].getName());
  }
 } catch (SecurityException e) {
  // throw new RuntimeException(e.getMessage());
  e.printStackTrace();
 } catch (IllegalArgumentException e) {
  // throw new RuntimeException(e.getMessage());
  e.printStackTrace();
 } catch (Exception e) {
  // TODO Auto-generated catch block
  e.printStackTrace();
 }
 }
}
主程序testReflect.java的源码如下:
package com.testReflect;
import java.util.ArrayList;
import java.util.List;
import android.app.Activity;
import android.bluetooth.BluetoothAdapter;
import android.bluetooth.BluetoothDevice;
import android.content.BroadcastReceiver;
import android.content.Context;
import android.content.Intent;
import android.content.IntentFilter;
import android.os.Bundle;
import android.util.Log;
import android.view.View;
import android.widget.AdapterView;
import android.widget.ArrayAdapter;
import android.widget.Button;
import android.widget.ListView;
import android.widget.Toast;
public class testReflect extends Activity {
 Button btnSearch, btnShow;
 ListView lvBTDevices;
 ArrayAdapter<String> adtDevices;
 List<String> lstDevices = new ArrayList<String>();
 BluetoothDevice btDevice;
 BluetoothAdapter btAdapt;
 @Override
 public void onCreate(Bundle savedInstanceState) {
 super.onCreate(savedInstanceState);
 setContentView(R.layout.main);
 btnSearch = (Button) this.findViewById(R.id.btnSearch);
 btnSearch.setOnClickListener(new ClickEvent());
 btnShow = (Button) this.findViewById(R.id.btnShow);
 btnShow.setOnClickListener(new ClickEvent());
 lvBTDevices = (ListView) this.findViewById(R.id.ListView01);
 adtDevices = new ArrayAdapter<String>(testReflect.this,
  android.R.layout.simple_list_item_1, lstDevices);
 lvBTDevices.setAdapter(adtDevices);
 lvBTDevices.setOnItemClickListener(new ItemClickEvent());
 btAdapt = BluetoothAdapter.getDefaultAdapter();// 初始化本机蓝牙功能
 if (btAdapt.getState() == BluetoothAdapter.STATE_OFF)// 开蓝牙
  btAdapt.enable();
 // 注册Receiver来获取蓝牙设备相关的结果
 IntentFilter intent = new IntentFilter();
 intent.addAction(BluetoothDevice.ACTION_FOUND);
 intent.addAction(BluetoothDevice.ACTION_BOND_STATE_CHANGED);
 reGISterReceiver(searchDevices, intent);
 }
 private BroadcastReceiver searchDevices = new BroadcastReceiver() {
 public void onReceive(Context context, Intent intent) {
  String action = intent.getAction();
  Bundle b = intent.getExtras();
  Object[] lstName = b.keySet().toArray();
  // 显示所有收到的消息及其细节
  for (int i = 0; i < lstName.length; i++) {
  String keyName = lstName[i].toString();
  Log.e(keyName, String.valueOf(b.get(keyName)));
  }
  // 搜索设备时,取得设备的Mac地址
  if (BluetoothDevice.ACTION_FOUND.equals(action)) {
  BluetoothDevice device = intent
   .getParcelableExtra(BluetoothDevice.EXTRA_DEVICE);
  if (device.getBondState() == BluetoothDevice.BOND_NONE) {
   String str = "未配对|" + device.getName() + "|" + device.getAddress();
   lstDevices.add(str); // 获取设备名称和mac地址
   adtDevices.notifyDataSetChanged();
  }
  }
 }
 };
 class ItemClickEvent implements AdapterView.OnItemClickListener {
 @Override
 public void onItemClick(AdapterView<?> arg0, View arg1, int arg2,
  long arg3) {
  btAdapt.cancelDiscovery();
  String str = lstDevices.get(arg2);
  String[] values = str.split("//|");
  String address=values[2];
  btDevice = btAdapt.getRemoteDevice(address);
  try {
  if(values[0].equals("未配对"))
  {
   Toast.makeText(testReflect.this, "由未配对转为已配对", 500).show();
   ClsUtils.createBond(btDevice.getClass(), btDevice);
  }
  else if(values[0].equals("已配对"))
  {
   Toast.makeText(testReflect.this, "由已配对转为未配对", 500).show();
   ClsUtils.removeBond(btDevice.getClass(), btDevice);
  }
  } catch (Exception e) {
  // TODO Auto-generated catch block
  e.printStackTrace();
  }
 }
 }

 class ClickEvent implements View.OnClickListener {
 @Override
 public void onClick(View v) {
  if (v == btnSearch) {//搜索附近的蓝牙设备
  lstDevices.clear();
  Object[] lstDevice = btAdapt.getBondedDevices().toArray();
  for (int i = 0; i < lstDevice.length; i++) {
   BluetoothDevice device=(BluetoothDevice)lstDevice[i];
   String str = "已配对|" + device.getName() + "|" + device.getAddress();
   lstDevices.add(str); // 获取设备名称和mac地址
   adtDevices.notifyDataSetChanged();
  }
  // 开始搜索
  setTitle("本机蓝牙地址:" + btAdapt.getAddress());
  btAdapt.startDiscovery();
  }
  else if(v==btnShow){//显示BluetoothDevice的所有方法和常量,包括隐藏API
  ClsUtils.printAllInform(btDevice.getClass());
  }
 }
 }
}希望本文实例能够对大家进行Android程序开发有一定的借鉴帮助作用。
您可能感兴趣的文章:android 微信 sdk api调用不成功解决方案android monkey自动化测试改为java调用monkeyrunner ApiAndroid 高版本API方法在低版本系统上的兼容性处理Android 调用百度地图API示例android开发教程之获取使用当前api的应用程序名称android通过Google api获取天气信息示例android通过Location API显示地址信息的实现方法Android通过原生APi获取所在位置的经纬度Android指纹识别API初试Android开发学习笔记之通过API接口将LaTex数学函数表达式转化为图片形式Android 支付宝支付、微信支付、银联支付 整合第三方支付接入方法(后台订单支付API设计)Android4.4 webapi实现拍照上传功能使用android隐藏api实现亮度调节的方法Android API开发之SMS短信服务处理和获取联系人的方法Android 用 camera2 API 自定义相机Android基于API的Tabs3实现仿优酷tabhost效果实例Android 多媒体播放API简单实例最新Android版本、代号、对应API/NDK级别、发布时间及市场份额
--结束END--
本文标题: Android提高之蓝牙隐藏API探秘
本文链接: https://lsjlt.com/news/27025.html(转载时请注明来源链接)
有问题或投稿请发送至: 邮箱/279061341@qq.com QQ/279061341
2024-01-21
2023-10-28
2023-10-28
2023-10-27
2023-10-27
2023-10-27
2023-10-27
回答
回答
回答
回答
回答
回答
回答
回答
回答
回答
0