随着微信的到来,二维码越来越火爆,随处能看到二维码,比如商城里面,肯德基,餐厅等等,对于二维码扫描我们使用的是Google的开源框架Zxing,我们可以去Http://code
随着微信的到来,二维码越来越火爆,随处能看到二维码,比如商城里面,肯德基,餐厅等等,对于二维码扫描我们使用的是Google的开源框架Zxing,我们可以去Http://code.google.com/p/zxing/下载源码和jar包,之前我项目中的二维码扫描功能只实现了扫描功能,其UI真的是其丑无比,一个好的应用软件,其UI界面也要被大众所接纳,不然人家就不会用你的软件啦,所以说应用软件功能和界面一样都很重要,例如微信,相信微信UI被很多应用软件所模仿,我也仿照微信扫描二维码效果进行模仿,虽然没有微信做的那么精致,但是效果还是可以的,所以将自己修改UI的代码和扫描二维码的代码分享给大家,一是自己以后项目遇到同样的功能直接拷贝来用,二是给还没有加入二维码功能的人一个参考,站在巨人的肩膀上,哈哈,我之前也是站在巨人的肩膀上加上此功能,接下来跟着我一步一步来实现此项功能,里面去除了很多不必要的文件
我们先看下项目的结构

public void handleDecode(Result result, Bitmap barcode) {
 inactivityTimer.onActivity();
 playBeepSoundAndVibrate();
 String resultString = result.getText();
 if (resultString.equals("")) {
  Toast.makeText(MipcaActivityCapture.this, "Scan failed!", Toast.LENGTH_SHORT).show();
 }else {
  Intent resultIntent = new Intent();
  Bundle bundle = new Bundle();
  bundle.putString("result", resultString);
  bundle.putParcelable("bitmap", barcode);
  resultIntent.putExtras(bundle);
  this.setResult(RESULT_OK, resultIntent);
 }
 MipcaActivityCapture.this.finish();
}
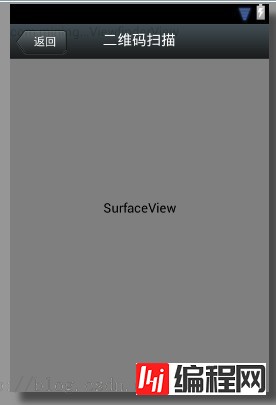
我对MipcaActivityCapture界面的布局做了自己的改动,先看下效果图,主要是用到FrameLayout,里面嵌套RelativeLayout。

布局代码如下
<?xml version="1.0" encoding="utf-8"?>
<FrameLayout xmlns:Android="http://schemas.android.com/apk/res/android"
 android:layout_width="fill_parent"
  android:layout_height="fill_parent" >
 <RelativeLayout
  android:layout_width="fill_parent"
  android:layout_height="fill_parent" >
  <SurfaceView
   android:id="@+id/preview_view"
   android:layout_width="fill_parent"
   android:layout_height="fill_parent"
   android:layout_gravity="center" />
  <com.mining.app.zxing.view.ViewfinderView
   android:id="@+id/viewfinder_view"
   android:layout_width="wrap_content"
   android:layout_height="wrap_content" />
  <include
   android:id="@+id/include1"
   android:layout_width="fill_parent"
   android:layout_height="wrap_content"
   android:layout_alignParentTop="true"
   layout="@layout/activity_title" />
 </RelativeLayout>
</FrameLayout>
在里面我将界面上面部分写在另一个布局里面,然后include进来,因为这个activity_title在我项目里面还供其他的Activity使用,我也是直接拷贝出来的
<?xml version="1.0" encoding="utf-8"?>
<RelativeLayout xmlns:android="http://schemas.android.com/apk/res/android"
 android:layout_width="fill_parent"
 android:layout_height="wrap_content"
 android:background="@drawable/mmtitle_bg_alpha" >
 <Button
  android:id="@+id/button_back"
  android:layout_width="75.0dip"
  android:text="返回"
  android:background="@drawable/mm_title_back_btn"
  android:textColor="@android:color/white"
  android:layout_height="wrap_content"
  android:layout_centerVertical="true"
  android:layout_marginLeft="2dip" />
 <TextView
  android:id="@+id/textview_title"
  android:layout_width="wrap_content"
  android:layout_height="wrap_content"
  android:layout_alignBaseline="@+id/button_back"
  android:layout_alignBottom="@+id/button_back"
  android:layout_centerHorizontal="true"
  android:gravity="center_vertical"
  android:text="二维码扫描"
  android:textColor="@android:color/white"
  android:textSize="18sp" />
</RelativeLayout>
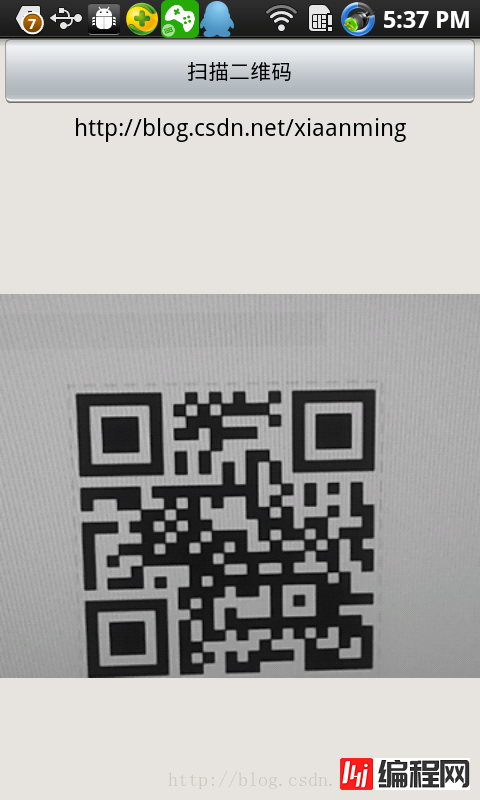
在我这个demo里面,有一个主界面MainActivity,里面一个Button, 一个ImageView和一个TextView,点击Button进入到二维码扫描界面,当扫描OK的时候,回到主界面,将扫描的结果显示到TextView,将图片显示到ImageView里面,然后你可以不处理图片,我这里随带的加上图片,主界面的布局很简单如下
<RelativeLayout xmlns:android="http://schemas.android.com/apk/res/android"
 xmlns:tools="http://schemas.android.com/tools"
 android:layout_width="match_parent"
 android:layout_height="match_parent"
 android:background="#ffe1e0de" >
 <Button
  android:id="@+id/button1"
  android:layout_width="fill_parent"
  android:layout_height="wrap_content"
  android:layout_alignParentTop="true"
  android:text="扫描二维码" />
 <TextView
  android:id="@+id/result"
  android:layout_width="fill_parent"
  android:layout_height="wrap_content"
  android:layout_below="@+id/button1"
  android:lines="2"
  android:gravity="center_horizontal"
  android:textColor="@android:color/black"
  android:textSize="16sp" />
 <ImageView
  android:id="@+id/qrcode_bitmap"
  android:layout_width="fill_parent"
  android:layout_height="fill_parent"
  android:layout_alignParentLeft="true"
  android:layout_below="@+id/result"/>
</RelativeLayout>
MainActivity里面的代码如下,里面的功能在上面已经说了
package com.example.qr_codescan;
import android.app.Activity;
import android.content.Intent;
import android.graphics.Bitmap;
import android.os.Bundle;
import android.view.View;
import android.view.View.OnClickListener;
import android.widget.Button;
import android.widget.ImageView;
import android.widget.TextView;
public class MainActivity extends Activity {
 private final static int SCANNIN_GREQUEST_CODE = 1;

 private TextView mTextView ;

 private ImageView mImageView;
 @Override
 protected void onCreate(Bundle savedInstanceState) {
  super.onCreate(savedInstanceState);
  setContentView(R.layout.activity_main);
  mTextView = (TextView) findViewById(R.id.result);
  mImageView = (ImageView) findViewById(R.id.qrcode_bitmap);
  //点击按钮跳转到二维码扫描界面,这里用的是startActivityForResult跳转
  //扫描完了之后调到该界面
  Button mButton = (Button) findViewById(R.id.button1);
  mButton.setOnClickListener(new OnClickListener() {
   @Override
   public void onClick(View v) {
    Intent intent = new Intent();
    intent.setClass(MainActivity.this, MipcaActivityCapture.class);
    intent.setFlags(Intent.FLAG_ACTIVITY_CLEAR_TOP);
    startActivityForResult(intent, SCANNIN_GREQUEST_CODE);
   }
  });
 }
 @Override
 protected void onActivityResult(int requestCode, int resultCode, Intent data) {
  super.onActivityResult(requestCode, resultCode, data);
  switch (requestCode) {
  case SCANNIN_GREQUEST_CODE:
   if(resultCode == RESULT_OK){
    Bundle bundle = data.getExtras();
    //显示扫描到的内容
    mTextView.setText(bundle.getString("result"));
    //显示
    mImageView.setImageBitmap((Bitmap) data.getParcelableExtra("bitmap"));
   }
   break;
  }
 }
}
上面的代码还是比较简单,但是要想做出像微信那样只的扫描框,紧紧上面的代码是没有那种效果的,我们必须重写com.mining.app.zxing.view包下面的ViewfinderView类,微信里面的都是用的图片,我是自己画出来的,代码注释的比较清楚,大家直接看代码吧,相信你能理解的,如果你要修改扫描框的大小,去CameraManager类里面修改
package com.mining.app.zxing.view;
import java.util.Collection;
import java.util.HashSet;
import android.content.Context;
import android.content.res.Resources;
import android.graphics.Bitmap;
import android.graphics.canvas;
import android.graphics.Color;
import android.graphics.Paint;
import android.graphics.Rect;
import android.graphics.Typeface;
import android.util.AttributeSet;
import android.view.View;
import com.example.qr_codescan.R;
import com.google.zxing.ResultPoint;
import com.mining.app.zxing.camera.CameraManager;

public final class ViewfinderView extends View {
 private static final String TAG = "log";

 private static final long ANIMATION_DELAY = 10L;
 private static final int OPAQUE = 0xFF;

 private int ScreenRate;

 private static final int CORNER_WIDTH = 10;

 private static final int MIDDLE_LINE_WIDTH = 6;

 private static final int MIDDLE_LINE_PADDING = 5;

 private static final int SPEEN_DISTANCE = 5;

 private static float density;

 private static final int TEXT_SIZE = 16;

 private static final int TEXT_PADDING_TOP = 30;

 private Paint paint;

 private int slideTop;

 private int slideBottom;
 private Bitmap resultBitmap;
 private final int maskColor;
 private final int resultColor;
 private final int resultPointColor;
 private Collection<ResultPoint> possibleResultPoints;
 private Collection<ResultPoint> lastPossibleResultPoints;
 boolean isFirst;
 public ViewfinderView(Context context, AttributeSet attrs) {
  super(context, attrs);
  density = context.getResources().getDisplayMetrics().density;
  //将像素转换成dp
  ScreenRate = (int)(20 * density);
  paint = new Paint();
  Resources resources = getResources();
  maskColor = resources.getColor(R.color.viewfinder_mask);
  resultColor = resources.getColor(R.color.result_view);
  resultPointColor = resources.getColor(R.color.possible_result_points);
  possibleResultPoints = new HashSet<ResultPoint>(5);
 }
 @Override
 public void onDraw(Canvas canvas) {
  //中间的扫描框,你要修改扫描框的大小,去CameraManager里面修改
  Rect frame = CameraManager.get().getFramingRect();
  if (frame == null) {
   return;
  }
  //初始化中间线滑动的最上边和最下边
  if(!isFirst){
   isFirst = true;
   slideTop = frame.top;
   slideBottom = frame.bottom;
  }
  //获取屏幕的宽和高
  int width = canvas.getWidth();
  int height = canvas.getHeight();
  paint.setColor(resultBitmap != null ? resultColor : maskColor);
  //画出扫描框外面的阴影部分,共四个部分,扫描框的上面到屏幕上面,扫描框的下面到屏幕下面
  //扫描框的左边面到屏幕左边,扫描框的右边到屏幕右边
  canvas.drawRect(0, 0, width, frame.top, paint);
  canvas.drawRect(0, frame.top, frame.left, frame.bottom + 1, paint);
  canvas.drawRect(frame.right + 1, frame.top, width, frame.bottom + 1,
    paint);
  canvas.drawRect(0, frame.bottom + 1, width, height, paint);
  if (resultBitmap != null) {
   // Draw the opaque result bitmap over the scanning rectangle
   paint.setAlpha(OPAQUE);
   canvas.drawBitmap(resultBitmap, frame.left, frame.top, paint);
  } else {
   //画扫描框边上的角,总共8个部分
   paint.setColor(Color.GREEN);
   canvas.drawRect(frame.left, frame.top, frame.left + ScreenRate,
     frame.top + CORNER_WIDTH, paint);
   canvas.drawRect(frame.left, frame.top, frame.left + CORNER_WIDTH, frame.top
     + ScreenRate, paint);
   canvas.drawRect(frame.right - ScreenRate, frame.top, frame.right,
     frame.top + CORNER_WIDTH, paint);
   canvas.drawRect(frame.right - CORNER_WIDTH, frame.top, frame.right, frame.top
     + ScreenRate, paint);
   canvas.drawRect(frame.left, frame.bottom - CORNER_WIDTH, frame.left
     + ScreenRate, frame.bottom, paint);
   canvas.drawRect(frame.left, frame.bottom - ScreenRate,
     frame.left + CORNER_WIDTH, frame.bottom, paint);
   canvas.drawRect(frame.right - ScreenRate, frame.bottom - CORNER_WIDTH,
     frame.right, frame.bottom, paint);
   canvas.drawRect(frame.right - CORNER_WIDTH, frame.bottom - ScreenRate,
     frame.right, frame.bottom, paint);
   //绘制中间的线,每次刷新界面,中间的线往下移动SPEEN_DISTANCE
   slideTop += SPEEN_DISTANCE;
   if(slideTop >= frame.bottom){
    slideTop = frame.top;
   }
   canvas.drawRect(frame.left + MIDDLE_LINE_PADDING, slideTop - MIDDLE_LINE_WIDTH/2, frame.right - MIDDLE_LINE_PADDING,slideTop + MIDDLE_LINE_WIDTH/2, paint);
   //画扫描框下面的字
   paint.setColor(Color.WHITE);
   paint.setTextSize(TEXT_SIZE * density);
   paint.setAlpha(0x40);
   paint.setTypeface(Typeface.create("System", Typeface.BOLD));
   canvas.drawText(getResources().getString(R.string.scan_text), frame.left, (float) (frame.bottom + (float)TEXT_PADDING_TOP *density), paint);
   Collection<ResultPoint> currentPossible = possibleResultPoints;
   Collection<ResultPoint> currentLast = lastPossibleResultPoints;
   if (currentPossible.isEmpty()) {
    lastPossibleResultPoints = null;
   } else {
    possibleResultPoints = new HashSet<ResultPoint>(5);
    lastPossibleResultPoints = currentPossible;
    paint.setAlpha(OPAQUE);
    paint.setColor(resultPointColor);
    for (ResultPoint point : currentPossible) {
     canvas.drawCircle(frame.left + point.getX(), frame.top
       + point.getY(), 6.0f, paint);
    }
   }
   if (currentLast != null) {
    paint.setAlpha(OPAQUE / 2);
    paint.setColor(resultPointColor);
    for (ResultPoint point : currentLast) {
     canvas.drawCircle(frame.left + point.getX(), frame.top
       + point.getY(), 3.0f, paint);
    }
   }
   //只刷新扫描框的内容,其他地方不刷新
   postInvalidateDelayed(ANIMATION_DELAY, frame.left, frame.top,
     frame.right, frame.bottom);
  }
 }
 public void drawViewfinder() {
  resultBitmap = null;
  invalidate();
 }

 public void drawResultBitmap(Bitmap barcode) {
  resultBitmap = barcode;
  invalidate();
 }
 public void addPossibleResultPoint(ResultPoint point) {
  possibleResultPoints.add(point);
 }
}
上面的代码中,中间那根线微信是用的图片,我这里是画的,如果你想更加仿真点就将下面的代码
canvas.drawRect(frame.left + MIDDLE_LINE_PADDING, slideTop - MIDDLE_LINE_WIDTH/2, frame.right - MIDDLE_LINE_PADDING,slideTop + MIDDLE_LINE_WIDTH/2, paint);
改成
Rect lineRect = new Rect();
   lineRect.left = frame.left;
   lineRect.right = frame.right;
   lineRect.top = slideTop;
   lineRect.bottom = slideTop + 18;
   canvas.drawBitmap(((BitmapDrawable)(getResources().getDrawable(R.drawable.qrcode_scan_line))).getBitmap(), null, lineRect, paint);
那条扫描线自己去微信里面找一下,我贴出来的失真了,下载微信apk,将后缀名改成zip,然后解压就行了
画扫描框下面字体的代码需要修改下,这样子能根据字体自动排列在中间,如果字太长我没有处理,那个要自动换行,你可以自行处理
paint.setColor(Color.WHITE);
paint.setTextSize(TEXT_SIZE * density);
paint.setAlpha(0x40);
paint.setTypeface(Typeface.DEFAULT_BOLD);
String text = getResources().getString(R.string.R.string.scan_text);
float textWidth = paint.measureText(text);
canvas.drawText(text, (width - textWidth)/2, (float) (frame.bottom + (float)TEXT_PADDING_TOP *density), paint)
运行界面截图,其中中间的那根绿色的线会上下移动,跟微信的效果差不多,当然运行你还需要相对应的权限问题。


大家可以参考专题:java二维码进行学习
您可能感兴趣的文章:Android实现二维码扫描和生成的简单方法Android上使用ZXing识别条形码与二维码的方法iOS和Android用同一个二维码实现跳转下载链接的方法Android开发框架之自定义ZXing二维码扫描界面并解决取景框拉伸问题Android项目实战(二十八):使用Zxing实现二维码及优化实例基于Android实现个性彩色好看的二维码Android 二维码 生成和识别二维码 附源码下载Android平台生成二维码并实现扫描 & 识别功能Android编程实现二维码的生成与解析Android扫描和生成二维码
--结束END--
本文标题: Android基于google Zxing实现各类二维码扫描效果
本文链接: https://lsjlt.com/news/25638.html(转载时请注明来源链接)
有问题或投稿请发送至: 邮箱/279061341@qq.com QQ/279061341
2024-01-21
2023-10-28
2023-10-28
2023-10-27
2023-10-27
2023-10-27
2023-10-27
回答
回答
回答
回答
回答
回答
回答
回答
回答
回答
0