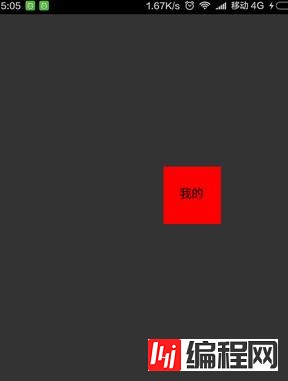
效果图如下 第一步:新建DragView继承RelativeLayout package com.rong.activity; import com.rong.test.R
效果图如下

第一步:新建DragView继承RelativeLayout
package com.rong.activity;
import com.rong.test.R;
import Android.content.Context;
import android.graphics.Color;
import android.graphics.PixelFORMat;
import android.util.AttributeSet;
import android.view.Gravity;
import android.view.MotionEvent;
import android.view.View;
import android.view.WindowManager;
import android.widget.Button;
import android.widget.RelativeLayout;
public class DragView extends RelativeLayout {
 private WindowManager windowManager;// 用于可拖动的浮动窗口
 private WindowManager.LayoutParams windowParams;// 浮动窗口的参数
 private Button myButton;
 public DragView(Context context, AttributeSet attrs) {
 super(context, attrs);
 init();
 }
 private void init() {
 View.inflate(getContext(), R.layout.layout_my, this);
 myButton = new Button(getContext());
 myButton.setText("我的");
 myButton.setBackgroundColor(Color.RED);
 }
 @Override
 public boolean onTouchEvent(MotionEvent event) {
 // 获取当前点的xy位置
 int currentX = (int) event.getX();
 int currentY = (int) event.getY();
 switch (event.getAction()) {
 case MotionEvent.ACTION_DOWN:
  if (windowManager == null) {
  setWindowParams(currentX, currentY);
  windowManager = (WindowManager) getContext().getSystemService(Context.WINDOW_SERVICE);
  windowManager.addView(myButton, windowParams);
  }
  break;
 case MotionEvent.ACTION_MOVE:
  windowParams.x = currentX;
  windowParams.y = currentY;
  windowManager.updateViewLayout(myButton, windowParams);
  break;
 case MotionEvent.ACTION_UP:
  // windowManager.removeView(myButton);
  break;
 }
 return true;
 }
 private void setWindowParams(int x, int y) {
 // 建立item的缩略图
 windowParams = new WindowManager.LayoutParams();
 windowParams.gravity = Gravity.TOP | Gravity.LEFT;// 这个必须加
 // 得到preview左上角相对于屏幕的坐标
 windowParams.x = x;
 windowParams.y = y;
 // 设置宽和高
 windowParams.width = 200;
 windowParams.height = 200;
 windowParams.flags = WindowManager.LayoutParams.FLAG_NOT_FOCUSABLE
  | WindowManager.LayoutParams.FLAG_NOT_TOUCHABLE | WindowManager.LayoutParams.FLAG_KEEP_SCREEN_ON
  | WindowManager.LayoutParams.FLAG_LAYOUT_IN_SCREEN;
 windowParams.format = PixelFormat.TRANSLUCENT;
 windowParams.windowAnimations = 0;
 }
}
第二步:新建布局文件activity_main.xml
<?xml version="1.0" encoding="utf-8"?>
<RelativeLayout xmlns:android="Http://schemas.android.com/apk/res/android"
  android:id="@+id/main_touchlayout"
  android:layout_width="match_parent"
  android:layout_height="match_parent"
  android:background="#ffffff"
  android:orientation="vertical" >
  <com.rong.activity.DragView
    android:id="@+id/main_touchview"
    android:layout_width="match_parent"
    android:layout_height="match_parent"
    android:layout_centerInParent="true"
    android:background="#ff0000" />
</RelativeLayout>
--结束END--
本文标题: Android使用WindowManager制作一个可拖动的控件
本文链接: https://lsjlt.com/news/24457.html(转载时请注明来源链接)
有问题或投稿请发送至: 邮箱/279061341@qq.com QQ/279061341
2024-01-21
2023-10-28
2023-10-28
2023-10-27
2023-10-27
2023-10-27
2023-10-27
回答
回答
回答
回答
回答
回答
回答
回答
回答
回答
0