目录Vite前端开发与构建工具vue3 与 Vue2区别typescript使用Vite创建脚手架1、创建项目文件夹2、选择Vue3、选择TypeScript4、完成后可以看到项目文
开发环境中,vite无需打包,可快速的冷启动
真正的按需编译,不需要等待整个应用编译完成
一个开发服务器,它基于原生ES模块 提供了丰富的内建功能,速度快模块热更新(HMR)
一套构建指令,它使用Rollup打包代码,并且它是预配置的,可输出用于生产环境的高度优化过的静态资源。
Vue2 使用 Options api 而 Vue3 使用的 Composition API
在应用中对类型判断的定义和使用有很强的表现。同一对象的多个键返回值必须通过定义对应的接口(interface)来进行类型定义。要不然在 ESLint 时都会报错
注意:Vite 需要 node.js 版本 >= 12.0.0
例如:想在workSpace文件下创建 my-vue-app,则先进入workplace文件夹,再打开cmd,运行一下命令
 # npm 6.x
  npm init vite@latest my-vue-app --template vue

  # npm 7+, 需要额外的双横线:
  npm init vite@latest my-vue-app -- --template vue

然后根据指令,进入文件夹,安装依赖,运行项目


完成后效果

import { defineConfig } from 'vite'
import vue from '@vitejs/plugin-vue'

import path from 'path'

// https://vitejs.dev/config/
export default defineConfig({
  plugins: [vue()],
   // 配置文件引用别名 alias
   resolve: {
    alias: {
      '@': path.resolve(__dirname, 'src'),
    },
  },
}){
"compilerOptions": {
"target": "ESNext",
"useDefineForClassFields": true,
"module": "ESNext",
"moduleResolution": "node",
"strict": true,
"jsx": "preserve",
"resolveJsonModule": true,
"isolatedModules": true,
"esModuleInterop": true,
"lib": ["ESNext", "DOM"],
"skipLibCheck": true,
"noEmit": true,
"baseUrl": ".",
"paths": {
"@*.ts", "src*.d.ts", "src*.tsx", "src*.vue"],
"references": [{ "path": "./tsconfig.node.json" }]
}npm install sass-loader sass webpack --save-dev
或yarn add sass-loader --dev
npm i dart-sass
或yarn add dart-sass --dev
npm i npm-sass
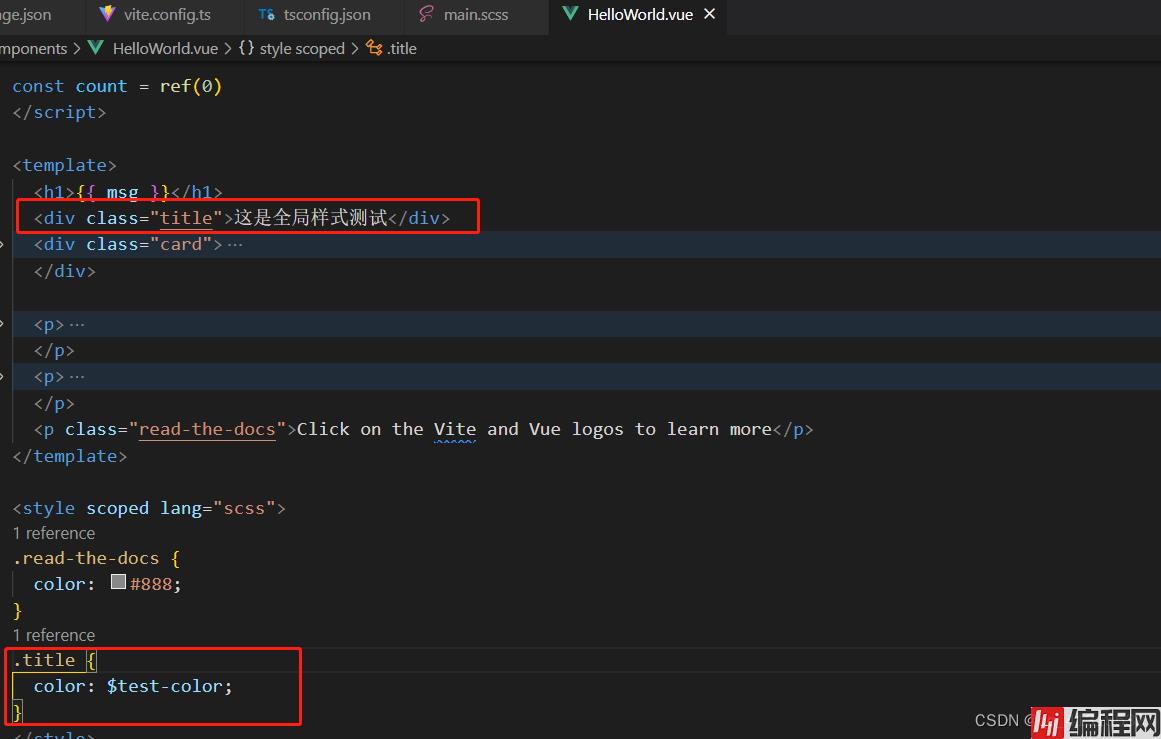
或yarn add sass --dev$test-color: rgb(255, 0, 60);
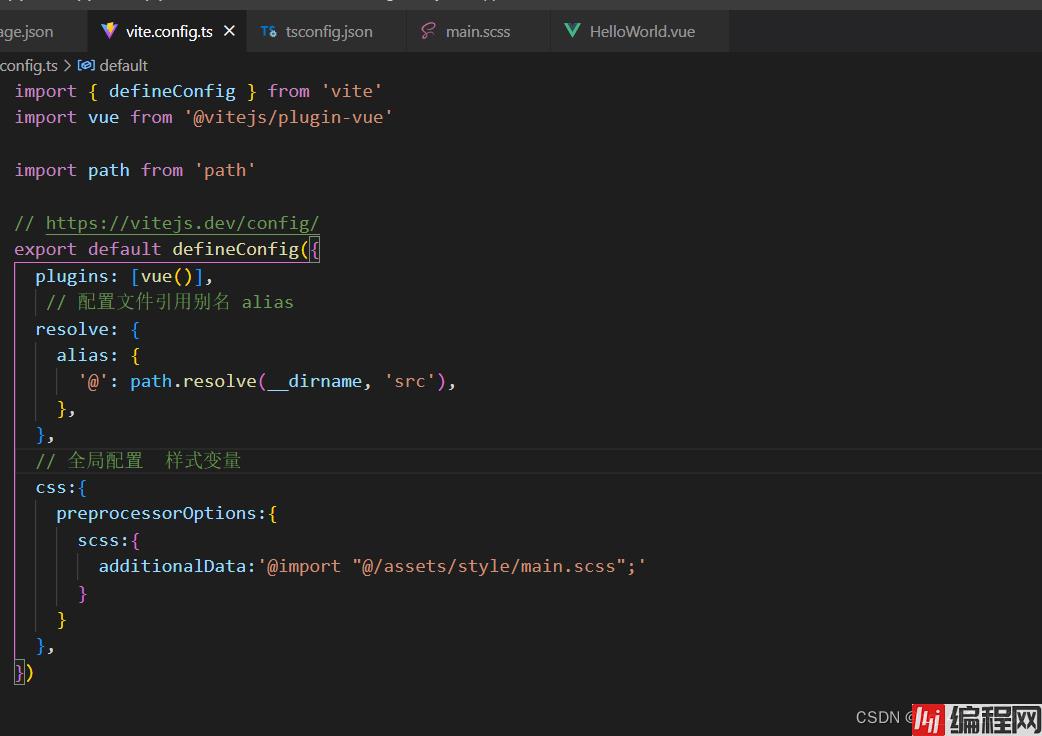
// 全局配置  样式变量
  css:{
    preprocessorOptions:{
      scss:{
        additionalData:'@import "@/assets/style/main.scss";'
      }
    }
  },
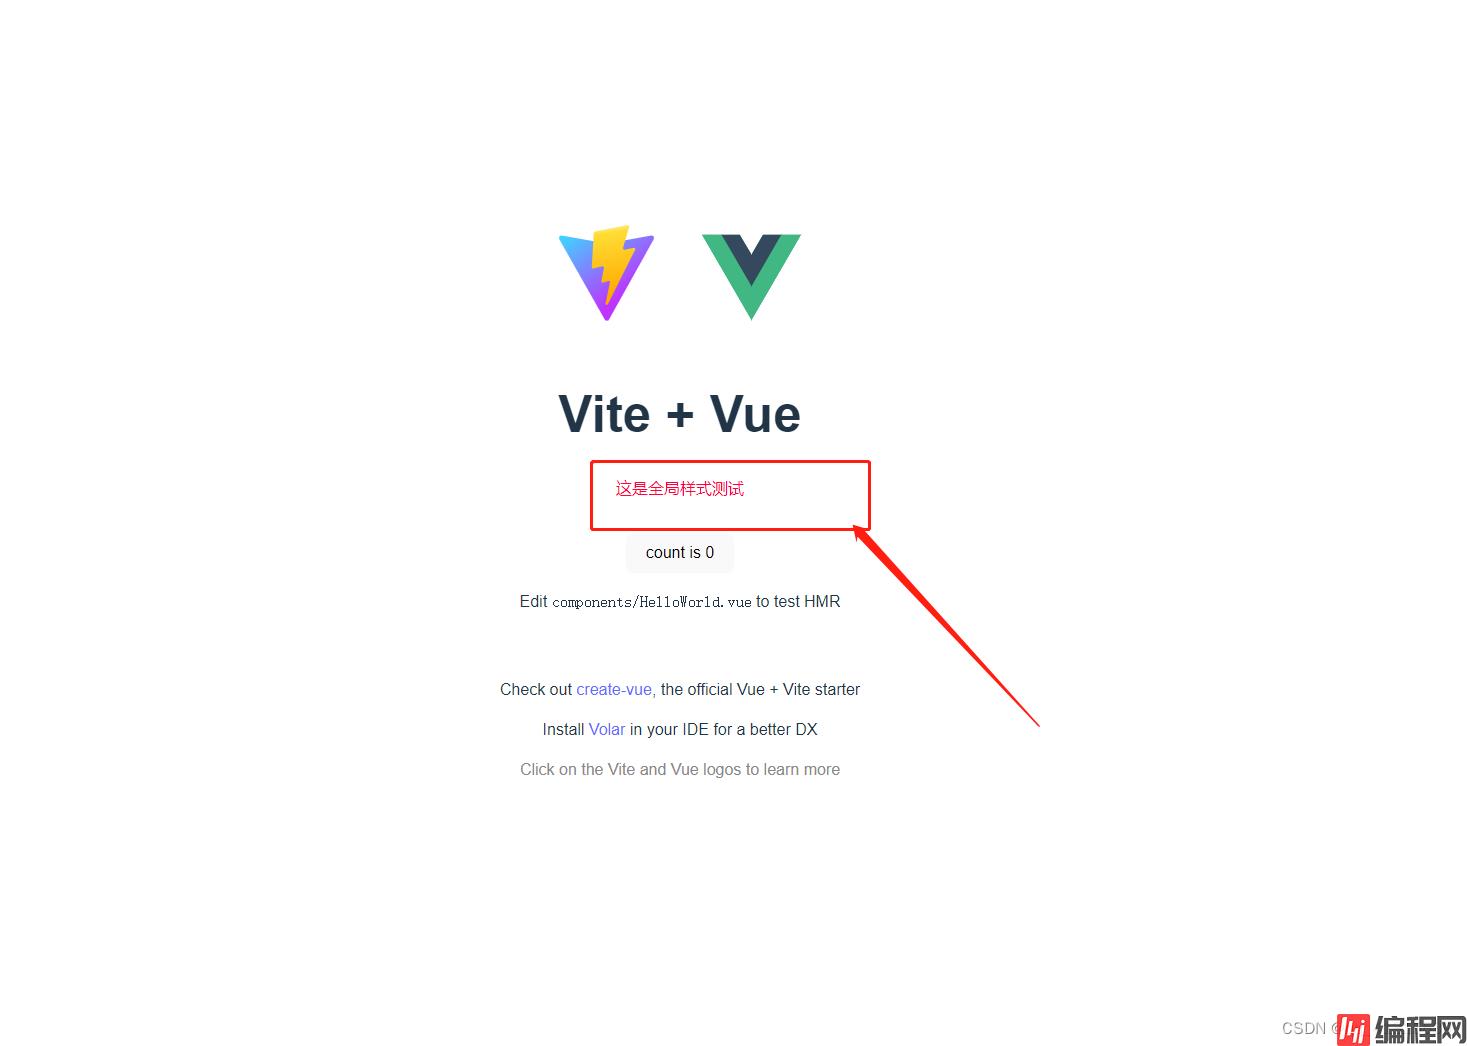
效果图片

npm i vue-router
yarn add vue-router@4
在src 文件夹下 创建 router 文件夹 -》并新建router.ts 文件,文件内容如下
import { createRouter, createWEBHistory, RouteRecordRaw } from 'vue-router';
const routes: RouteRecordRaw[] = [
    {
        path: '/home',
        name: 'home',
        component: () => import('@/views/Home/index.vue'), //可能问题1    注意这里要带上 文件后缀.vue
    },
    {
        path: '/',
        name: 'helloWorld',
        component: () => import('@/components/HelloWorld.vue'), //可能问题1    注意这里要带上 文件后缀.vue
    },
    {
        path: '/helloWorld',
        name: 'helloWorld',
        component: () => import('@/components/HelloWorld.vue'), //可能问题1    注意这里要带上 文件后缀.vue
    },
];
const router = createRouter({
    history: createWebHistory(),
    routes,
});
export default router;
新建页面:在src 文件夹下创建 views文件夹-》创建 home 文件夹-》创建 index.vue 文件,文件内容如下
<template>
    <h1>这是 home 页</h1>

  <router-link :to="{path:'/helloWorld'}">跳转到helloWord(router-link)</router-link>
    <br/>
  <button @click="GoHelloWordPage">跳转到 helloWord(js_function)</button>
</template>


<script setup lang="ts">
import {useRouter} from 'vue-router'

// 2. 调用useRouter函数
const $r = useRouter();

  const goHelloWordPage = () =>{
    $r.push("helloWorld")
  }

</script>
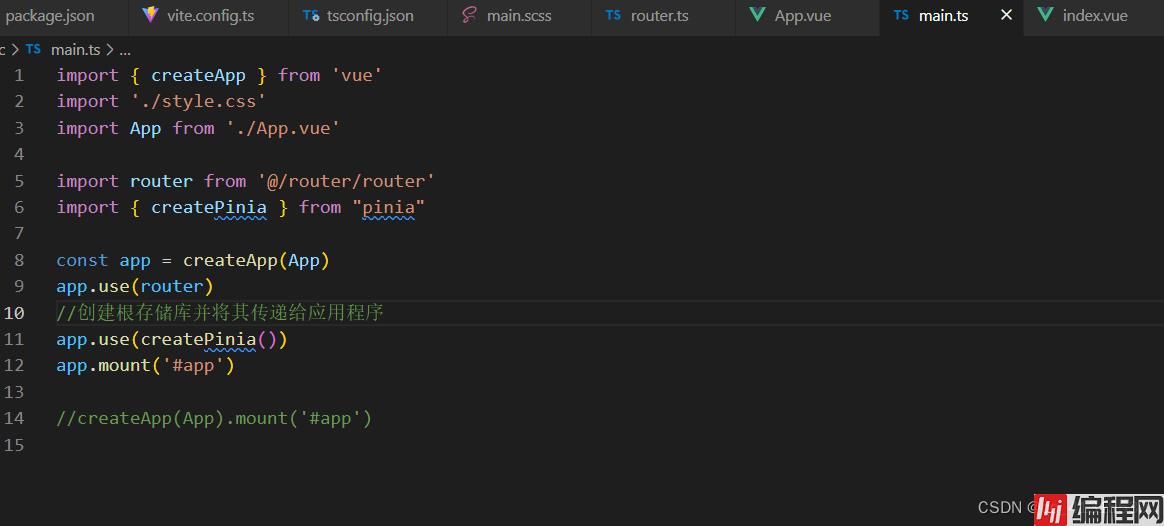
在入口文件main.ts 中 配置路由
import { createApp } from 'vue'
import './style.css'
import App from './App.vue'

import router from '@/router/router'

const app = createApp(App)

app.use(router)
app.mount('#app')

//createApp(App).mount('#app')
注意:配置完成后发现 浏览器地址栏:Http://127.0.0.1:5174/home 无法跳转,需要在App.vue中配置路由容器,原有的template 替换为 一下内容
<template>
    <!-- <h1>这是 主容器</h1> -->
  <router-view></router-view>

</template>安装
npm i pinia
yarn add pinia@next// 导入组件
import { createPinia } from "pinia"
# 创建根存储库并将其传递给应用程序
app.use(createPinia())
定义状态:在src文件夹下 创建store文件夹-》创建main.ts文件,文件内容如下
import { defineStore } from 'pinia'

export const useMainStore = defineStore({
  id: 'main',
  state: () =>({
    name: '群主'
  }),
  getters: {
    nameLength: (state) => state.name.length,
  }
})
组件中使用与修改:
<template>
<div>这是状态管理Pinia:{{ mainStore.name }}<br />长度:{{ mainStore.nameLength }}</div>
<button @click="updateName">修改 store 中的 name</button>
</template>

<script setup lang="ts">

import { useMainStore } from "@/store/main";

const mainStore = useMainStore()
const updateName = () => {
  // $patch 修改 store 中的数据
  mainStore.$patch({
    name: "名称被修改了,nameLength也随之改变了",
  });
};

</script>
例如在 home->index.vue 中使用
<template>
    <h1>这是 home 页</h1>
    <router-link :to="{path:'/helloWorld'}">跳转到helloWord(router-link)</router-link>
    <button @click="goHelloWordPage">跳转到 helloWord(js_function)</button>
    <div>这是状态管理Pinia:{{ mainStore.name }}<br />长度:{{ mainStore.nameLength }}</div>
    <button @click="updateName">修改 store 中的 name</button>
</template>
<script setup lang="ts">
import {useRouter} from 'vue-router'
import { useMainStore } from "@/store/main";

const mainStore = useMainStore()
const updateName = () => {
  // $patch 修改 store 中的数据
  mainStore.$patch({
    name: "名称被修改了,nameLength也随之改变了",
  });
};

// 2. 调用useRouter函数
const $r = useRouter();

const goHelloWordPage = () =>{
$r.push("helloWorld")
}

</script>vite提供了开发模式(development)和生产模式(product)
项目根目录创建开发环境 .enc.dev 文件,文件内容如下
  NODE_ENV=development
  VITE_APP_WEB_URL= 'https://www.baidu.com'
项目根目录创建生产环境 .enc.prod 文件,文件内容如下
 NODE_ENV=production
  VITE_APP_WEB_URL='https://www.goole.com'
使用:在views->home->index.vue 中 添加
<template>
<p>当前环境:{{ env.NODE_ENV }}</p>
</template>
<script setup lang="ts">
const env = import.meta.env
</script>
最后修改 pacakge.json 生效
"scripts": {
    "dev": "vite --mode dev",
    "dev:prod": "vite --mode prod",
    "build": "vue-tsc && vite build",
    "build:dev": "vue-tsc --noEmit && vite build --mode dev",
    "build:uat": "vue-tsc --noEmit && vite build --mode uat",
    "build:prod": "vue-tsc --noEmit && vite build --mode prod",
    "preview": "vite preview"
  },
启动项目时:
npm run dev
npm run dev:prod
不同的启动方式,环境变量值不同
到此这篇关于Vite+Vue3+TypeScript 搭建开发脚手架的文章就介绍到这了,更多相关Vite+Vue3+TypeScript 搭建脚手架内容请搜索编程网以前的文章或继续浏览下面的相关文章希望大家以后多多支持编程网!
--结束END--
本文标题: 使用Vite+Vue3+TypeScript 搭建开发脚手架的详细过程
本文链接: https://lsjlt.com/news/194125.html(转载时请注明来源链接)
有问题或投稿请发送至: 邮箱/279061341@qq.com QQ/279061341
2024-01-12
2023-05-20
2023-05-20
2023-05-20
2023-05-20
2023-05-20
2023-05-20
2023-05-20
2023-05-20
2023-05-20
回答
回答
回答
回答
回答
回答
回答
回答
回答
回答
0