Python 官方文档:入门教程 => 点击学习
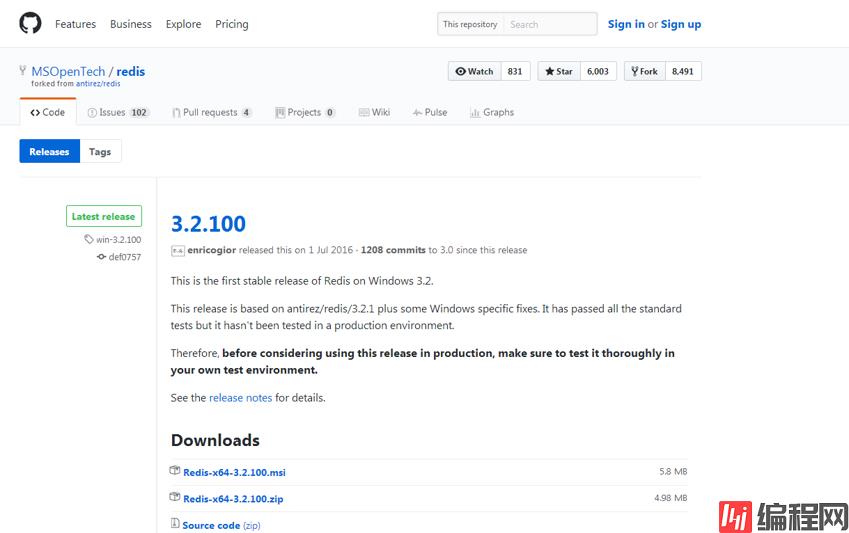
首先说一下在windows下安装Redis,安装包可以在https://GitHub.com/MSOpenTech/redis/releases中找到,可以下载msi安装文件,也可以下载zip的压缩文件。下载zip文件之后解压,解压后是这些
首先说一下在windows下安装Redis,安装包可以在https://GitHub.com/MSOpenTech/redis/releases中找到,可以下载msi安装文件,也可以下载zip的压缩文件。

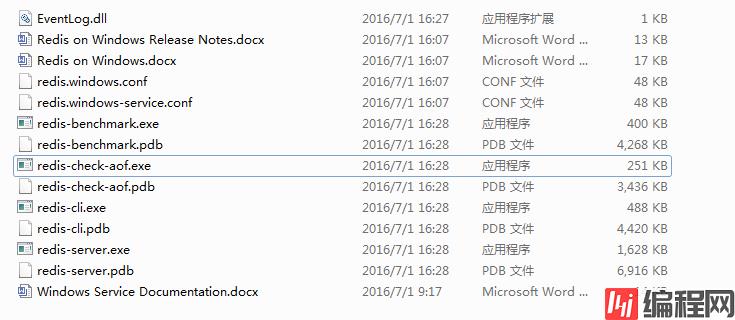
下载zip文件之后解压,解压后是这些文件:

里面这个Windows Service Documentation.docx是一个文档,里面有安装指导和使用方法。
也可以直接下载msi安装文件,直接安装,安装之后的安装目录中也是这些文件,可以对redis进行相关的配置。
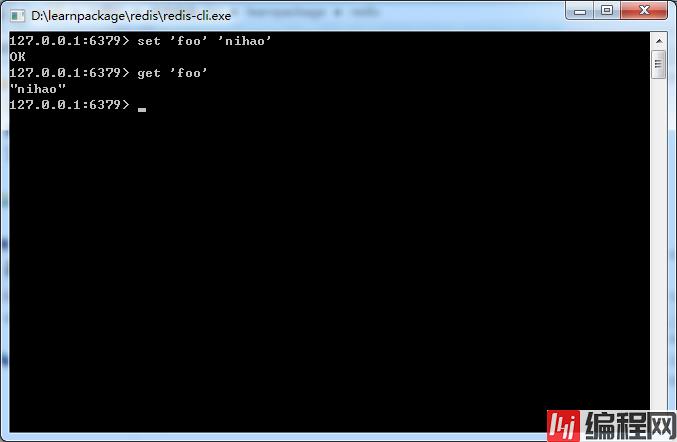
安装完成之后可以对redis进行测试,双击redis-cli.exe,如果不报错的话,应该会连接上本地的redis,进行简单的测试:

默认安装的是6379端口,测试成功。
也可以输入help,查看帮助:
127.0.0.1:6379> help
redis-cli 3.2.100
To get help about Redis commands type:
      "help @<group>" to get a list of commands in <group>
      "help <command>" for help on <command>
      "help <tab>" to get a list of possible help topics
      "quit" to exit

To set redis-cli perferences:
      ":set hints" enable online hints
      ":set nohints" disable online hints
Set your preferences in ~/.redisclirc
127.0.0.1:6379> help
redis-cli 3.2.100
To get help about Redis commands type:
"help @<group>" to get a list of commands in <group>
"help <command>" for help on <command>
"help <tab>" to get a list of possible help topics
"quit" to exit
To set redis-cli perferences:
":set hints" enable online hints
":set nohints" disable online hints
Set your preferences in ~/.redisclirc下面说一下用python操作Redis吧,使用Python安装Redis的话需要安装redis-py的库
1、安装redis-py
easy_install redis 也可以使用pip install redis安装,或者在Https://github.com/andymccurdy/redis-py下载然后执行python setup.py install安装
2、安装Parser安装
Parser可以控制如何解析redis响应的内容。redis-py包含两个Parser类,PythonParser和HiredisParser。默认,如果已经安装了hiredis模块,redis-py会使用HiredisParser,否则会使用PythonParser。HiredisParser是C编写的,由redis核心团队维护,性能要比PythonParser提高10倍以上,所以推荐使用。安装方法,使用easy_install:
easy_install hiredis 或者pip install hiredis
3、使用python操作redis
redis-py提供两个类Redis和StrictRedis用于实现Redis的命令,StrictRedis用于实现大部分官方的命令,并使用官方的语法和命令(比如,SET命令对应与StrictRedis.set方法)。Redis是StrictRedis的子类,用于向后兼容旧版本的redis-py。
import redis

r = redis.StrictRedis(host='127.0.0.1', port=6379)
r.set('foo', 'hello')
r.rpush('mylist', 'one')
print r.get('foo')
print  r.rpop('mylist')
import redis
r = redis.StrictRedis(host='127.0.0.1', port=6379)
r.set('foo', 'hello')
r.rpush('mylist', 'one')
print r.get('foo')
print r.rpop('mylist')redis-py使用connection pool来管理对一个redis server的所有连接,避免每次建立、释放连接的开销。默认,每个Redis实例都会维护一个自己的连接池。可以直接建立一个连接池,然后作为参数Redis,这样就可以实现多个Redis实例共享一个连接池。
pool = redis.ConnectionPool(host='127.0.0.1', port=6379)
r = redis.Redis(connection_pool=pool)
r.set('one', 'first')
r.set('two', 'second')
print r.get('one')
print r.get('two')
pool = redis.ConnectionPool(host='127.0.0.1', port=6379)
r = redis.Redis(connection_pool=pool)
r.set('one', 'first')
r.set('two', 'second')
print r.get('one')
print r.get('two')redis pipeline机制,可以在一次请求中执行多个命令,这样避免了多次的往返时延。
pool = redis.ConnectionPool(host='127.0.0.1', port=6379)
r = redis.Redis(connection_pool=pool)
pipe = r.pipeline()
pipe.set('one', 'first')
pipe.set('two', 'second')
pipe.execute()

pipe.set('one'. 'first').rpush('list', 'hello').rpush('list', 'world').execute()
pool = redis.ConnectionPool(host='127.0.0.1', port=6379)
r = redis.Redis(connection_pool=pool)
pipe = r.pipeline()
pipe.set('one', 'first')
pipe.set('two', 'second')
pipe.execute()
pipe.set('one'. 'first').rpush('list', 'hello').rpush('list', 'world').execute()
redis-py默认在一次pipeline中的操作是原子的,要改变这种方式,可以传入transaction=False
pipe = r.pipeline(transaction=False)
--结束END--
本文标题: python访问redis
本文链接: https://lsjlt.com/news/184042.html(转载时请注明来源链接)
有问题或投稿请发送至: 邮箱/279061341@qq.com QQ/279061341
2024-03-01
2024-03-01
2024-03-01
2024-02-29
2024-02-29
2024-02-29
2024-02-29
2024-02-29
2024-02-29
2024-02-29
回答
回答
回答
回答
回答
回答
回答
回答
回答
回答
0