目录热更新实现1.封装一个对比版本号的函数2.封装更新函数3.用变量接收实现函数(在函数中使用上方封装的函数)并导出使用1.引入封装好的函数2.然后可以在onLoad函数中进行触发补
热更新是开发中常见且常用的一种软件版本控制的方式,在uniapp进行使用热更新将软件实现更新操作
思路:
采用方法封装进行使用~
function compare(v1 = '0', v2 = '0') {
	v1 = String(v1).split('.')
	v2 = String(v2).split('.')
	const minVersionLens = Math.min(v1.length, v2.length);

	let result = 0;
	for (let i = 0; i < minVersionLens; i++) {
		const curV1 = Number(v1[i])
		const curV2 = Number(v2[i])

		if (curV1 > curV2) {
			result = 1
			break;
		} else if (curV1 < curV2) {
			result = -1
			break;
		}
	}

	if (result === 0 && (v1.length !== v2.length)) {
		const v1BiggerThenv2 = v1.length > v2.length;
		const maxLensVersion = v1BiggerThenv2 ? v1 : v2;
		for (let i = minVersionLens; i < maxLensVersion.length; i++) {
			const curVersion = Number(maxLensVersion[i])
			if (curVersion > 0) {
				v1BiggerThenv2 ? result = 1 : result = -1
				break;
			}
		}
	}
	return result;
}
通过
downloadTask.onProgressUpdate进行监听,再通过plus.nativeUI.showWaiting("正在下载 - 0%");进行加载显示下载进度…
var updateUseModal = (packageInfo) => {
	const {
		title, // 标题
		contents, // 升级内容
		is_mandatory, // 是否强制更新
		url, // 安装包下载地址
		platfORM, // 安装包平台
		type // 安装包类型
	} = packageInfo;

	let isWGT = type === 'wgt'
	let isiOS = !isWGT ? platform.includes('iOS') : false;
	let confirmText = isiOS ? '立即跳转更新' : '立即下载更新'

	return uni.showModal({
		title,
		content: contents,
		showCancel: !is_mandatory,
		confirmText,
		success: res => {
			if (res.cancel) return;

			// 安装包下载
			if (isiOS) {
				plus.runtime.openURL(url);
				return;
			}
			let waiting =  plus.nativeUI.showWaiting("正在下载 - 0%");
			// uni.showLoading({
			// 	title: '安装包下载中'
			// });
			// wgt 和 安卓下载更新
			const downloadTask = uni.downloadFile({
				url,
				success: res => {
					if (res.statusCode !== 200) {
						console.error('下载安装包失败', err);
						return;
					}
					// 下载好直接安装,下次启动生效
					plus.runtime.install(res.tempFilePath, {
						force: false
					}, () => {
						uni.hideLoading()
						if (is_mandatory) {
							//更新完重启app
							plus.runtime.restart();
							return;
						}
						uni.showModal({
							title: '安装成功是否重启?',
							success: res => {
								if (res.confirm) {
									//更新完重启app
									plus.runtime.restart();
								}
							}
						});
					}, err => {
						uni.hideLoading()
						uni.showModal({
							title: '更新失败',
							content: err.message,
							showCancel: false
						});
					});
				},
				//接口调用结束
				complete: ()=>{
					uni.hideLoading();
					downloadTask.offProgressUpdate();//取消监听加载进度
				}
			});
			//监听下载进度
			downloadTask.onProgressUpdate(res => {
				// state.percent = res.progress;
				waiting.setTitle("正在下载 - "+res.progress+"%");
				// console.log('下载进度百分比:' + res.progress); // 下载进度百分比
				// console.log('已经下载的数据长度:' + res.totalBytesWritten); // 已经下载的数据长度,单位 Bytes
				// console.log('预期需要下载的数据总长度:' + res.totalBytesExpectedToWrite); // 预期需要下载的数据总长度,单位 Bytes
			});
		}
	});
}
fRequestWithToken为我封装的请求方法,可自行进行使用axios进行请求也行!!!
var fCheckVersion = (cb) => {
	// #ifdef APP-PLUS
	plus.runtime.getProperty(plus.runtime.appid, function(widgetInfo) {
		// console.log(widgetInfo.version)
		// console.log(plus.runtime.version)
		// console.log(widgetInfo.version)
		var nVerSta = compare(plus.runtime.version, widgetInfo.version),
			sLaststVer = plus.runtime.version;
		if (widgetInfo.version) {
			if (nVerSta == 1) {
				console.log(plus.runtime.version)
				sLaststVer = plus.runtime.version
			} else if (nVerSta == -1) {
				console.log(widgetInfo.version)
				sLaststVer = widgetInfo.version
			}
		}
		console.log(sLaststVer)
		//发送请求进行匹对,我这里数据库设定的是如果返回null则版本号一致,反之需要更新!!!
		fRequestWithToken({
			ajaxOpts: {
				url: URLS_COM.d_lastVer,
				data: {
					versionCode: sLaststVer
				}
			},
			showloading: false,
			silence:true
		}).then(data => {
			console.log(data)
			// console.log('################')
			if (data) {
				var sUrl = '',
					type = '';
				if (data.wgtName) {
					sUrl = data.wgtName;
					type = "wgt"
				} else {
					sUrl = data.pkgName;
					type = "pkg";
				}

				updateUseModal({
					title: data.title||"",
					contents: data.note||'',
					is_mandatory: true,
					url: sUrl,
					platform: 'Android',
					type: type // 安装包类型
				})
			}
		}).catch((res)=>{
			cb&&cb()
			console.log(res)
		})
	})
	// #endif
}

export {
	fCheckVersion
}
以上代码即可实现热更新的操作
路径自己记得填写自己封装的位置
import{fCheckVersion} from '@/common/project/checkversion.js'
onLoad() {
		fCheckVersion();//检查更新
}
这样就实现了热更新
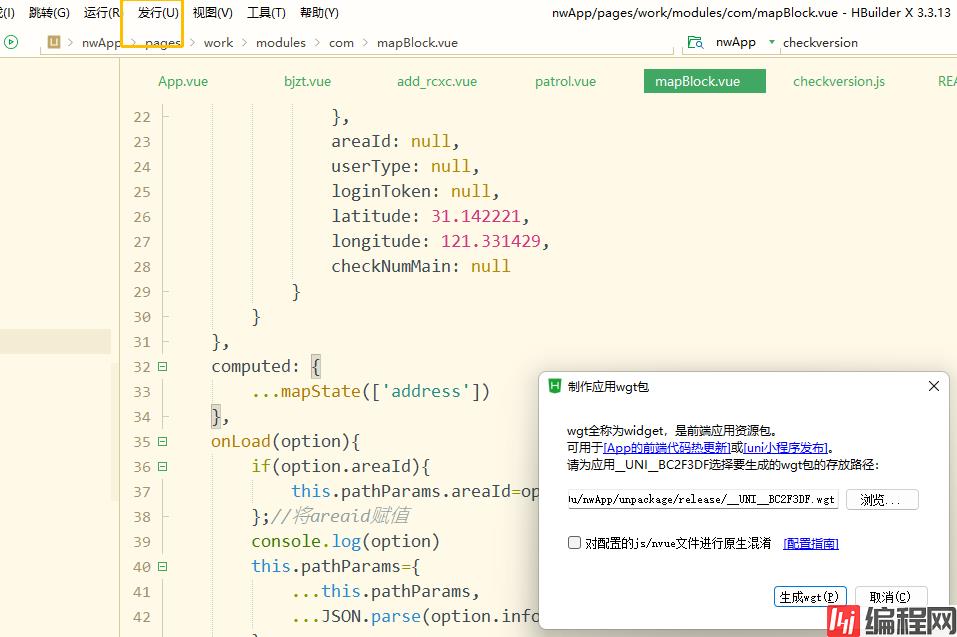
然后的话只需要进行打包个热更新的包

后端进行上传至服务器进行更新数据
本地再进行一个云打包,记得在mainifest.JSON文件中进行版本号的修改,修改成低于热更新包的版本号即可

整包升级代码:
在App.vue的onLaunch中,发起升级检测请求,如下:

onLaunch: function () {
    //#ifdef APP-PLUS
    var server = "https://www.example.com/update"; //检查更新地址
    var req = { //升级检测数据
        "appid": plus.runtime.appid,
        "version": plus.runtime.version
    };
    uni.request({
        url: server,
        data: req,
        success: (res) => {
            if (res.statusCode == 200 && res.data.status === 1) {
                uni.showModal({ //提醒用户更新
                    title: "更新提示",
                    content: res.data.note,
                    success: (res) => {
                        if (res.confirm) {
                            plus.runtime.openURL(res.data.url);
                        }
                    }
                })
            }
        }
    })
    //#endif
}注意:App的升级检测代码必须使用条件编译,否则在非App环境由于不存在plus相关api,将会报错。
升级地址URL,如果是自行托管的App,就提供自己的包地址。如果是打开应用市场,那URL如下:
if (plus.os.name=="Android") {
    appurl = "market://details?id=io.dcloud.hellouniapp"; //这个是通用应用市场,如果想指定某个应用商店,需要单独查这个应用商店的包名或scheme及参数
}
else{
    appurl = "itms-apps://itunes.apple.com/cn/app/hello-uni-app/id1417078253";
}到此这篇关于uniApp实现热更新的文章就介绍到这了,更多相关uniApp实现热更新内容请搜索编程网以前的文章或继续浏览下面的相关文章希望大家以后多多支持编程网!
--结束END--
本文标题: uniApp实现热更新的思路与详细过程
本文链接: https://lsjlt.com/news/173003.html(转载时请注明来源链接)
有问题或投稿请发送至: 邮箱/279061341@qq.com QQ/279061341
2024-01-12
2023-05-20
2023-05-20
2023-05-20
2023-05-20
2023-05-20
2023-05-20
2023-05-20
2023-05-20
2023-05-20
回答
回答
回答
回答
回答
回答
回答
回答
回答
回答
0