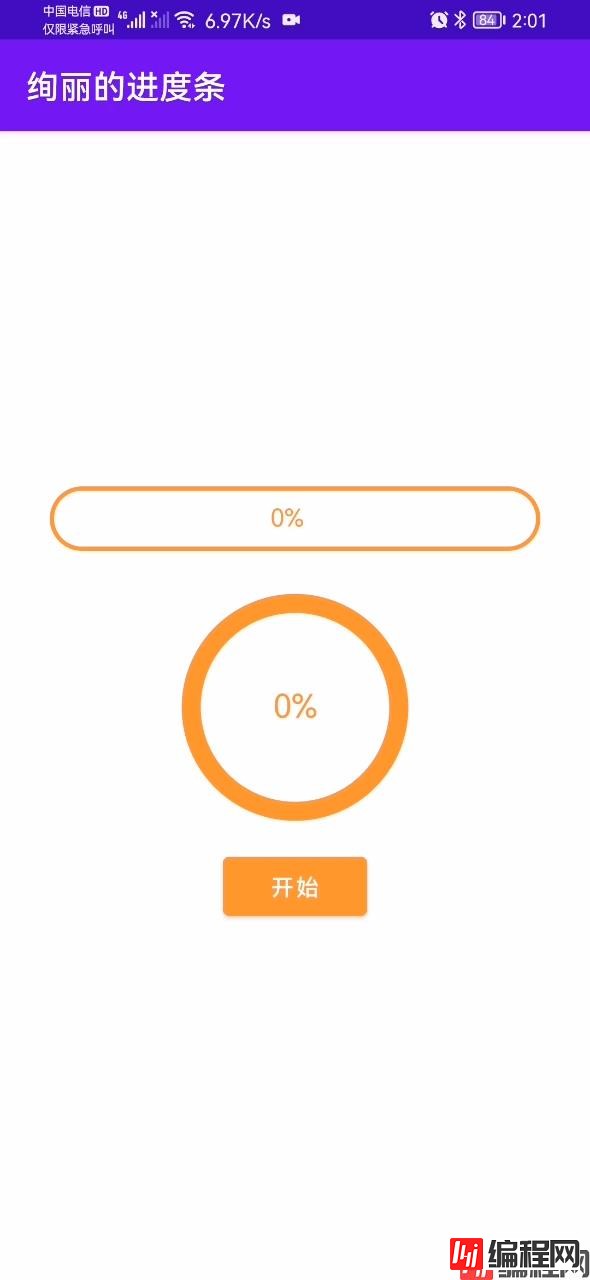
目录前言效果图实现步骤1.绘制背景圆形矩形2.绘制进度3.绘制文字4.加入动画 完整代码前言 进度条是在Android项目中很常用的组件之一,如果想要理解它是怎么实现的,首
进度条是在Android项目中很常用的组件之一,如果想要理解它是怎么实现的,首先还需要了解自定义view和Android坐标系相关的知识,下面我来详细地介绍一下自定义进度条的实现过程。
本项目源码:https://gitee.com/tu_erhongjiang/android-progress-bar


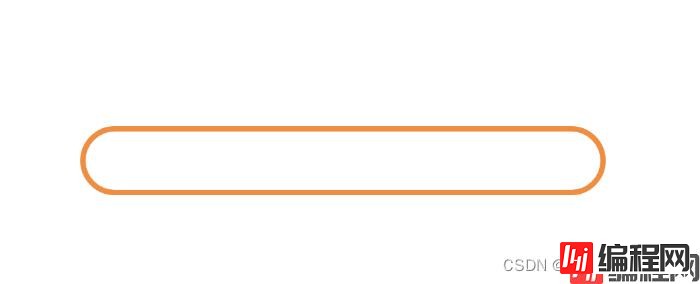
首先要画出一个圆形矩形,RectF里面传递的是矩形左上角和右下角的xy坐标,这是用来确定矩形的位置和大小,然后在矩形内部画出一个圆形矩形。
核心代码:canvas.drawRoundRect()
private void drawBackground(Canvas canvas){
   //圆角矩形
    RectF rectF = new RectF(padding, padding, mWidth - padding, mHeight - padding);
    canvas.drawRoundRect(rectF, round, round, mPaintRoundRect);
}

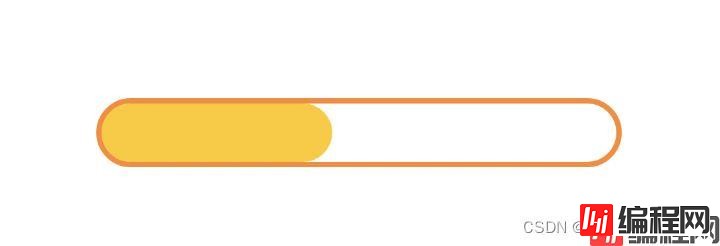
其实里面的进度条也是圆形矩形,只不过进度条的画笔是实心的。内部进度条矩形的大小需要略小于外面的矩形,这样就可以实现上面的这种效果。如果进度条矩形大于或等于背景矩形大小的话那就完全压住背景中的边框,显示出来的只是一个没有边框的进度条,所以这里需要减掉strokeWidth。
private void drawProgress(Canvas canvas){
        if (process!=0){
            RectF rectProgress = new RectF(padding + strokeWidth, padding + strokeWidth, process, mHeight - padding - strokeWidth);//内部进度条
            canvas.drawRoundRect(rectProgress, round, round, mPaint);
        }
    }

下面来看看怎么居中文字:
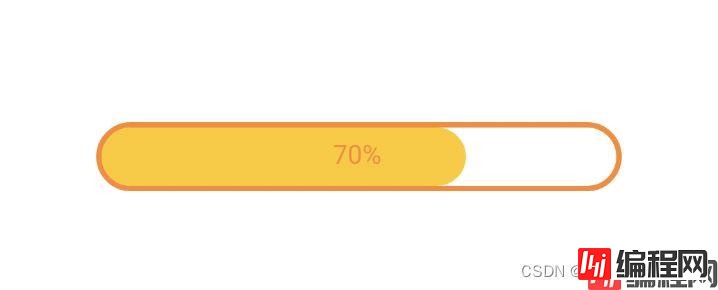
getWidth() / 2 得到的结果是中间位置的x坐标,但是从这里开始绘制文字的话不能实现居中的效果。所以还需要计算出文字的长度,然后把文字整体左移。mTxtWidth / 2 是文字的中心位置,也就是说文字的中心位置移到矩形的中心位置就可以实现居中的效果。
    private void updateText(Canvas canvas) {
        String finishedText = getResources().getString(R.string.finished);
        String defaultText = getResources().getString(R.string.defaultText);
        int percent = (int) (process / (mWidth - padding - strokeWidth) * 100);
        Paint.FontMetrics fm = mPaintText.getFontMetrics();
        int mTxtWidth = (int) mPaintText.measureText(finishedText, 0, defaultText.length());
        int mTxtHeight = (int) Math.ceil(fm.descent - fm.ascent);
        int x = getWidth() / 2 - mTxtWidth / 2; //文字在画布中的x坐标
        int y = getHeight() / 2 + mTxtHeight / 4; //文字在画布中的y坐标
        if (percent < 100) {
            canvas.drawText(percent + "%", x, y, mPaintText);
        } else {
            canvas.drawText(finishedText, x, y, mPaintText);
        }
    }
最后就是加入动画效果了,让进度条动起来。我这里用到的是属性动画中的valueAnimator。这种动画不能直接修改view,它是类似于timer,需要我们传递一个数值范围和执行时间。比如说3秒内从1加到100。然后在接口回调时拿到当前的进度,执行view的invalidate()方法,刷新UI。
 //属性动画
    public void start() {
        ValueAnimator valueAnimator = ValueAnimator.ofFloat(0, mWidth - padding - strokeWidth);
        valueAnimator.setDuration(duration);
        valueAnimator.setInterpolator(new DecelerateInterpolator());
        valueAnimator.addUpdateListener(animation -> {
            process = (float) animation.getAnimatedValue();
            invalidate();
        });
        valueAnimator.start();
    }
package com.example.floatingwindow.widget;

import android.animation.ValueAnimator;
import android.content.Context;
import android.graphics.Canvas;
import android.graphics.Paint;
import android.graphics.RectF;
import android.util.AttributeSet;
import android.util.TypedValue;
import android.view.View;
import android.view.animation.DecelerateInterpolator;

import androidx.annotation.Nullable;

import com.example.floatingwindow.R;

public class HorizontalProgressView extends View {

    private Paint mPaint;
    private Paint mPaintRoundRect;
    private Paint mPaintText;
    private int mWidth;
    private int mHeight;
    private int padding = 5;
    private int strokeWidth = 8;
    private int textSize = 15;
    private long duration = 3500;
    private int round;
    private float process;

    public HorizontalProgressView(Context context) {
        super(context);
        init();
    }

    public HorizontalProgressView(Context context, @Nullable AttributeSet attrs) {
        super(context, attrs);
        init();
    }

    public HorizontalProgressView(Context context, @Nullable AttributeSet attrs, int defStyleAttr) {
        super(context, attrs, defStyleAttr);
        init();
    }

    //初始化画笔
    private void init(){
        mPaintRoundRect = new Paint();//圆角矩形
        mPaintRoundRect.setColor(getResources().getColor(R.color.back));//圆角矩形颜色
        mPaintRoundRect.setAntiAlias(true);// 抗锯齿效果
        mPaintRoundRect.setStyle(Paint.Style.STROKE);//设置画笔样式
        mPaintRoundRect.setStrokeWidth(strokeWidth);//设置画笔宽度

        mPaint = new Paint();
        mPaint.setColor(getResources().getColor(R.color.inner));
        mPaint.setStyle(Paint.Style.FILL_AND_STROKE);
        mPaint.setAntiAlias(true);
        mPaint.setStrokeWidth(strokeWidth);

        mPaintText = new Paint();
        mPaintText.setAntiAlias(true);
        mPaintText.setStyle(Paint.Style.FILL);
        mPaintText.setColor(getResources().getColor(R.color.back));
        mPaintText.setTextSize(sp2px(textSize));
    }

    public void setPadding(int padding) {
        this.padding = padding;
    }

    public void setStrokeWidth(int strokeWidth) {
        this.strokeWidth = strokeWidth;
    }

    public void setTextSize(int textSize) {
        this.textSize = textSize;
    }

    public void setDuration(long duration) {
        this.duration = duration;
    }

    @Override
    protected void onMeasure(int widthMeasureSpec, int heightMeasureSpec) {
        super.onMeasure(widthMeasureSpec, heightMeasureSpec);
        int widthSpecMode = MeasureSpec.getMode(widthMeasureSpec);
        int heightSpecMode = MeasureSpec.getMode(heightMeasureSpec);
        int widthSpecSize = MeasureSpec.getSize(widthMeasureSpec);
        int heightSpecSize = MeasureSpec.getSize(heightMeasureSpec);
        //MeasureSpec.EXACTLY,精确尺寸
        if (widthSpecMode == MeasureSpec.EXACTLY || widthSpecMode == MeasureSpec.AT_MOST) {
            mWidth = widthSpecSize;
        } else {
            mWidth = 0;
        }
        //MeasureSpec.AT_MOST,最大尺寸,只要不超过父控件允许的最大尺寸即可,MeasureSpec.UNSPECIFIED未指定尺寸
        if (heightSpecMode == MeasureSpec.AT_MOST || heightSpecMode == MeasureSpec.UNSPECIFIED) {
            mHeight = defaultHeight();
        } else {
            mHeight = heightSpecSize;
        }
        //设置控件实际大小
        round = mHeight / 2;//圆角半径
        setMeasuredDimension(mWidth, mHeight);
    }

    @Override
    protected void onDraw(Canvas canvas) {
        super.onDraw(canvas);
        drawBackground(canvas);//绘制背景矩形
        drawProgress(canvas);//绘制进度
        updateText(canvas);//处理文字
    }

    private void drawBackground(Canvas canvas){
        RectF rectF = new RectF(padding, padding, mWidth - padding, mHeight - padding);//圆角矩形
        canvas.drawRoundRect(rectF, round, round, mPaintRoundRect);
    }

    private void drawProgress(Canvas canvas){
        if (process!=0){
            RectF rectProgress = new RectF(padding + strokeWidth, padding + strokeWidth, process, mHeight - padding - strokeWidth);//内部进度条
            canvas.drawRoundRect(rectProgress, round, round, mPaint);
        }
    }

    private void updateText(Canvas canvas) {
        String finishedText = getResources().getString(R.string.finished);
        String defaultText = getResources().getString(R.string.defaultText);
        int percent = (int) (process / (mWidth - padding - strokeWidth) * 100);
        Paint.FontMetrics fm = mPaintText.getFontMetrics();
        int mTxtWidth = (int) mPaintText.measureText(finishedText, 0, defaultText.length());
        int mTxtHeight = (int) Math.ceil(fm.descent - fm.ascent);
        int x = getWidth() / 2 - mTxtWidth / 2; //文字在画布中的x坐标
        int y = getHeight() / 2 + mTxtHeight / 4; //文字在画布中的y坐标
        if (percent < 100) {
            canvas.drawText(percent + "%", x, y, mPaintText);
        } else {
            canvas.drawText(finishedText, x, y, mPaintText);
        }
    }

    //属性动画
    public void start() {
        ValueAnimator valueAnimator = ValueAnimator.ofFloat(0, mWidth - padding - strokeWidth);
        valueAnimator.setDuration(duration);
        valueAnimator.setInterpolator(new DecelerateInterpolator());
        valueAnimator.addUpdateListener(animation -> {
            process = (float) animation.getAnimatedValue();
            invalidate();
        });
        valueAnimator.start();
    }

    private int sp2px(int sp) {
        return (int) TypedValue.applyDimension(TypedValue.COMPLEX_UNIT_SP, sp,
                getResources().getDisplayMetrics());
    }

    //进度条默认高度,未设置高度时使用
    private int defaultHeight() {
        float scale = getContext().getResources().getDisplayMetrics().density;
        return (int) (20 * scale + 0.5f * (20 >= 0 ? 1 : -1));
    }

}
以上就是横向进度条的实现步骤,整体来说还是比较简单的,如果你对Android坐标系和canvas比较熟悉的话自定义view实现起来还是很容易的。
到此这篇关于Android实现绚丽的自定义进度条的文章就介绍到这了,更多相关Android自定义进度条内容请搜索编程网以前的文章或继续浏览下面的相关文章希望大家以后多多支持编程网!
--结束END--
本文标题: Android实现绚丽的自定义进度条
本文链接: https://lsjlt.com/news/163132.html(转载时请注明来源链接)
有问题或投稿请发送至: 邮箱/279061341@qq.com QQ/279061341
2024-01-21
2023-10-28
2023-10-28
2023-10-27
2023-10-27
2023-10-27
2023-10-27
回答
回答
回答
回答
回答
回答
回答
回答
回答
回答
0