目录可组合函数游戏机身 - TetrisBody游戏按钮 - TetrisButton游戏屏幕 - TetrisScreen调度器 - TetrisViewModel项目地址你的童年
你的童年是否有俄罗斯方块呢,本文就来介绍如何通过 Jetpack Compose 实现一个俄罗斯方块 ~~
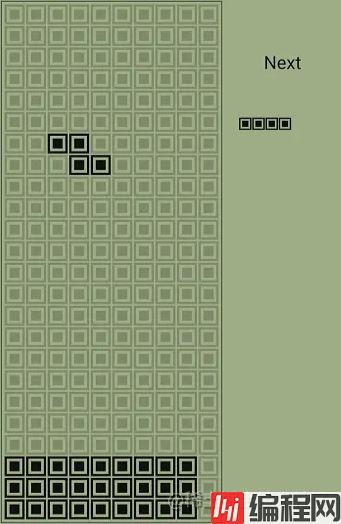
先看下效果图,功能还是挺完善的
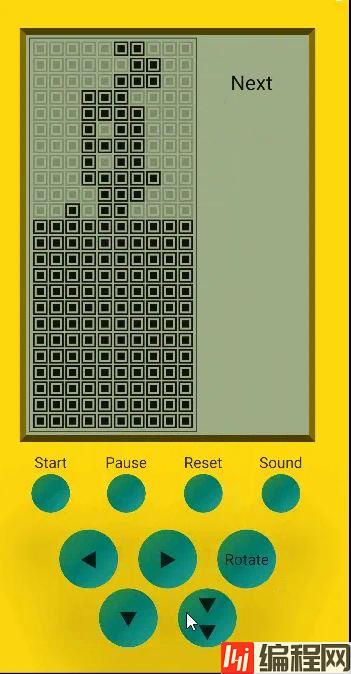
就我自己的体验来说,使用 Compose 开发的应用我感受不到和 Android 原生开发之间有什么性能差异,但 Compose 在开发难度上会低很多
Google 官网上是这么介绍 Compose 的:Jetpack Compose 是用于构建原生界面的新款 Android 工具包,它可简化并加快 Android 上的界面开发,使用更少的代码、强大的工具和直观的 Kotlin api,快速让应用生动而精彩
长期以来,Android 的视图层次结构可以表示为一个视图树,视图树中包含着若干个 View 和 ViewGroup。当应用的数据由于用户交互等原因而发生变化时,界面的层次结构就需要进行更新以显示最新数据。最常见的界面更新方式就是使用findViewById()等函数遍历视图树,并通过调用 button.setText(String)、container.addChild(View) 或 img.setImageBitmap(Bitmap) 等方法来改变特定节点,而这些方法就会改变 View 的内部状态。但这种手动操纵视图的方式提高了出错的可能性。如果一条数据需要在多个位置呈现,开发者可能一不小心就会忘记更新某个显示它的视图。此外,当两项更新以意外的方式发生冲突时,也很容易造成异常状态。例如,某项更新可能会尝试修改刚刚从界面中移除的节点。一般来说,软件维护复杂性会随着需要更新的视图数量增多而增长
在过去的几年中,整个行业已开始转向声明性界面模型,该模型大大简化了与构建和更新界面关联的工程设计。该技术的工作原理是在概念上从头开始重新生成整个屏幕,然后仅执行必要的更改。此方法可避免手动更新有状态视图层次结构的复杂性。Compose 就是一个适用于 Android 的新式声明性界面工具包,提供了声明性 API,让开发者可在不以命令方式改变前端视图的情况下呈现应用界面,从而使编写和维护应用界面变得更加容易
Compose 的重点就在于 @Composable函数,即可组合函数,每个可组合函数可以接收若干入参参数用于参与视图结构的绘制说明,但函数不返回任何值。可组合函数只用于描述视图结构如何绘制以及如何与用户进行交互,但不需要返回视图对象,而是由 Compose 根据开发者的描述来生成具体的视图对象
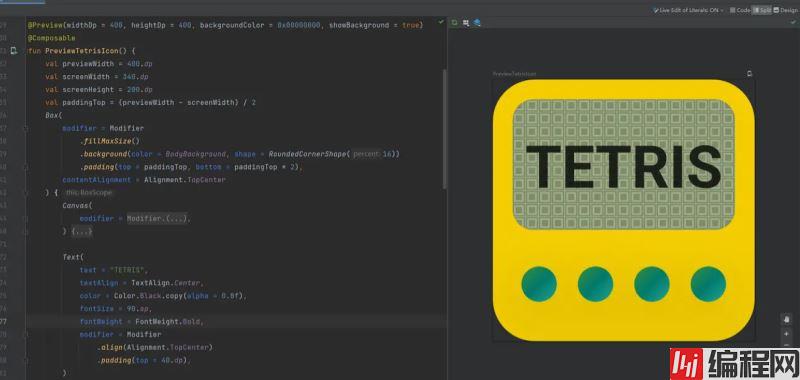
本游戏的 icon 就是通过这种方式来生成的。可以看到 PreviewTetrisIcon() 函数并不包含返回值,当然这种情况下也不需要入参参数。此外,Compose 的一个优点就是所见即所得,通过添加 @Preview 注解就可以预览实现效果,每次修改过后无需编译,只要刷新一下就可以看到修改结果
Compose 是一个声明性界面框架,这本身也带有一点组合的意味。每个视图结点均通过函数的形式来进行声明,那么我们自然也可以将每个视图结点均声明为一个个函数,然后将每个函数作为最终视图树函数的入参参数来进行组合
以本游戏为例,整个游戏只包含一个页面,页面可以再细分为三个节点:游戏机身(TetrisBody)、游戏屏幕(TetrisScreen)、游戏按钮(TetrisButton)
TetrisBody 函数就包含两个入参参数用于容纳 TetrisScreen 和 TetrisButton
@Composable
fun TetrisBody(
    tetrisScreen: @Composable (() -> Unit),
    tetrisButton: @Composable (() -> Unit),
)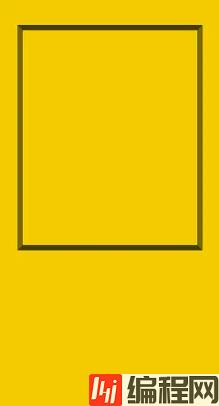
TetrisBody 比较简单,需要实现的功能有三个:
@Composable
fun TetrisBody(
    tetrisScreen: @Composable (() -> Unit),
    tetrisButton: @Composable (() -> Unit),
) {
    Column(
        modifier = Modifier
            .fillMaxSize()
            .background(color = BodyBackground)
            .padding(bottom = 30.dp)
    ) {
        Box(
            Modifier
                .align(alignment = Alignment.CenterHorizontally)
                .fillMaxWidth()
                .weight(weight = 1f)
                .padding(start = 40.dp, top = 50.dp, end = 40.dp, bottom = 10.dp),
        ) {

            //绘制游戏屏幕的边框
            val borderPadding = 8.dp
            canvas(modifier = Modifier.fillMaxSize()) {
                drawScreenBorder(
                    leftTop = Offset(x = 0f, y = 0f),
                    width = size.width,
                    height = size.height,
                    borderPadding = borderPadding,
                )
            }

            //游戏屏幕
            Row(
                modifier = Modifier
                    .matchParentSize()
                    .padding(all = borderPadding)
            ) {
                tetrisScreen()
            }
        }

        //游戏按钮
        tetrisButton()
    }
}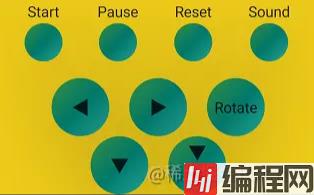
TetrisButton 也很简单,需要实现的功能有两个:
因此 TetrisButton 函数就需要包含一个入参参数 PlayListener 对象,TetrisButton 需要根据用户点击了哪个按钮来回调 PlayListener 相应的方法,向外透传点击事件
enum class TransfORMationType {
    Left, Right, Rotate, Down, FastDown, Fall
}

data class PlayListener constructor(
    val onStart: () -> Unit,
    val onPause: () -> Unit,
    val onReset: () -> Unit,
    val onSound: () -> Unit,
    val onTransformation: (TransformationType) -> Unit
)

@Preview(backgroundColor = 0xffefcc19, showBackground = true)
@Composable
fun TetrisButton(
    playListener: PlayListener = combinedPlayListener()
) {
    Column(
        modifier = Modifier
            .fillMaxWidth()
            .wrapContentHeight(),
    ) {
        Row(
            modifier = Modifier
                .fillMaxWidth()
                .wrapContentHeight(),
            horizontalArrangement = Arrangement.Center
        ) {
            val controlPadding = 20.dp
            ControlButton(hint = "Start", modifier = Modifier.padding(end = controlPadding)) {
                playListener.onStart()
            }
            ControlButton(
                hint = "Pause",
                modifier = Modifier.padding(start = controlPadding, end = controlPadding)
            ) {
                playListener.onPause()
            }
            ControlButton(
                hint = "Reset",
                modifier = Modifier.padding(start = controlPadding, end = controlPadding)
            ) {
                playListener.onReset()
            }
            ControlButton(hint = "Sound", modifier = Modifier.padding(start = controlPadding)) {
                playListener.onSound()
            }
        }
        ConstraintLayout(
            modifier = Modifier
                .padding(top = 20.dp)
                .fillMaxWidth()
                .wrapContentWidth(align = Alignment.CenterHorizontally)
        ) {
            val (leftBtn, rightBtn, fastDownBtn, rotateBtn, fallBtn) = createRefs()
            val innerMargin = 24.dp
            PlayButton(icon = "◀", modifier = Modifier.constrainAs(leftBtn) {
                start.linkTo(anchor = parent.start)
                top.linkTo(anchor = parent.top)
                end.linkTo(anchor = rightBtn.start, margin = innerMargin)
            }) {
                playListener.onTransformation(Left)
            }
            PlayButton(icon = "▶", modifier = Modifier.constrainAs(rightBtn) {
                start.linkTo(anchor = leftBtn.end, margin = innerMargin)
                top.linkTo(anchor = leftBtn.top)
                bottom.linkTo(anchor = leftBtn.bottom)
            }) {
                playListener.onTransformation(Right)
            }
            PlayButton(
                icon = "Rotate",
                fontSize = 18.sp,
                modifier = Modifier.constrainAs(rotateBtn) {
                    top.linkTo(anchor = rightBtn.top)
                    start.linkTo(anchor = rightBtn.end, margin = innerMargin)
                }) {
                playListener.onTransformation(Rotate)
            }
            PlayButton(icon = "▼", modifier = Modifier.constrainAs(fastDownBtn) {
                top.linkTo(anchor = leftBtn.bottom)
                start.linkTo(anchor = leftBtn.start)
                end.linkTo(anchor = rightBtn.end)
            }) {
                playListener.onTransformation(FastDown)
            }
            PlayButton(
                icon = "▼\n▼",
                modifier = Modifier.constrainAs(fallBtn) {
                    top.linkTo(anchor = fastDownBtn.top)
                    start.linkTo(anchor = rightBtn.end)
                    end.linkTo(anchor = rotateBtn.start)
                }) {
                playListener.onTransformation(Fall)
            }
        }
    }

}
TetrisScreen 比较复杂,需要实现的功能点主要有五个:
Compose 是根据函数的入参参数是否发生了变化来决定是否需要进行界面更新的,所以我们在绘制下落的方块时可以将整个页面视为静态的,仅需要根据当前的坐标值进行绘制即可,然后每隔几百毫秒就改变方块的坐标信息,由此生成新的入参参数,通知 Compose 进行页面更新即可
整个游戏的所有状态信息都保存在一个 TetrisState 对象中,Compose 就通过监听State<TetrisState>中值的变化来决定是否需要进行界面更新。整个游戏屏幕就被定义为一个 10 x 24 的二维数组,即 brickArray,当数组值等于一时,就对应实心方块,否则就是空心方块。Tetris 就对应处于下落状态中的方块
data class TetrisState(
    val brickArray: Array<IntArray>, //屏幕坐标系
    val tetris: Tetris, //下落的方块
    val gameStatus: GameStatus = GameStatus.Welcome, //游戏状态
    val soundEnable: Boolean = true, //是否开启音效
    val nextTetris: Tetris = Tetris(), //下一个方块
)
方块类型一共可以分为七种,用字母表示就分别是:I、S、Z、L、O、J、T。每种类型都可以容纳在一个 4 x 4 的二维数组里,不管其如何旋转,都不会超出这个范围。可以用以下数组来方便记忆每种可能的旋转结果
val mockData = arrayOf(
    arrayOf(//I
        intArrayOf(
            0, 0, 0, 0,
            0, 0, 0, 0,
            0, 0, 0, 0,
            1, 1, 1, 1
        ),
        intArrayOf(
            0, 1, 0, 0,
            0, 1, 0, 0,
            0, 1, 0, 0,
            0, 1, 0, 0
        )
    ),
    arrayOf(//S
        intArrayOf(
            0, 0, 0, 0,
            0, 0, 0, 0,
            0, 1, 1, 0,
            1, 1, 0, 0
        ),
        intArrayOf(
            0, 0, 0, 0,
            1, 0, 0, 0,
            1, 1, 0, 0,
            0, 1, 0, 0
        )
    ),
    arrayOf(//Z
        intArrayOf(
            0, 0, 0, 0,
            0, 0, 0, 0,
            1, 1, 0, 0,
            0, 1, 1, 0
        ),
        intArrayOf(
            0, 0, 0, 0,
            0, 1, 0, 0,
            1, 1, 0, 0,
            1, 0, 0, 0
        )
    ),
    ···
)
每个处于下落状态的方块都被定义为 Tetris 对象。初始状态下 brickArray 的值都等于 0,而 Tetris 的初始位置是在屏幕之外的,方块每次下落时都将方块在 brickArray 中的位置的坐标值改变为 1,从而决定了需要在屏幕的哪个位置绘制实心方块;再通过改变方块相对屏幕左上角的偏移量 Offset 的值,以此改变方块相对屏幕的位置,从而实现方块的左右移动和下落
data class Location(val x: Int, val y: Int)

data class Tetris constructor(
    val shapes: List<List<Location>>, //此方块所有可能的旋转结果
    val type: Int, //用于标记当前处于哪种旋转状态
    val offset: Location, //方块相对屏幕左上角的偏移量
) {

    //此方块当前的形状
    val shape: List<Location>
        get() = shapes[type]

}
简单起见,可以事先就定义好 Tetris 各种可能的方块类型,以及该方块的各种旋转结果
		private val allShapes = listOf(
            //I
            listOf(
                listOf(Location(0, 3), Location(1, 3), Location(2, 3), Location(3, 3)),
                listOf(Location(1, 0), Location(1, 1), Location(1, 2), Location(1, 3)),
            ),
            //S
            listOf(
                listOf(Location(0, 3), Location(1, 2), Location(1, 3), Location(2, 2)),
                listOf(Location(0, 1), Location(0, 2), Location(1, 2), Location(1, 3)),
            ),
            //Z
            listOf(
                listOf(Location(0, 2), Location(1, 2), Location(1, 3), Location(2, 3)),
                listOf(Location(0, 2), Location(0, 3), Location(1, 1), Location(1, 2)),
            ),
            //L
            listOf(
                listOf(Location(0, 1), Location(0, 2), Location(0, 3), Location(1, 3)),
                listOf(Location(0, 2), Location(0, 3), Location(1, 2), Location(2, 2)),
                listOf(Location(0, 1), Location(1, 1), Location(1, 2), Location(1, 3)),
                listOf(Location(0, 3), Location(1, 3), Location(2, 3), Location(2, 2)),
            ),
            //O
            listOf(
                listOf(Location(0, 2), Location(0, 3), Location(1, 2), Location(1, 3)),
            ),
            //J
            listOf(
                listOf(Location(0, 3), Location(1, 1), Location(1, 2), Location(1, 3)),
                listOf(Location(0, 2), Location(0, 3), Location(1, 3), Location(2, 3)),
                listOf(Location(0, 1), Location(0, 2), Location(0, 3), Location(1, 1)),
                listOf(Location(0, 2), Location(1, 2), Location(2, 2), Location(2, 3)),
            ),
            //T
            listOf(
                listOf(Location(0, 2), Location(1, 2), Location(2, 2), Location(1, 3)),
                listOf(Location(1, 1), Location(0, 2), Location(1, 2), Location(1, 3)),
                listOf(Location(1, 2), Location(0, 3), Location(1, 3), Location(2, 3)),
                listOf(Location(0, 1), Location(0, 2), Location(0, 3), Location(1, 2)),
            ),
        )
之后在每次生成 Tetris 对象时,都随机从 allShapes 中取值。并且每个 Tetris 对象的初始偏移量 offset 的 Y 值固定是 -4,即默认处于屏幕之外,当方块不断移动时,其 Offset 就会变成 Location(0, -3)、Location(1, -2) .... Location(2, 10)等各种值,通过改变 X 值来实现左右移动、改变 Y 值来实现下移
        operator fun invoke(): Tetris {
            val shapes = allShapes.random()
            val type = Random.nextInt(0, shapes.size)
            return Tetris(
                shapes = shapes,
                type = type,
                offset = Location(
                    Random.nextInt(
                        0,
                        BRICK_WIDTH - 3
                    ), -4
                )
            )
        }
每个方块就可以通过 Canvas 来进行绘制,方便起见就将其定义为扩展函数,通过 color 来控制是要绘制实心方块还是虚心方块

fun DrawScope.drawBrick(brickSize: Float, color: Color) {
    drawRect(color = color, size = Size(brickSize, brickSize))
    val strokeWidth = brickSize / 9f
    translate(left = strokeWidth, top = strokeWidth) {
        drawRect(
            color = ScreenBackground,
            size = Size(
                width = brickSize - 2 * strokeWidth,
                height = brickSize - 2 * strokeWidth
            )
        )
    }
    val brickInnerSize = brickSize / 2.0f
    val translateLeft = (brickSize - brickInnerSize) / 2
    translate(left = translateLeft, top = translateLeft) {
        drawRect(
            color = color,
            size = Size(brickInnerSize, brickInnerSize)
        )
    }
}
之后只需要遍历代表整个屏幕坐标值的 screenMatrix 进行绘制就可以绘制出屏幕背景以及下落的方块,如果值等于一就使用 BrickFill 颜色,否则就使用 BrickAlpha。每当有方块无法继续下落时,该方块所在的坐标值就都会被写入到 screenMatrix 中,以此来保存各个固定的实心方块
	Canvas(
        modifier = Modifier
            .fillMaxSize()
            .background(color = ScreenBackground)
            .padding(
                start = screenPadding, top = screenPadding,
                end = screenPadding, bottom = screenPadding
            )
    ) {
        val width = size.width
        val height = size.height
        val screenPaddingPx = screenPadding.toPx()
        val spiritPaddingPx = spiritPadding.toPx()
        val brickSize = (height - spiritPaddingPx * (matrixHeight - 1)) / matrixHeight

        kotlin.run {
            screenMatrix.forEachIndexed { y, ints ->
                ints.forEachIndexed { x, isFill ->
                    translate(
                        left = x * (brickSize + spiritPaddingPx),
                        top = y * (brickSize + spiritPaddingPx)
                    ) {
                        drawBrick(
                            brickSize = brickSize,
                            color = if (isFill == 1) BrickFill else BrickAlpha
                        )
                    }
                }
            }
        }

        ···
}TetrisViewModel 是整个游戏的调度器,其大体结构如下所示。dispatch 方法负责接收外部的各个事件,事件类型就对应密封类 Action
class TetrisViewModel : ViewModel() {

    compaNIOn object {

        private const val DOWN_SPEED = 500L

        private const val CLEAR_SCREEN_SPEED = 30L

    }

    private val _tetrisStateLD: MutableStateFlow<TetrisState> = MutableStateFlow(TetrisState())

    val tetrisStateLD = _tetrisStateLD.asStateFlow()

    private val tetrisState: TetrisState
        get() = _tetrisStateLD.value

    private var downJob: Job? = null

    private var clearScreenJob: Job? = null

    fun dispatch(action: Action) {
        playSound(action)
        val unit = when (action) {
            Action.Welcome, Action.Reset -> {
                ···
            }
            Action.Start -> {
                ···
            }
            Action.Background, Action.Pause -> {
                ···
            }
            Action.Resume -> {

            }
            Action.Sound -> {
                ···
            }
            is Action.Transformation -> {
                ···
            }
        }
    }

    ···

}

sealed class Action {
    object Welcome : Action()
    object Start : Action()
    object Pause : Action()
    object Reset : Action()
    object Sound : Action()
    object Background : Action()
    object Resume : Action()
    data class Transformation(val transformationType: TransformationType) : Action()
}

enum class TransformationType {
    Left, Right, Rotate, Down, FastDown, Fall
}
游戏第一次启动时,由 MainActivity 来主动下发 Action.Welcome 事件,执行欢迎动画。当后续用户点击 Start 按钮启动游戏时,则会下发 Action.Start 事件,从而启动一个执行延时任务的协程任务 downJob,downJob 负责下发 TransformationType.Down 事件,即方块下落事件,当消耗了该事件后,又会重复调用 startDownJob() 方法,从而实现自我驱动方块匀速下降
    private var downJob: Job? = null

    private fun onStartGame() {
        dispatchState(TetrisState().copy(gameStatus = GameStatus.Running))
        startDownJob()
    }

    private fun startDownJob() {
        cancelDownJob()
        cancelClearScreenJob()
        downJob = viewModelScope.launch {
            delay(DOWN_SPEED)
            dispatch(Action.Transformation(TransformationType.Down))
        }
    }
Action.Transformation 代表的是多种操作行为,例如左右移动、旋转等。但并不是每种操作都能生效,因为执行该操作可能会导致方块超出屏幕。所以如果 onTransformation 方法返回 null 的话,说明此次行为无效,无需更新界面
fun TetrisState.onTransformation(transformationType: TransformationType): TetrisState {
    return when (transformationType) {
        TransformationType.Left -> {
            onLeft()
        }
        TransformationType.Right -> {
            onRight()
        }
        TransformationType.Down -> {
            onDown()
        }
        TransformationType.FastDown -> {
            onFastDown()
        }
        TransformationType.Fall -> {
            onFall()
        }
        TransformationType.Rotate -> {
            onRotate()
        }
    }?.finalize() ?: this.finalize()
}
对于 Left、Right、Down、FastDown、Fall 这几种事件,都是在对 offset 做操作,通过改变 offset 的 X 坐标和 Y 坐标来移动方块的位置
private fun TetrisState.onLeft(): TetrisState? {
    return copy(
        tetris = tetris.copy(offset = Location(tetris.offset.x - 1, tetris.offset.y))
    ).takeIf { it.isValidInMatrix() }
}

private fun TetrisState.onRight(): TetrisState? {
    return copy(
        tetris = tetris.copy(offset = Location(tetris.offset.x + 1, tetris.offset.y))
    ).takeIf { it.isValidInMatrix() }
}

private fun TetrisState.onDown(): TetrisState? {
    return copy(
        tetris = tetris.copy(
            offset = Location(tetris.offset.x, tetris.offset.y + 1)
        )
    ).takeIf { it.isValidInMatrix() }
}

private fun TetrisState.onFastDown(): TetrisState? {
    return copy(
        tetris = tetris.copy(
            offset = Location(tetris.offset.x, tetris.offset.y + 2)
        )
    ).takeIf { it.isValidInMatrix() }
}

private fun TetrisState.onFall(): TetrisState? {
    while (true) {
        val result = onDown() ?: return this
        return result.onFall()
    }
}
前文说了,每种方块类型都包含有多种旋转结果,所以 Rotate 事件就需要将方块改变为其它旋转形状。而由于当旋转过后方块的坐标系可能会超出当前屏幕的范围,所以还需要依靠 adjustOffset()方法将方块的坐标系迁移回屏幕内
private fun TetrisState.onRotate(): TetrisState? {
    if (tetris.shapes.size == 1) {
        return null
    }
    val nextType = if (tetris.type + 1 < tetris.shapes.size) {
        tetris.type + 1
    } else {
        0
    }
    return copy(
        tetris = tetris.copy(
            type = nextType,
        )
    ).adjustOffset().takeIf { it.isValidInMatrix() }
}
当方块无法再下落,或者是已经超出了屏幕时,则需要依靠 finalize()方法将方块的坐标值写入到屏幕背景 brickArray 中,并重置游戏状态
private fun TetrisState.finalize(): TetrisState {
    if (canDown()) {
        return this
    } else {
        var gameOver = false
        for (location in tetris.shape) {
            val x = location.x + tetris.offset.x
            val y = location.y + tetris.offset.y
            if (x in 0 until width && y in 0 until height) {
                brickArray[y][x] = 1
            } else {
                gameOver = true
            }
        }
        return if (gameOver) {
            copy(gameStatus = GameStatus.GameOver)
        } else {
            val clearRes = clearIfNeed()
            if (clearRes == null) {
                copy(
                    gameStatus = GameStatus.Running,
                    tetris = nextTetris,
                    nextTetris = Tetris()
                )
            } else {
                copy(
                    gameStatus = GameStatus.LineClearing,
                    tetris = nextTetris,
                    nextTetris = Tetris()
                )
            }
        }
    }
}游戏的大体实现思路就如上所述,表达能力所限,有些地方没法讲得太清楚,实现细节欢迎查阅源码了解
GitHub 地址
到此这篇关于利用Jetpack Compose实现经典俄罗斯方块游戏的文章就介绍到这了,更多相关Jetpack Compose俄罗斯方块内容请搜索编程网以前的文章或继续浏览下面的相关文章希望大家以后多多支持编程网!
--结束END--
本文标题: 利用JetpackCompose实现经典俄罗斯方块游戏
本文链接: https://lsjlt.com/news/149053.html(转载时请注明来源链接)
有问题或投稿请发送至: 邮箱/279061341@qq.com QQ/279061341
2024-01-21
2023-10-28
2023-10-28
2023-10-27
2023-10-27
2023-10-27
2023-10-27
回答
回答
回答
回答
回答
回答
回答
回答
回答
回答
0