在审核业务中难免会有需要对图片进行标注的需求,本次用一个最小demo来演示如何对图片进行矩形标注。 首先我们要理解canvas是一块画布,而这块画布需要在我们要标注的图片上层,图片和
在审核业务中难免会有需要对图片进行标注的需求,本次用一个最小demo来演示如何对图片进行矩形标注。
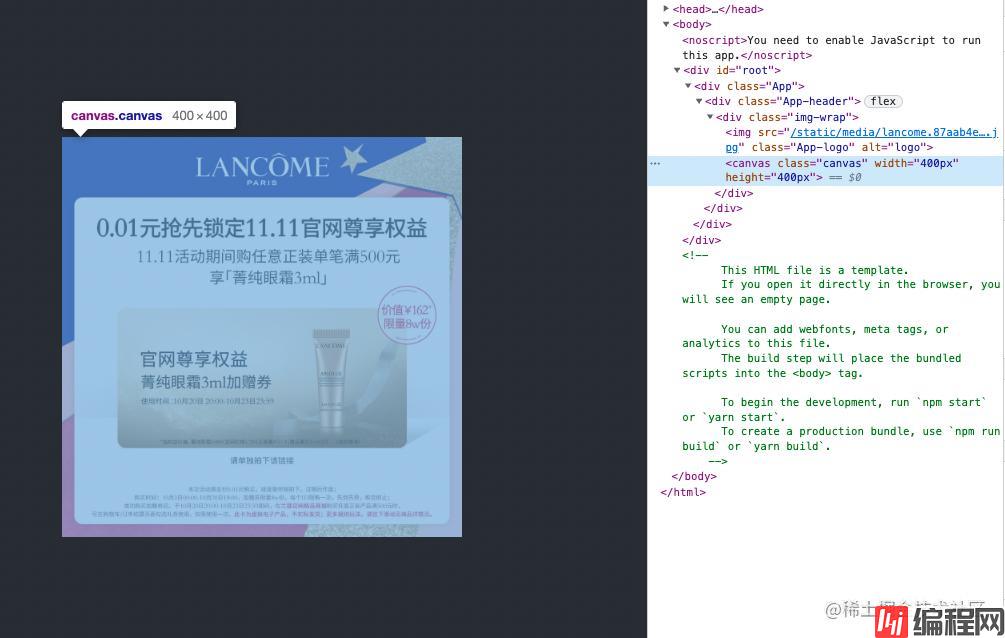
首先我们要理解canvas是一块画布,而这块画布需要在我们要标注的图片上层,图片和canvas外层的div用相对位置,内层的图片和canvas用绝对位置,即可保证canvas重叠于图片之上。如图:

我们来看下canvas的初始化,在img、canvas中都有ref属性,不同的是img的ref属性直接就是一个useRef引用,而canvas中的ref是一个回调函数。它在组件被加载或卸载时会立即执行,加载时ref回调接收当前组件实例作为参数,卸载时ref回调接收null作为参数。在initCanvas函数中,用canvas的ref引用承接了canvas节点,并且通过drawImage函数,初始化了一块400*400的画布,第一个参数为需要绘制到的上下文元素:
<img src={lancome} ref={imgInstance} className="App-loGo" alt="logo" />
<canvas className="canvas" ref={initCanvas} width="400px" height="400px" />
const canvasRef = useRef(null);
const imgInstance = useRef(null);
const initCanvas = useCallback((node) => {
canvasRef.current = node;
const context = node.getContext('2d');
context.drawImage(imgInstance.current, 0, 0, 400, 400);
}, []);接下来,我们通过invalidLocations来保存之前的标注位置信息,addInvalidLocation函数是为了添加标注位置信息。最需要注意的是我们在useEffect中所监听的三个函数,startDraw、drawingDeal和drawingEnd。
鼠标落下时,startDraw为起始点的x,y坐标赋值,并且拖拽状态位isDrawing置为true。鼠标移动时,drawingDeal函数会边通过clearRect函数更新画布,边根据鼠标的最新位置通过highlightInvalid来更新标注,经过确定矩形位置大小,内容填充,描边三个步骤来绘制出矩形。鼠标抬起时,drawingEnd函数会通过addInvalidLocation函数添加标注位置,然后初始化参数。
const [invalidLocations, setInvalidLocations] = useState([]);

const addInvalidLocation = useCallback((newMark) => {
    setInvalidLocations([...invalidLocations, newMark]);
}, [invalidLocations])

const highlightInvalid = (context, x1, y1, x2, y2) => {
    context.beginPath();
    context.rect(x1, y1, x2 - x1, y2 - y1);
    context.fillStyle = 'rgba(255, 0, 0, 0.2)';
    context.fill();
    context.strokeStyle = '#FF0070';
    context.lineWidth = 1;
    context.stroke();
    console.log('drawing', x2, y2);
};

const clearRect = (drawContext) => {
    drawContext.clearRect(0, 0, canvasRef.current.width, canvasRef.current.height);
};

useEffect(() => {
    const canvasElem = canvasRef.current;
    let x = 0; let y = 0;
    let isDrawing = false;
    const drawContext = canvasRef.current.getContext('2d');
    let canvasRect;
    const lastCursorPosition = {
      x: 0,
      y: 0,
    };
    const startDraw = (e) => {
      console.log(e.type, 'start');
      canvasRect = canvasRef.current.getBoundinGClientRect();
      x = e.clientX - canvasRect.left;
      y = e.clientY - canvasRect.top;
      if (x < 0) x = 0;
      if (y < 0) y = 0;
      isDrawing = true;
    };
    const drawingDeal = (e) => {
      console.log(e.type, 'move');
      if (isDrawing) {
        const x1 = e.clientX - canvasRect.left;
        const y1 = e.clientY - canvasRect.top;
        clearRect(drawContext);
        highlightInvalid(drawContext, x, y, x1, y1);
        lastCursorPosition.x = x1;
        lastCursorPosition.y = y1;
      }
    };
    const drawingEnd = () => {
      if (isDrawing) {
        if (lastCursorPosition.x && lastCursorPosition.y) {
          const width = lastCursorPosition.x - x + 1;
          const height = lastCursorPosition.y - y + 1;
          addInvalidLocation({ x, y, width, height });
          lastCursorPosition.x = 0;
          lastCursorPosition.y = 0;
        }
        clearRect(drawContext);
        isDrawing = false;
        x = 0;
        y = 0;
      }
    };
    canvasElem.addEventListener('mousedown', startDraw);
    canvasElem.addEventListener('mousemove', drawingDeal);
    canvasElem.addEventListener('mouseup', drawingEnd);
    return () => {
      canvasElem.removeEventListener('mousedown', startDraw);
      canvasElem.removeEventListener('mousemove', drawingDeal);
      canvasElem.removeEventListener('mouseup', drawingEnd);
    };
}, [invalidLocations, addInvalidLocation]);
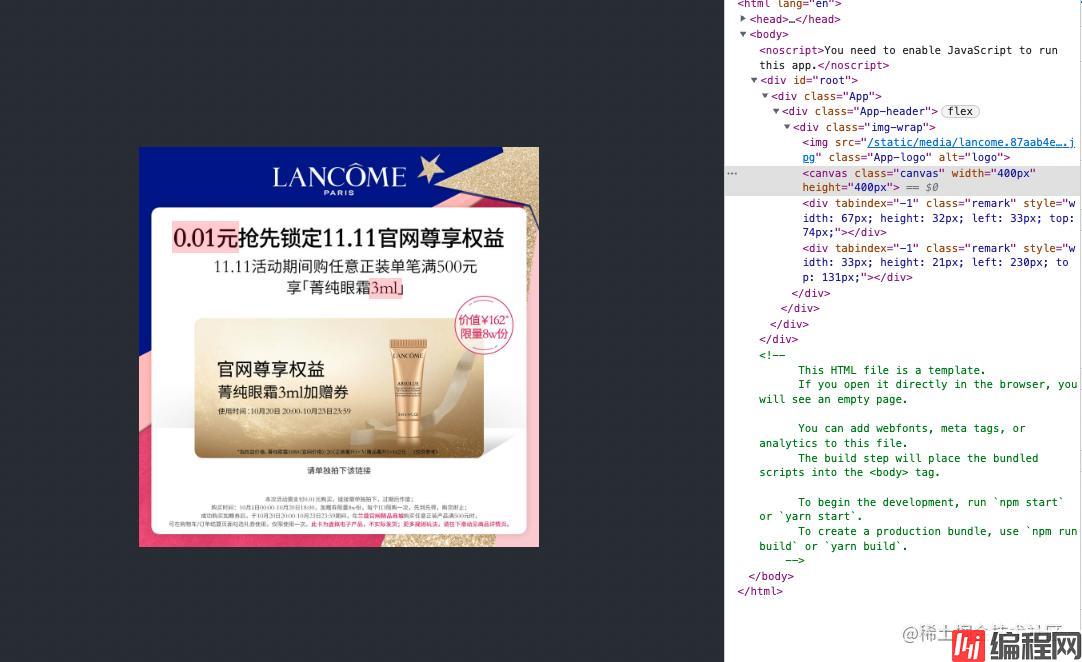
在添加完标注位置之后,模板中我们通过迭代返回绝对定位的div来实现已经标注过的矩形。
<div className="img-wrap">
    <img src={lancome} ref={imgInstance} className="App-logo" alt="logo" />
    <canvas className="canvas" ref={initCanvas} width="400px" height="400px" />
    {invalidLocations && invalidLocations.map((location, index) => {
        const { width, height, x, y } = location;
            return <div
                     key={`${width}_${height}_${x}_${y}`}
                     tabIndex={-1}
                     className={'remark'}
                     style={{ width: `${width}px`, height: `${height}px`, left: `${x}px`, top: `${y}px` }}
            ></div>
    })}
</div>
最后效果:

到此这篇关于在React中用canvas对图片标注的实现 的文章就介绍到这了,更多相关React canvas对图片标注内容请搜索编程网以前的文章或继续浏览下面的相关文章希望大家以后多多支持编程网!
--结束END--
本文标题: 在React中用canvas对图片标注的实现
本文链接: https://lsjlt.com/news/148998.html(转载时请注明来源链接)
有问题或投稿请发送至: 邮箱/279061341@qq.com QQ/279061341
2024-01-12
2023-05-20
2023-05-20
2023-05-20
2023-05-20
2023-05-20
2023-05-20
2023-05-20
2023-05-20
2023-05-20
回答
回答
回答
回答
回答
回答
回答
回答
回答
回答
0