目录效果图绘制静态吃豆人、豆豆、眼睛加入动画属性总结效果图 国际惯例,先看效果图: 具体效果就是吃豆人会根据吃不同颜色的豆子改变身体的颜色。 绘制静态吃豆人、豆豆、眼睛 首先,我们
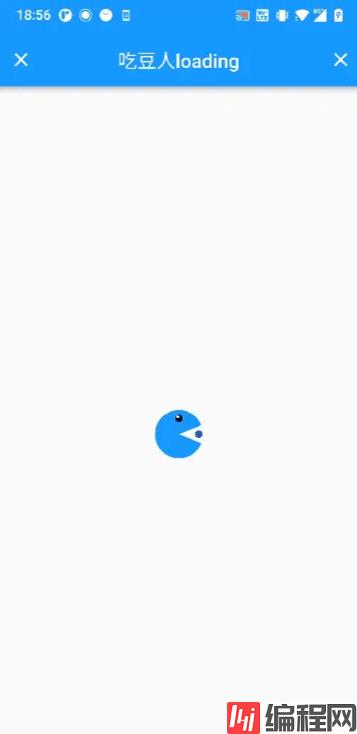
国际惯例,先看效果图:

具体效果就是吃豆人会根据吃不同颜色的豆子改变身体的颜色。
首先,我们需要将这个静态的吃豆人绘制出来,我们可以把吃豆人看做是一个实心圆弧,豆豆和眼睛就是一个圆。
关键代码:
//画头
_paint
  ..color = color.value
  ..style = PaintingStyle.fill;
var rect = Rect.fromCenter(
    center: Offset(0, 0), width: size.width, height: size.height);
/// 起始角度
var a =  40 / 180 * pi;
// 绘制圆弧
canvas.drawArc(rect, 0, 2 * pi - a * 2, true, _paint);

// 画豆豆
canvas.drawOval(
    Rect.fromCenter(
        center: Offset(
            size.width / 2 +
                ddSize -
                angle2.value * (size.width / 2 + ddSize),
            0),
        width: ddSize,
        height: ddSize),
    _paint..color = color2.value);

//画眼睛
canvas.drawOval(
    Rect.fromCenter(
        center: Offset(0, -size.height / 3), width: 8, height: 8),
    _paint..color = Colors.black87);
动画属性: 嘴巴的张合:通过圆弧的角度不断改变实现,豆豆移动:从头的右侧源源不断的有豆子向左移动,改变豆豆x轴的坐标即可,接下来我们让吃豆人动起来吧。
这里我们需要创建2个动画控制器,一个控制头,一个控制豆豆,我们看到因为头部一开一合属于动画正向执行一次然后再反向执行一次,相当于执行了两次,豆豆的从右边到嘴巴只执行了一次,所以头的执行时间是豆豆执行时间的两倍,嘴巴一张一合才能吃豆子嘛,吃豆完毕,将豆子颜色赋值给头改变颜色,豆子随机获取另一个颜色,不断的吃豆。 这里的绘制状态有多种情况,嘴巴的张合、豆子的平移、颜色的改变都需要进行重新绘制,这里我们可以使用 Listenable.merge方法来进行监听,接受一个Listenable数组,可以将我们需要改变的状态放到这个数组里,返回一个 Listenable赋值给CustomPainter构造函数repaint属性即可,然后在监听只需判断这个Listenable即可。
factory Listenable.merge(List<Listenable?> listenables) = _MergingListenable;关键代码: 动画执行相关。
late Animation<double> animation; // 吃豆人
late Animation<double> animation2; // 豆豆
late AnimationController _controller = AnimationController(
    vsync: this, duration: Duration(milliseconds: 500)); //1s
late AnimationController _controller2 = AnimationController(
    vsync: this, duration: Duration(milliseconds: 1000)); //2s

//初始化吃豆人、豆豆颜色
ValueNotifier<Color> _color = ValueNotifier<Color>(Colors.yellow.shade800);
ValueNotifier<Color> _color2 =
    ValueNotifier<Color>(Colors.redAccent.shade400);

// 动画轨迹
late CurvedAnimation cure = CurvedAnimation(
    parent: _controller, curve: Curves.easeIn); // 动画运行的速度轨迹 速度的变化

@override
void initState() {
  super.initState();
  animation = Tween(begin: 0.2, end: 1.0).animate(_controller)
    ..addStatusListener((status) {
      // dismissed 动画在起始点停止
      // forward 动画正在正向执行
      // reverse 动画正在反向执行
      // completed 动画在终点停止
      if (status == AnimationStatus.completed) {
        _controller.reverse(); //反向执行 100-0
      } else if (status == AnimationStatus.dismissed) {
        _color.value = _color2.value;
        // 获取一个随机彩虹色
        _color2.value = getRandomColor();
        _controller.forward(); //正向执行 0-100
        // 豆子已经被吃了 从新加载豆子动画
        _controller2.forward(from: 0); //正向执行 0-100
      }
    });
animation2 = Tween(begin: 0.2, end: 1.0).animate(_controller2);
  // 启动动画 正向执行
  _controller.forward();
  // 启动动画 0-1循环执行
  _controller2.forward();
  // 这里这样重复调用会导致两次动画执行时间不一致 时间长了就不对应了
  // _controller2.repeat();
}

@override
void dispose() {
  _controller.dispose();
  _controller2.dispose();

  super.dispose();
}

@override
Widget build(BuildContext context) {
  return Center(
      child: CustomPaint(
    size: Size(50, 50),
    painter: Pain2Painter(
        _color,
        _color2,
        animation,
        animation2,
        Listenable.merge([
          animation,
          animation2,
          _color,
        ]),
        ddSize: 8),
  ));
}

// 获取一个随机颜色
Color getRandomColor() {
  Random random = Random.secure();
  int randomInt = random.nextInt(6);
  var colors = <Color>[
    Colors.red,
    Colors.orange,
    Colors.yellow,
    Colors.green,
    Colors.blue,
    Colors.indiGo,
    Colors.purple,
  ];
  Color color = colors[randomInt];
  while (color == _color2.value) {
    // 重复再选一个
    color = colors[random.nextInt(6)];
  }
  return color;
}
绘制吃豆人源码:
class Pain2Painter extends CustomPainter {
  final ValueNotifier<Color> color; // 吃豆人的颜色
  final ValueNotifier<Color> color2; // 豆子的的颜色
  final Animation<double> angle; // 吃豆人
  final Animation<double> angle2; // 豆
  final double ddSize; // 豆豆大小
  final Listenable listenable;

  Pain2Painter(
      this.color, this.color2, this.angle, this.angle2, this.listenable,
      {this.ddSize = 6})
      : super(repaint: listenable);
  Paint _paint = Paint();

  @override
  void paint(Canvas canvas, Size size) {
    canvas.clipRect(Offset.zero & size);
    canvas.translate(size.width / 2, size.height / 2);
    // 画豆豆
    canvas.drawOval(
        Rect.fromCenter(
            center: Offset(
                size.width / 2 +
                    ddSize -
                    angle2.value * (size.width / 2 + ddSize),
                0),
            width: ddSize,
            height: ddSize),
        _paint..color = color2.value);
    //画头
    _paint
      ..color = color.value
      ..style = PaintingStyle.fill;

    var rect = Rect.fromCenter(
        center: Offset(0, 0), width: size.width, height: size.height);

    /// 起始角度
    /// angle.value 动画控制器的值 0.2~1 0是完全闭合就是 起始0~360° 1是完全张开 起始 40°~ 280° 顺时针
    var a = angle.value * 40 / 180 * pi;
    // 绘制圆弧
    canvas.drawArc(rect, a, 2 * pi - a * 2, true, _paint);
    //画眼睛
    canvas.drawOval(
        Rect.fromCenter(
            center: Offset(0, -size.height / 3), width: 8, height: 8),
        _paint..color = Colors.black87);
canvas.drawOval(
    Rect.fromCenter(
        center: Offset(-1.5, -size.height / 3 - 1.5), width: 3, height: 3),
    _paint..color = Colors.white);
  }

  @override
  bool shouldRepaint(covariant Pain2Painter oldDelegate) {
    return oldDelegate.listenable != listenable;
  }
}
至此,一个简单的吃豆人加载Loading就完成啦。再也不要到处都是菊花转的样式了。。。
通过这个加载Loading动画可以重新复习下Flutter中绘制、动画的使用的联动使用、还有多状态重绘机制,通过动画还可以改变吃豆的速度和吃豆的时间运动轨迹,有兴趣可以试试哦。
以上就是基于Flutter制作一个吃豆人加载动画的详细内容,更多关于Flutter加载动画的资料请关注编程网其它相关文章!
--结束END--
本文标题: 基于Flutter制作一个吃豆人加载动画
本文链接: https://lsjlt.com/news/146570.html(转载时请注明来源链接)
有问题或投稿请发送至: 邮箱/279061341@qq.com QQ/279061341
2024-01-21
2023-10-28
2023-10-28
2023-10-27
2023-10-27
2023-10-27
2023-10-27
回答
回答
回答
回答
回答
回答
回答
回答
回答
回答
0