Python 官方文档:入门教程 => 点击学习
目录一、SpringBoot——Actuator1.1 快速开始1.2 简单介绍最常用的几个端点1.3 开启或关闭某个端点1.4 定制端点1.5 springBoot——Admin
未来每一个微服务在运算部署以后,我们都需要对其进行监控、追踪、审计和控制等等。Springboot就抽取了Actuator场景,使得我们每个微服务快速引用即可获得生产级别的应用监控、审计等功能。
那么,我们要怎么用呢?
首先,导入我们的场景:
<!--指示监控-->
<dependency>
    <groupId>org.springframework.boot</groupId>
    <artifactId>spring-boot-starter-actuator</artifactId>
</dependency>
导入场景后,我们启动我们的主程序,我们来访问一下这个actuator。
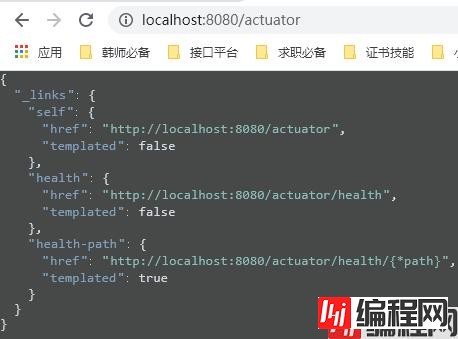
他告诉我们我们现在可以访问的有Http://localhost:8080/actuator和http://localhost:8080/actuator/health。
我们来看一下这个health。(下图的意思是正常,如果是宕机状态的话,他的值是DOWN)
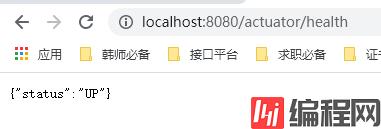
在上面的网址:http://localhost:8080/actuator/health 中,actuator后的health是actuator模块的一个端点。类似的端点还有很多,借用一下官网的表吧:
| 端点 | 描述 |
|---|---|
| auditevents | 公开当前应用程序的审计事件信息。需要一个AuditEventRepository豆子。 |
| beans | 显示应用程序中所有 Spring bean 的完整列表。 |
| caches | 公开可用的缓存。 |
| conditions | 显示在配置和自动配置类上评估的条件以及它们匹配或不匹配的原因。 |
| configprops | 显示所有 的整理列表@ConfigurationProperties。 |
| env | 从 Spring 的ConfigurableEnvironment. |
| flyway | 显示已应用的任何 Flyway 数据库迁移。需要一颗或多Flyway颗豆子。 |
| health | 显示应用程序运行状况信息。 |
| httptrace | 显示 HTTP 跟踪信息(默认情况下,最后 100 个 HTTP 请求-响应交换)。需要一个HttpTraceRepository豆子。 |
| info | 显示任意应用程序信息。 |
| integrationgraph | 显示 Spring 集成图。需要依赖于spring-integration-core. |
| loggers | 显示和修改应用程序中记录器的配置。 |
| liquibase | 显示已应用的任何 Liquibase 数据库迁移。需要一颗或多Liquibase颗豆子。 |
| metrics | 显示当前应用程序的“指标”信息。 |
| mappings | 显示所有@RequestMapping路径的整理列表。 |
| quartz | 显示有关 Quartz 调度程序作业的信息。 |
| scheduledtasks | 显示应用程序中的计划任务。 |
| sessions | 允许从 Spring Session 支持的会话存储中检索和删除用户会话。需要使用 Spring Session 的基于 Servlet 的 WEB 应用程序。 |
| shutdown | 让应用程序正常关闭。默认禁用。 |
| startup | 显示由收集的启动步骤数据ApplicationStartup。需要SpringApplication使用BufferingApplicationStartup. |
| threaddump | 执行线程转储。 |
注意:虽然我们的Springboot有这么多Actuator的监控端点,但是,我们刚才也看到了,他默认情况下在HTTP就给我们开了一个health的端点。其他端点默认是无法访问的,得要我们手动开启才行。但是在我们的JMX中默认暴露的就是所有的端点了。
什么东西?JMX??JMX是什么?
JMX(Java Management Extensions,即Java管理扩展)是一个为应用程序、设备、系统等植入管理功能的框架。JMX可以跨越一系列异构操作系统平台、系统体系结构和网络传输协议,灵活的开发无缝集成的系统、网络和服务管理应用。(来源于百度百科)
那我们怎么打开它呢?
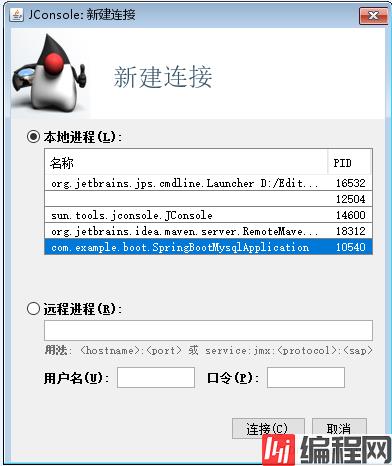
简单,我们打开cmd,输入jconsole。

然后,选择我们现在的那个SpringBoot的项目。
在我们的MBean菜单项中,可以找到org.springframework.boot,Endpoint(端点),里面那些就是我们所对应的端点及其信息了。
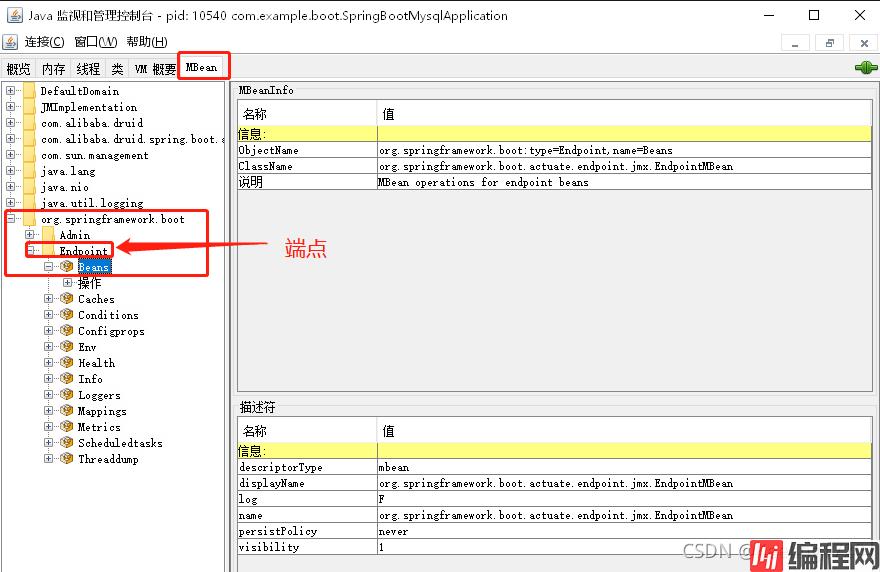
我们可以通过点击Beans端点下的操作,再点击他的beans按钮查看我们当前所有的bean。
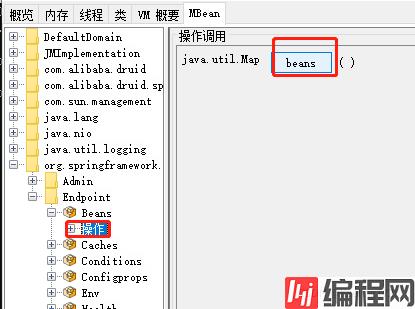
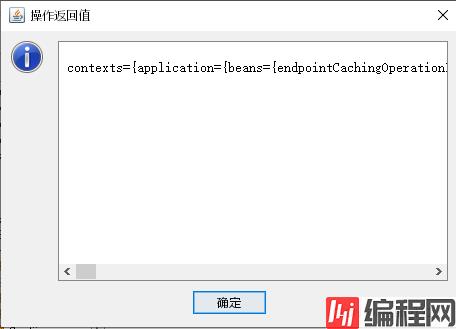
但是这种方式看起来,属实不舒服。所以,我们就想,能不能打开web端的这些个端点信息呢?答案肯定是可以的。
官网给出的打开方式如下:
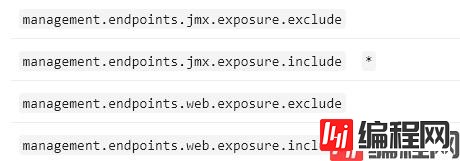
解释一下:
举两个案例:
停止通过 JMX 公开所有端点而仅公开health和info端点
management:
  endpoints:
    jmx:
      exposure:
        include: "health,info"
通过 HTTP 公开除env和beans端点之外的所有端点
management:
  endpoints:
    web:
      exposure:
        include: "*"
        exclude: "env,beans"
我们可以尝试打开所有的端点看一下:
management:
  endpoints:
    web:
      exposure:
        include: '*'
编译一下,然后我们看一下我们的beans端点:
里面有我们所有的Bean,包括他们是不是单例,他们的全类名和依赖等等信息。
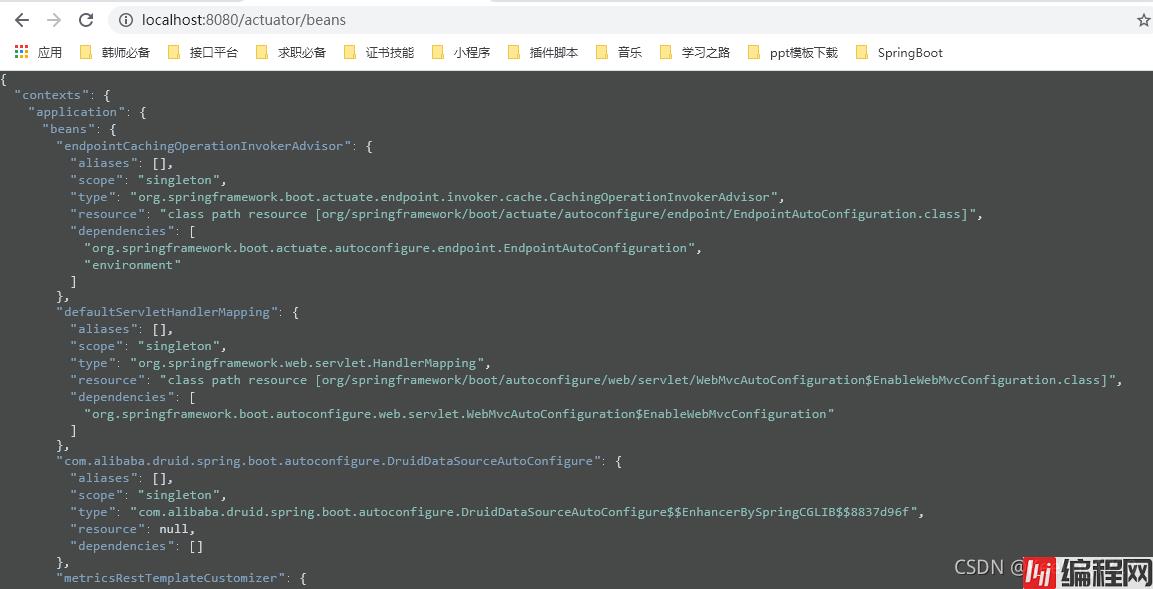
我们还可以访问我们的conditions端点,查看我们所有的配置(包括我们成功配置的和没有配置的)
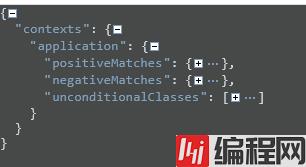
还有他们为什么能够配置上:

以及他们为什么不能够配置上:

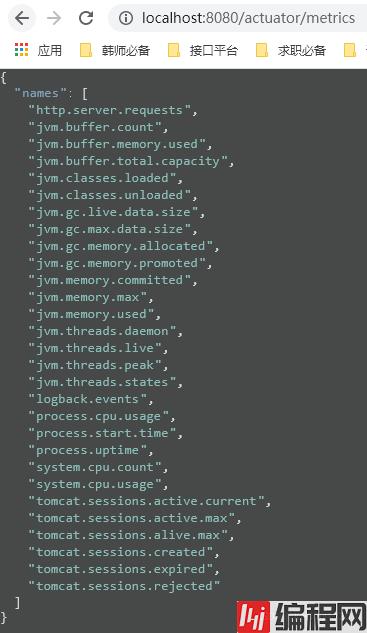
我们再来看一个常用的端点:metrics。
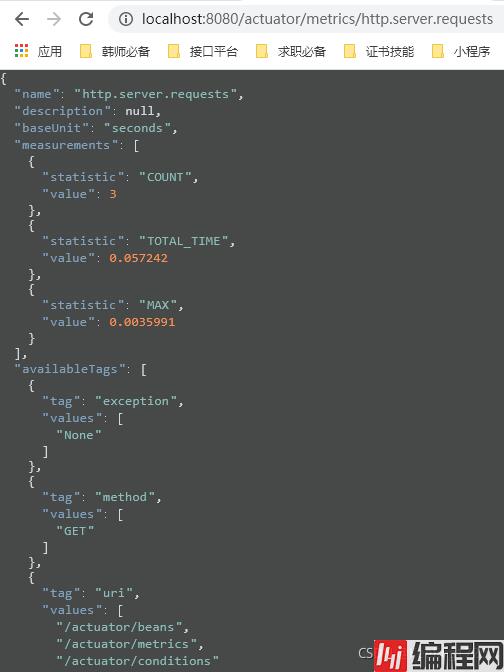
他可以看很多消息,具体翻译一下即可,比如第一个http.server.requests,说的就是我们的http请求。我们可以访问来看一下。
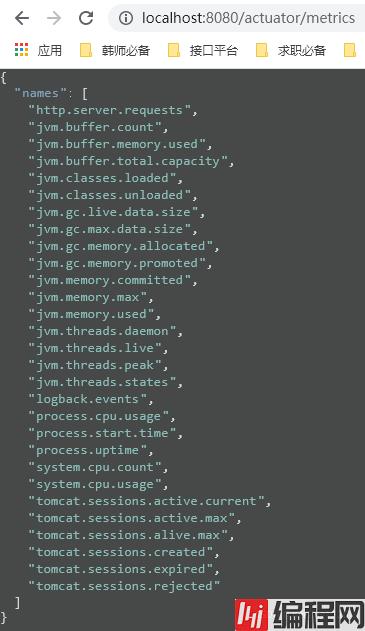
直接在/metrics后边加上面的字符串就可以了。
1.2.1 health(健康状况)
健康检查端点,一般用于云平台,平台会定时的检查应用的监控状况,为此,我们就需要使用health端点为平台返回当前应用的一系列组件的健康状况的集合。
重要的几点:
1、健康端点返回的结果,应该是一系列健康检查后的一个汇总报告
2、很多的健康检查默认已经自动配置好了,比如:数据库、Redis等
3、可以很容易的添加自定义的健康检查机制
前面我们已经说过了端点,好像没啥特别的呀,别急嘛。那主要是因为我们没有让他显示详细的信息。
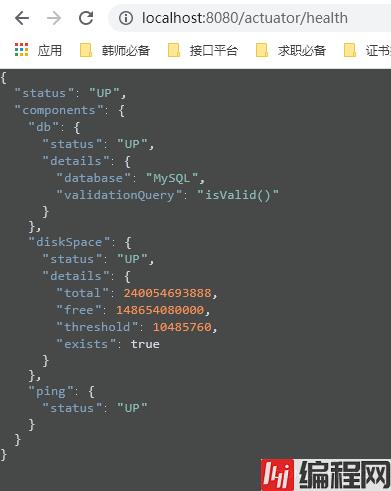
现在,我们来让health端点显示详细信息,在配置文件中这么配置:(注意:配置所有的端点的时候,我们用的是复数的endpoints,而配置具体某个端点的时候,我们用的是endpoint)
management:
  endpoint:
    health:
      show-details: always
此时我们再访问health端点:
解释一下:
1、首先是db,数据库,健康,通过isValid方法判断出来。
2、然后是diskSpace,我们的磁盘空间,总计是240054693888,空闲是148654080000,使用10485760。
3、最后是ping,表示能ping通
1.2.2 metrics(运行时指标)
指标端点主要用于提供详细的、层级的、空间指标信息,这些信息可以被pull(主动推送)或者push(被动获取)方式得到。
重要的几点:
1、通过metrics对接多种监控系统
2、简化核心metrics的开发
3、添加自定义metrics或者扩展已有metrics
这个我们前面已经讲过了。他里面含有我们很多的指标信息。具体有哪些我们可以进入/actuator/metrics下进行查看。然后,我们找到我们要查看的指标信息对应的字符串,将那段字符串后接到/metrics/后边即可。
1.2.3 loggers(日志记录)
这个感觉也没啥好说的,自己访问去看一下即可。
上面讲的那种直接开启web端所有的端点的方式,其实还是比较危险的,因此,我们一般需要修改默认的配置。让他不要开启那么多的端点给我们的http或者JMX。我们修改他的默认配置。(默认是true,true情况下开启JMX下所有的端点,开启http下的health端点)
management:
  endpoints:
    enabled-by-default: false
然后我们想开启某个端点的话,我们就在配置文件给他的enable属性赋予true。
比如,开启我们的health和info端点
management:
  endpoint:
    health:
      show-details: always
      enabled: true
    info:
      enabled: true
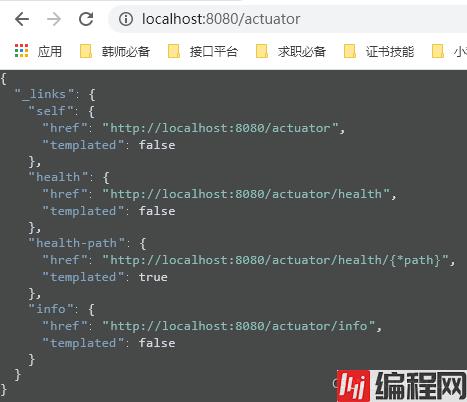
此时,我们再访问我们的/actuator可以看到,他只开启了health和info两个端点。
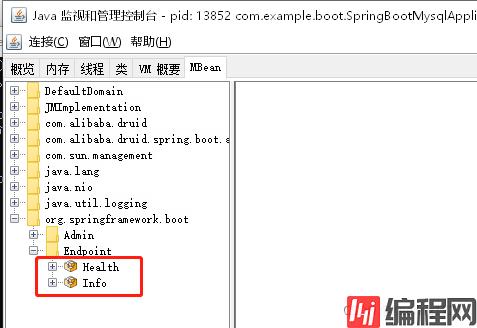
去我们的JMX看一下:(也只剩下两个了)
1.4.1 定制我们的Health端点
我们知道这个端点默认的给我们设置了数据库和磁盘信息的健康情况。但是,当我们引入其他的组件的时候,我们也希望他判断一下,这个组件健不健康,健康的话,给我们返回什么信息,不健康的话,又给我们返回什么信息。
下面,我们就模仿磁盘给出的信息的格式,来给Health端点定制一个对我们自己的某个组件的检查。
很简单,只需要写一个类继承AbstractHealthIndicator类或者实现HealthIndicator接口,然后实现他的doHealthCheck方法。
我们可以参照DiskSpaceHealthIndicator类的doHealthCheck方法来写一个。
//
// Source code recreated from a .class file by IntelliJ idea
// (powered by FernFlower decompiler)
//

package org.springframework.boot.actuate.system;

import java.io.File;
import org.apache.commons.logging.Log;
import org.apache.commons.logging.LogFactory;
import org.springframework.boot.actuate.health.AbstractHealthIndicator;
import org.springframework.boot.actuate.health.Health.Builder;
import org.springframework.core.log.LogMessage;
import org.springframework.util.unit.DataSize;

public class DiskSpaceHealthIndicator extends AbstractHealthIndicator {
    private static final Log logger = LogFactory.getLog(DiskSpaceHealthIndicator.class);
    private final File path;
    private final DataSize threshold;

    public DiskSpaceHealthIndicator(File path, DataSize threshold) {
        super("DiskSpace health check failed");
        this.path = path;
        this.threshold = threshold;
    }

    protected void doHealthCheck(Builder builder) throws Exception {
        long diskFreeInBytes = this.path.getUsableSpace();
        if (diskFreeInBytes >= this.threshold.toBytes()) {
            builder.up();
        } else {
            logger.warn(LogMessage.fORMat("Free disk space below threshold. Available: %d bytes (threshold: %s)", diskFreeInBytes, this.threshold));
            builder.down();
        }

        builder.withDetail("total", this.path.getTotalSpace()).withDetail("free", diskFreeInBytes).withDetail("threshold", this.threshold.toBytes()).withDetail("exists", this.path.exists());
    }
}
来,我们继承并重写doHealthCheck方法的代码如下:
package com.example.boot.health;

import org.springframework.boot.actuate.health.AbstractHealthIndicator;
import org.springframework.boot.actuate.health.Health;
import org.springframework.stereotype.Component;

import java.util.HashMap;
import java.util.Map;

@Component
public class MyIndicator extends AbstractHealthIndicator {

    @Override
    protected void doHealthCheck(Health.Builder builder) throws Exception {
        //判断的变量
        boolean flag = true;
        //存储详细信息
        Map<String, Object> msg = new HashMap<>();
        //判断是否健康
        if(flag){
            //健康
            builder.up();
            msg.put("code",200);
            msg.put("detail","我各个地方都没有问题");
        }else {
            //不健康
            builder.down();
            msg.put("code",500);
            msg.put("detail","服务器好像出了什么毛病");
        }
        //将数据写入检查器
        builder.withDetail("codes",100)
                .withDetails(msg);
    }
}
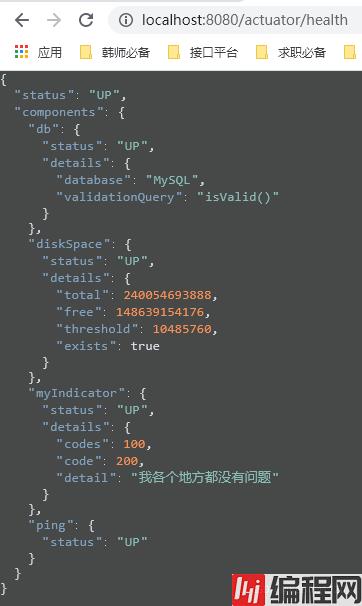
结果如下:
1.4.2 定制我们的Info端点
对于info信息的定制,我们有两种定制方式。
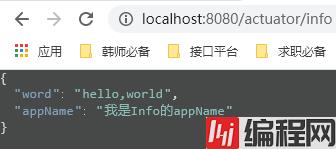
方式一、在yaml文件中直接配置即可。以info开头,后边自己随便加变量和属性值。(只有一级目录,有二级目录会报错)
info:
  Word: hello,world
  appName: 我是Info的appName
运行:
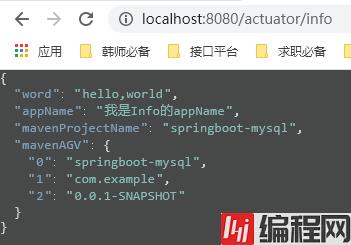
我们还可以拿pom.xml的东西,通过@@获取。
info:
  word: hello,world
  appName: 我是Info的appName
  MavenProjectName: @project.name@
  mavenAGV: [@project.artifactId@, @project.groupId@, @project.version@]
结果:
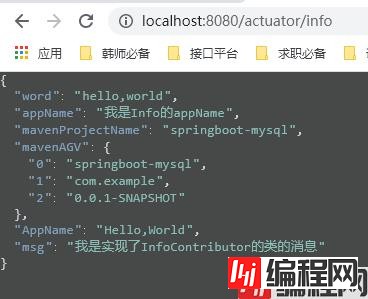
方式二、编写一个类实现InfoContributor接口
package com.example.boot.info;

import org.springframework.boot.actuate.info.Info;
import org.springframework.boot.actuate.info.InfoContributor;
import org.springframework.stereotype.Component;

@Component
public class MyInfo implements InfoContributor {
    @Override
    public void contribute(Info.Builder builder) {
        builder.withDetail("AppName","Hello,World")
                .withDetail("msg","我是实现了InfoContributor的类的消息");
    }
}
结果:
1.4.3 定制我们的metrics端点
先打开我们的metrics端点。
management:
  endpoint:
    health:
      show-details: always
      enabled: true
    info:
      enabled: true
    metrics:
      enabled: true
然后,假如我们现在要计算某个方法被调用的次数。
package com.example.boot.service.impl;

import com.baomidou.mybatisplus.extension.service.impl.ServiceImpl;
import com.example.boot.bean.User;
import com.example.boot.mapper.UserMapper;
import com.example.boot.service.UserService;
import io.micrometer.core.instrument.Counter;
import io.micrometer.core.instrument.MeterReGIStry;
import org.springframework.stereotype.Service;

import java.util.List;

@Service
public class UserServiceImpl extends ServiceImpl<UserMapper, User> implements UserService {

    Counter counter;

    //在构造器传入参数MeterRegistry registry
    UserServiceImpl(MeterRegistry registry){
        //设置在metrics端点下的名称
        counter = registry.counter("userServiceImpl.list.count");
    }

    @Override
    public List<User> list() {
        //次数加1
        counter.increment();
        return super.list();
    }
}
编译一下,我们可以去看看此时的metrics端点。
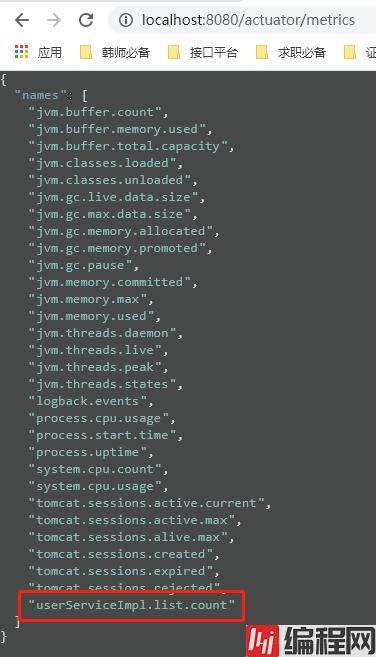
然后访问几次我们的localhost:8080/user。

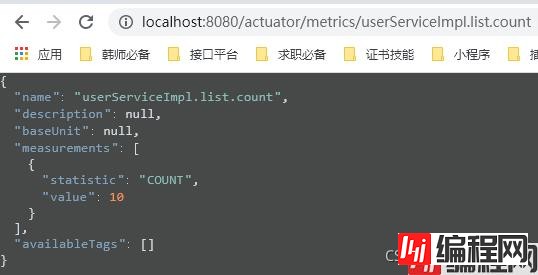
然后看一下我们的metrics/userServiceImpl.list.count。(可以看到我们调用了10次)
1.4.4 定制我们自己的端点
package com.example.boot.endpoint;

import org.springframework.boot.actuate.endpoint.annotation.Endpoint;
import org.springframework.boot.actuate.endpoint.annotation.ReadOperation;
import org.springframework.boot.actuate.endpoint.annotation.WriteOperation;
import org.springframework.stereotype.Component;

import java.util.HashMap;
import java.util.Map;


@Endpoint(id = "myEndPoint")
@Component
public class MyEndPoint {


    @ReadOperation
    public Map<String,Object> getDockerInfo(){
        Map<String, Object> map = new HashMap<>();
        map.put("dockerInfo","docker started......");
        return map;
    }


    @WriteOperation
    public void stopDocker(){
        System.out.println("docker stopped.......");
    }
}
定义完成后,我们可以打开我们的监控看一下:发现他是开着的。
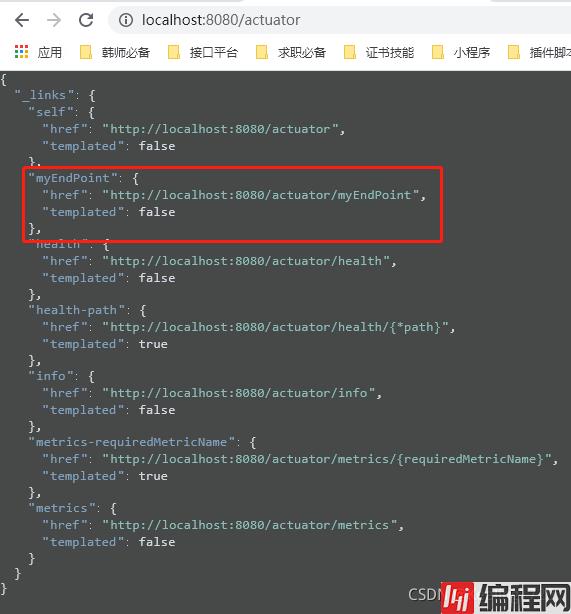
访问一下:(读操作)

至于写操作要怎么执行,我们只能打开我们的cmd,进我们的JMX看看了。
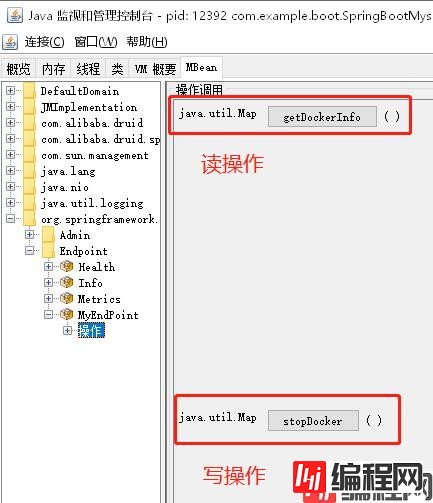
我们点击stopDocker。
编译器后台输出:docker stopped…

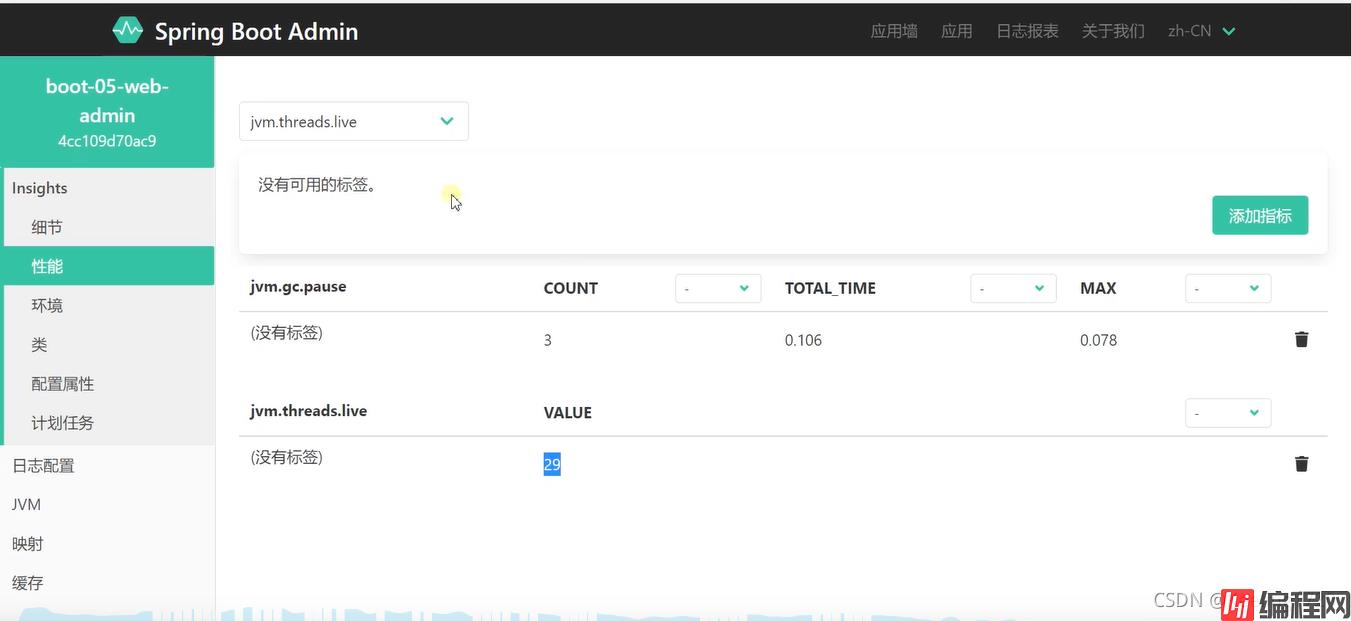
用来可视化我们所有的监控指数。(包括所有我们开启的端点的信息)具体可以点击这个链接观看尚硅谷的视频(时长13分25秒,每一秒都干货满满)。
运行的图大致如下:(部分截图仅供参考)
图1:
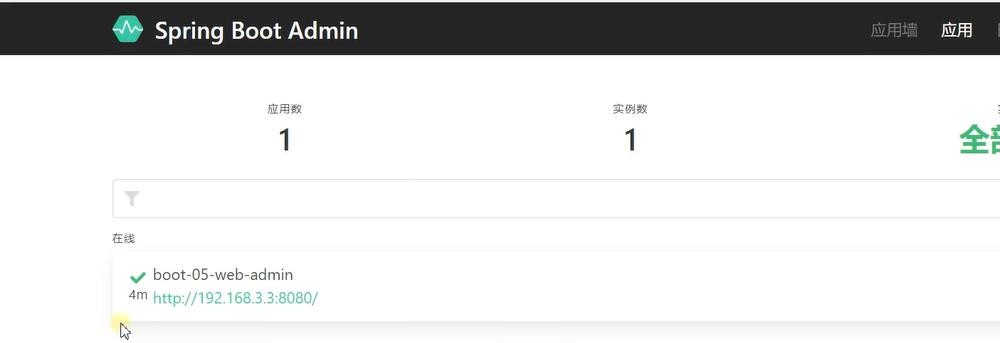
图2:
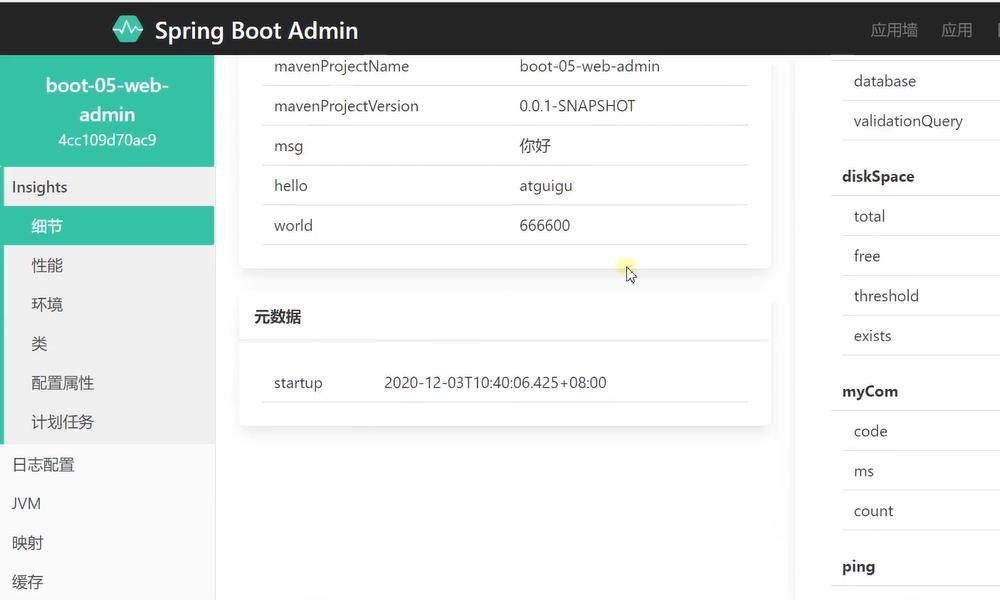
图3:
到此这篇关于SpringBoot指标监控的实现的文章就介绍到这了,更多相关SpringBoot指标监控内容请搜索编程网以前的文章或继续浏览下面的相关文章希望大家以后多多支持编程网!
--结束END--
本文标题: SpringBoot指标监控的实现
本文链接: https://lsjlt.com/news/136437.html(转载时请注明来源链接)
有问题或投稿请发送至: 邮箱/279061341@qq.com QQ/279061341
2024-03-01
2024-03-01
2024-03-01
2024-02-29
2024-02-29
2024-02-29
2024-02-29
2024-02-29
2024-02-29
2024-02-29
回答
回答
回答
回答
回答
回答
回答
回答
回答
回答
0