Python 官方文档:入门教程 => 点击学习
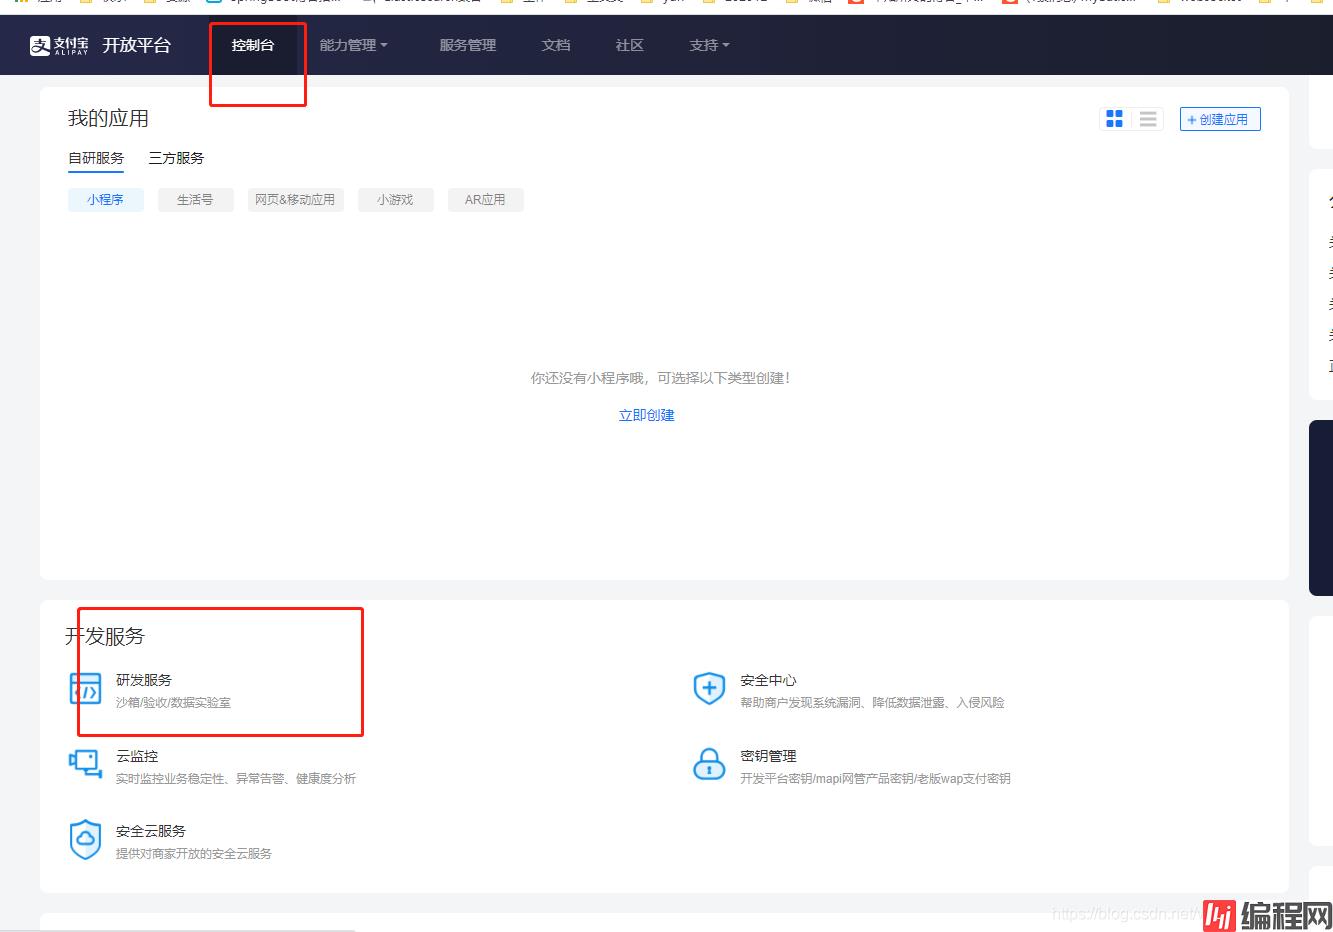
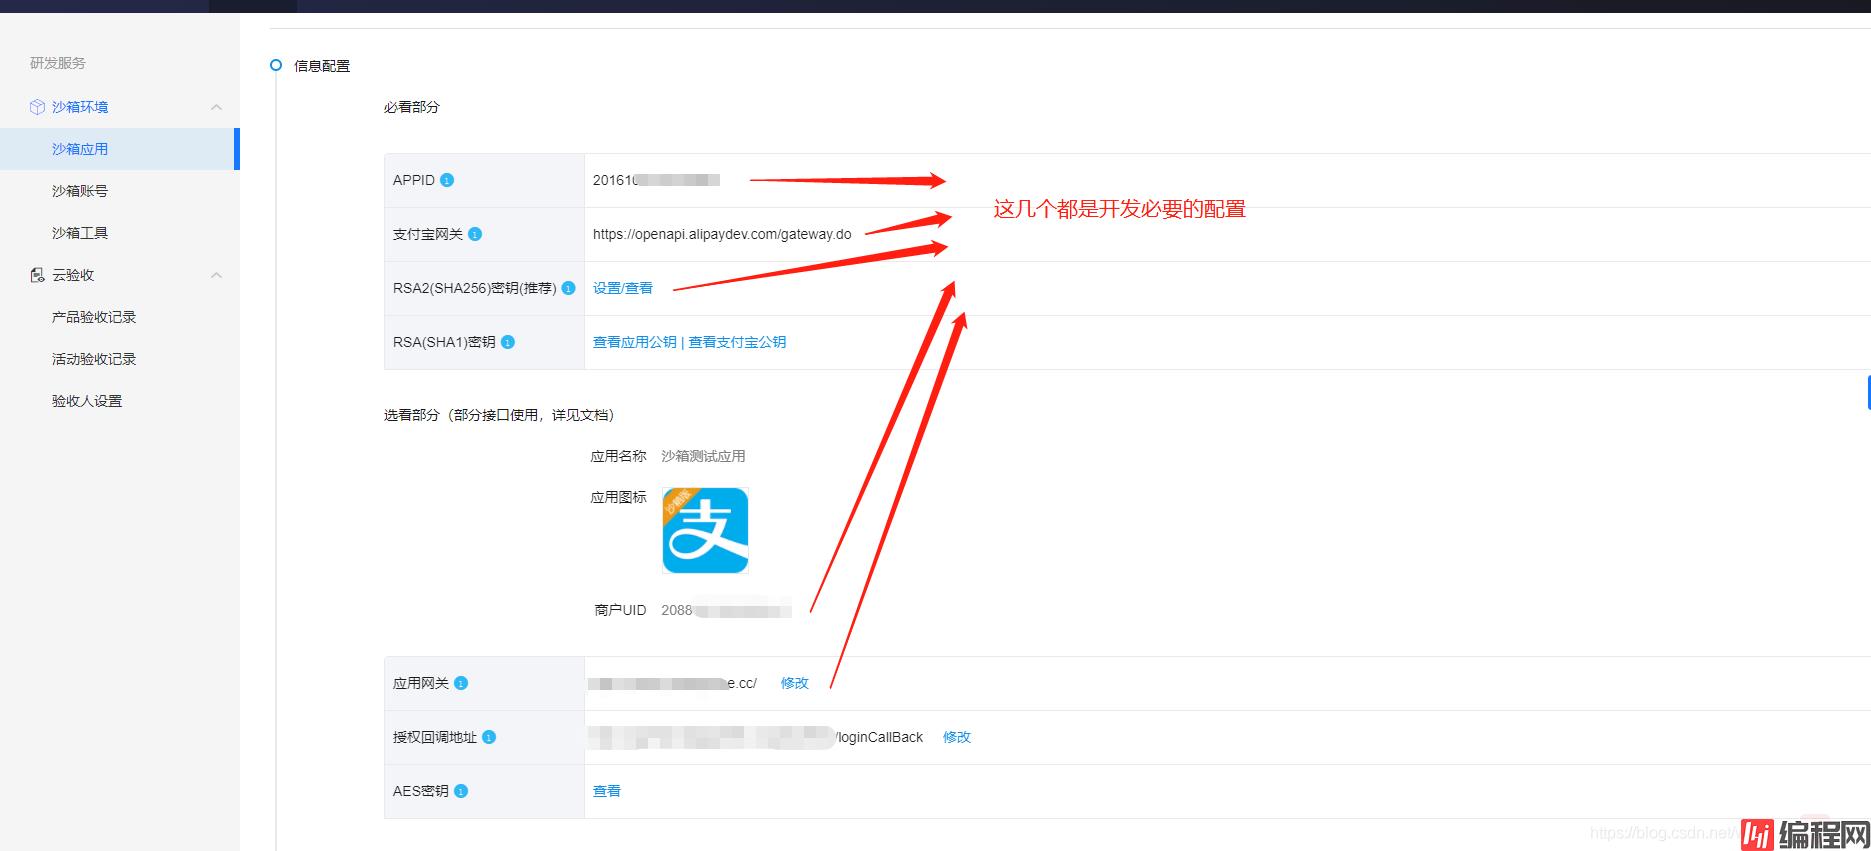
开发前准备 支付宝开发平台. 支付宝沙箱环境申请使用 !!!重点 授权回调地址必须要写全路径也就是controller最终路径(下面有具体细节) RSA2的密钥生成: 支付宝提供
支付宝开发平台.


!!!重点 授权回调地址必须要写全路径也就是controller最终路径(下面有具体细节)
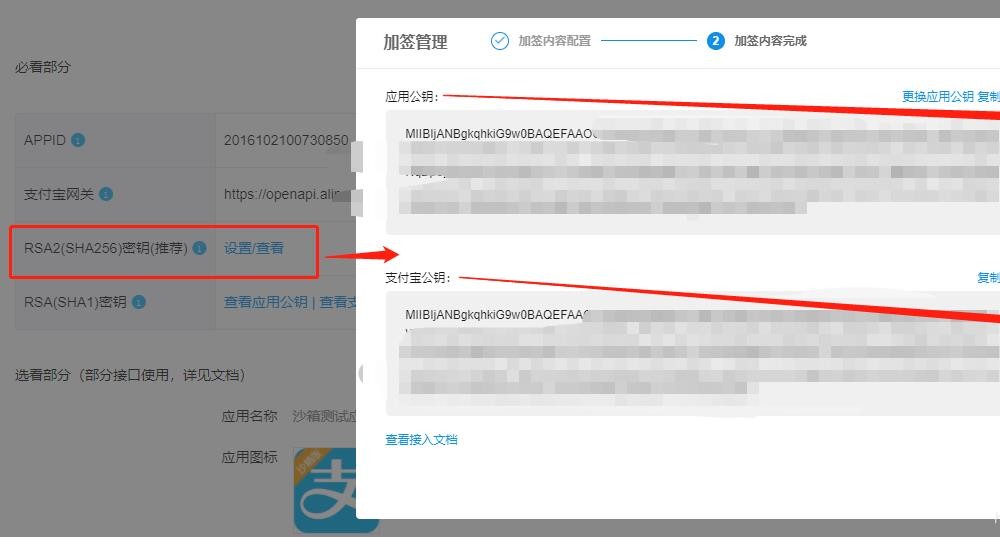
RSA2的密钥生成: 支付宝提供生成密钥地址.
生成唤起支付宝授权连接
用到appid+回调路径 回调路径=在上面配置的全路径 具体路径:
https://openauth.alipay.com/oauth2/publicAppAuthorize.htm?
app_id=2016####&scope=auth_user&edirect_uri=Http://ip | 域名 + 接口地址
也可以使用自定义参数的连接:
https://openauth.alipay.com/oauth2/publicAppAuthorize.htm?app_id=2016####
&state=自定义参数(多个用逗号拼接)&scope=auth_user&edirect_uri=http://ip | 域名 + 接口地址
具体怎么用??? 在线生成二维码用支付宝沙箱app扫码
回调地址接收支付宝参数
构建请求支付宝客户端
yml:
# 支付宝配置
ali:
  appId: 2016####

  # 自己的私钥
  merchantPrivateKey: 连接生成的私钥
  # 支付宝公钥
  alipayPublicKey: 链接生成的公钥配置后支付宝给到的支付宝公钥
  # 签名方式
  signType: RSA2
  # 字符编码格式
  charset: UTF-8
  # 字符编码格式
  fORMat: JSON
  # 支付宝网关 https://openapi.alipay.com/gateway.do 是正式的
  gatewayUrl: https://openapidev.alipay.com/gateway.do #dev是沙箱

Property:
import com.alipay.api.AlipayClient;
import com.alipay.api.DefaultAlipayClient;
import lombok.Data;
import org.springframework.boot.context.properties.ConfigurationProperties;
import org.springframework.stereotype.Component;


@Data
@Component
@ConfigurationProperties(prefix = "ali")
public class AliPayProperty {


    public String appId;

    public String merchantPrivateKey ;

    public String alipayPublicKey;

    public String format;

    public String signType;

    public String charset;

    public String gatewayUrl;


    public AlipayClient getAlipayClient(){
        AlipayClient alipayClient = new DefaultAlipayClient(
                this.gatewayUrl,
                this.appId,
                this.merchantPrivateKey,
                this.format,
                this.charset,
                this.alipayPublicKey,
                this.signType);
        return alipayClient;
    }

}
业务流程代码
controller:
@GetMapping(value = "/loginCallBack")
public String loginCallBack(HttpServletRequest request){
	return aliPayService.loginCallBack(request);
}
service:
public String loginCallBack(HttpServletRequest request){
	//获取用户扫码授权的参数
	Map<String,String> map = this.getAliPayParam(request);
	//获取用户扫码后的code
	String code = map.get("auth_code");
	//构建阿里客户端
    AlipayClient alipayClient = aliPayProperty.getAlipayClient();
	//获取阿里用户token
    AlipaySystemOauthTokenResponse aliUserToken =
    			this.getAliUserToken(code, alipayClient,0);
    //获取用户信息
    AlipayUserInfoShareResponse infoShareResponse =
    			this.getUserInfo(alipayClient, aliUserToken, 0);
    //!!!沙箱环境用户没有这些基本信息但是可以看到支付宝接口是成功的
    return "SUECCSS";
}
封装接收参数方法:
    public Map<String,String> getAliPayParam(HttpServletRequest request) {
        Map<String,String> map = new HashMap();
        Map<String, String[]> requestParams = request.getParameterMap();
        for (Iterator<String> iter = requestParams.keySet().iterator(); iter.hasNext();) {
            String name = (String) iter.next();
            String[] values = (String[]) requestParams.get(name);
            String valueStr = "";
            for (int i = 0; i < values.length; i++) {
                valueStr = (i == values.length - 1) ? valueStr + values[i] : valueStr + values[i] + ",";
            }
            // 乱码解决,这段代码在出现乱码时使用
//            valueStr = new String(valueStr.getBytes("ISO-8859-1"), "utf-8");
            map.put(name, valueStr);
            log.info("接受支付宝回调参数:{}",map);
        }
        return map;
    }
获取token方法:
    private AlipaySystemOauthTokenResponse getAliUserToken(String code, AlipayClient alipayClient,int number) throws AlipayApiException {
        AlipaySystemOauthTokenRequest alipaySystemOauthTokenRequest = new AlipaySystemOauthTokenRequest();
        alipaySystemOauthTokenRequest.setGrantType("authorization_code");
        alipaySystemOauthTokenRequest.setCode(code);
        AlipaySystemOauthTokenResponse oauthTokenResponse = alipayClient.execute(alipaySystemOauthTokenRequest);
        log.info("获得用户+++++++++++++++token:{}+++++++++++++++",oauthTokenResponse.getAccessToken());
        log.info("获得用户+++++++++++++++uuid:{}+++++++++++++++",oauthTokenResponse.getUserId());
        if(oauthTokenResponse.isSuccess()){
            log.info("成功");
        } else {
        	log.info("***********失败,自旋开始第:{}次",number);
            number += 1;
            if(number < 3){
                log.info("获取token失败,尝试:*******{}*******",number);
                return this.getAliUserToken(apiPayLoginReq, alipayClient, number);
            }
        }
        return oauthTokenResponse;
    }
获取用户支付宝信息方法:
private AlipayUserInfoShareResponse getUserInfo(AlipayClient alipayClient,AlipaySystemOauthTokenResponse aliUserToken,int number) throws AlipayApiException {
        AlipayUserInfoShareRequest alipayUserInfoShareRequest = new AlipayUserInfoShareRequest();
        AlipayUserInfoShareResponse infoShareResponse = alipayClient.execute(alipayUserInfoShareRequest,aliUserToken.getAccessToken());
        log.info("----------------获得支付宝用户详情:{}",infoShareResponse.getBody());
        UserInfoReq userInfoReq = new UserInfoReq();
        if(infoShareResponse.isSuccess()){
            //用户授权成功
            log.info("----------------获得支付宝用户基本而信息:{}",userInfoReq);
            log.info("成功");
        } else {
            log.info("***********失败,自旋开始第:{}次",number);
            number += 1;
            if(number < 3){
                log.info("调用用户详情失败,尝试:*******{}*******",number);
                return this.getUserInfo(alipayClient,aliUserToken,number);
            }
            return infoShareResponse ;
        }
    }
用户扫码后后会跳到你配置的回调地址上!!!但是因为代码中返回是success,用户收到的只是个字符串。所以此处因该是配置支付宝去回调前端地址 然后参数让前端原封不动传向后端 后端解析成功后,前端引导用户进行下一步操作
到此这篇关于Java接入支付宝授权第三方登录的文章就介绍到这了,更多相关Java接入支付宝授权内容请搜索编程网以前的文章或继续浏览下面的相关文章希望大家以后多多支持编程网!
--结束END--
本文标题: Java接入支付宝授权第三方登录的完整步骤
本文链接: https://lsjlt.com/news/129684.html(转载时请注明来源链接)
有问题或投稿请发送至: 邮箱/279061341@qq.com QQ/279061341
2024-03-01
2024-03-01
2024-03-01
2024-02-29
2024-02-29
2024-02-29
2024-02-29
2024-02-29
2024-02-29
2024-02-29
回答
回答
回答
回答
回答
回答
回答
回答
回答
回答
0