一、1 像素 Activity 提高进程优先级 使用 Activity 可以提升进程的 oom_adj 值 ; APP 进入后台后 , 使用 BroadcastReceiver 广播
使用 Activity 可以提升进程的 oom_adj 值 ;
APP 进入后台后 , 使用 BroadcastReceiver 广播接收者 , 监听 Android 系统的锁屏广播事件 ;
主界面 , 主要负责注册广播接收者 ;
package kim.hsl.keep_progress_alive;

import androidx.appcompat.app.AppCompatActivity;

import android.os.Bundle;

public class MainActivity extends AppCompatActivity {

    @Override
    protected void onCreate(Bundle savedInstanceState) {
        super.onCreate(savedInstanceState);
        setContentView(R.layout.activity_main);

        // 注册广播接收者
        KeepProgressAliveManager.getmInstance().reGISterReceiver(this);
    }

    @Override
    protected void onDestroy() {
        super.onDestroy();

        // 取消注册广播接收者, 也可以不取消注册
        //KeepProgressAliveManager.getmInstance().registerReceiver(this);
    }
}在锁屏时 , 弹出的 1 像素 Activity , 有可能有进程保活的同行 , 也弹出个同样类型的 Activity , 一般都是透明的 , 即使这样 , 最次也是个可见进程 ;
package kim.hsl.keep_progress_alive;

import android.app.Activity;
import android.os.Bundle;
import android.util.Log;
import android.view.Gravity;
import android.view.Window;
import android.view.WindowManager;

import androidx.annotation.Nullable;


public class OnePixelActivity extends Activity {
    @Override
    protected void onCreate(@Nullable Bundle savedInstanceState) {
        super.onCreate(savedInstanceState);

        Log.i("OnePixelActivity", "onCreate");

        // 获取本界面的窗口 Window 对象
        Window window = getWindow();
        // 屏幕左上角展示
        window.setGravity(Gravity.LEFT | Gravity.TOP);

        // 将 Activity 设置成 1 像素
        WindowManager.LayoutParams layoutParams = window.getAttributes();
        // 宽高都设置 1 像素
        layoutParams.width = 1;
        layoutParams.height = 1;
        // 放置位置 (0, 0) 坐标开始放置
        layoutParams.x = 0;
        layoutParams.y = 0;

        // 在将布局参数设置会 Window 对象中
        window.setAttributes(layoutParams);

        // 设置界面到 KeepProgressAliveManager 单例对象中 , 用于关闭界面
        KeepProgressAliveManager.getmInstance().setmOnePixelActivity(this);
    }

    @Override
    protected void onDestroy() {
        super.onDestroy();

        Log.i("OnePixelActivity", "onDestroy");
    }
}监听 Intent.ACTION_SCREEN_OFF 和 Intent.ACTION_SCREEN_ON , 两个广播 , 再锁屏时启动 1 像素 Activity , 在解除锁屏时 , 关闭 1 像素 Activity ;
package kim.hsl.keep_progress_alive;

import android.annotation.SuppressLint;
import android.content.BroadcastReceiver;
import android.content.Context;
import android.content.Intent;
import android.util.Log;

public class KeepProgressAliveReceiver extends BroadcastReceiver {
    @SuppressLint("LongLogTag")
    @Override
    public void onReceive(Context context, Intent intent) {
        String action = intent.getAction();
        Log.i("KeepProgressAliveReceiver", "action : " + action);

        if (Intent.ACTION_SCREEN_OFF.equals(action)){
            // 锁屏时开启 Activity
            KeepProgressAliveManager.getmInstance().startActivity(context);
            Log.i("KeepProgressAliveReceiver", "锁屏, 开启 1 像素 Activity");

        }else if (Intent.ACTION_SCREEN_ON.equals(action)){
            // 解除所屏蔽关闭 Activity
            KeepProgressAliveManager.getmInstance().finishActivity();
            Log.i("KeepProgressAliveReceiver", "解除锁屏, 关闭 1 像素 Activity");
        }
    }
}单例管理类 , 负责注册广播接收者 , 在广播接收者中启动 1 像素页面 , 同时也负责关闭该 1 像素页面 ;
该管理类负责 Activity 组件与 BroadcastReceiver 组件的耦合 ;
package kim.hsl.keep_progress_alive;

import android.annotation.SuppressLint;
import android.content.Context;
import android.content.Intent;
import android.content.IntentFilter;
import android.util.Log;

public class KeepProgressAliveManager {

    private static KeepProgressAliveManager mInstance;
    private KeepProgressAliveManager(){}
    public static KeepProgressAliveManager getmInstance(){
        if (mInstance == null){
            mInstance = new KeepProgressAliveManager();
        }
        return mInstance;
    }


    private KeepProgressAliveReceiver mKeepProgressAliveReceiver;


    private OnePixelActivity mOnePixelActivity;


    @SuppressLint("LongLogTag")
    public void registerReceiver(Context context){

        Log.i("KeepProgressAliveManager", "注册广播接收者");

        IntentFilter intentFilter = new IntentFilter();
        // 监听屏幕解除锁定广播
        intentFilter.addAction(Intent.ACTION_SCREEN_ON);
        // 监听[屏幕锁定广播
        intentFilter.addAction(Intent.ACTION_SCREEN_OFF);

        // 创建广播接收者
        mKeepProgressAliveReceiver = new KeepProgressAliveReceiver();
        // 注册广播接收者
        context.registerReceiver(mKeepProgressAliveReceiver, intentFilter);
    }


    @SuppressLint("LongLogTag")
    public void unregisterReceiver(Context context){
        Log.i("KeepProgressAliveManager", "取消注册广播接收者");
        if(mKeepProgressAliveReceiver != null){
            context.unregisterReceiver(mKeepProgressAliveReceiver);
            mKeepProgressAliveReceiver = null;
        }
    }


    public void startActivity(Context context){
        // 开启 OnePixelActivity 界面
        Intent intent = new Intent(context, OnePixelActivity.class);
        // 重新创建一个任务栈 ( 前提是亲和性不同 )
        intent.setFlags(Intent.FLAG_ACTIVITY_NEW_TASK);
        context.startActivity(intent);
    }


    public void setmOnePixelActivity(OnePixelActivity mOnePixelActivity) {
        this.mOnePixelActivity = mOnePixelActivity;
    }


    public void finishActivity(){
        // 关闭 Activity 界面
        this.mOnePixelActivity.finish();
        // 不要长期持有该 Activity 界面
        this.mOnePixelActivity = null;
    }

}主要是配置 1 像素 Activity 的亲和性设置 , 不要把这个 Activity 放在与主 Activity 相同的任务栈中 , 否则在解除锁定时 , 会拉起后台的无关任务栈 ;
同时也要注意不要把 1 像素 Activity 展示到用户眼前 , 对用户透明即可 ;
<?xml version="1.0" encoding="utf-8"?>
<manifest xmlns:android="Http://schemas.android.com/apk/res/android"
    package="kim.hsl.keep_progress_alive">

    <application
        android:allowBackup="true"
        android:icon="@mipmap/ic_launcher"
        android:label="@string/app_name"
        android:roundIcon="@mipmap/ic_launcher_round"
        android:supportsRtl="true"
        android:theme="@style/Theme.Keep_Progress_Alive">
        <activity android:name=".MainActivity">
            <intent-filter>
                <action android:name="android.intent.action.MAIN" />

                <cateGory android:name="android.intent.category.LAUNCHER" />
            </intent-filter>
        </activity>

        <!--
            设置最近任务列表中不显示该 Activity 组件 ( 不要被用户察觉 )
            android:excludeFromRecents="true"

            设置 Activity 亲和性
            让该界面在一个独立的任务栈中 , 不要与本应用的其它任务栈放在一起
            避免解除锁屏后 , 关闭 1 像素界面 , 将整个任务栈都唤醒
            android:taskAffinity="kim.hsl.keep_progress_alive.alive"
        -->
        <activity
            android:name=".OnePixelActivity"
            android:theme="@style/OnePixelActivityTheme"
            android:excludeFromRecents="true"
            android:taskAffinity="kim.hsl.keep_progress_alive.onepixel" />

    </application>

</manifest>要保证 1 像素 Activity 界面完全透明 ;
<resources xmlns:tools="http://schemas.android.com/tools">
    <!-- Base application theme. -->
    <style name="Theme.Keep_Progress_Alive" parent="Theme.MaterialComponents.DayNight.DarkActionBar">
        <!-- Primary brand color. -->
        <item name="colorPrimary">@color/purple_500</item>
        <item name="colorPrimaryVariant">@color/purple_700</item>
        <item name="colorOnPrimary">@color/white</item>
        <!-- Secondary brand color. -->
        <item name="colorSecondary">@color/teal_200</item>
        <item name="colorSecondaryVariant">@color/teal_700</item>
        <item name="colorOnSecondary">@color/black</item>
        <!-- Status bar color. -->
        <item name="android:statusBarColor" tools:targetapi="l">?attr/colorPrimaryVariant</item>
        <!-- Customize your theme here. -->
    </style>

    <style name="OnePixelActivityTheme">
        <!-- 清空窗口背景 -->
        <item name="android:windowBackground">@null</item>
        <!-- 设置窗口背景透明 -->
        <item name="android:windowIsTranslucent">true</item>
    </style>
</resources>
        <activity
            android:name=".OnePixelActivity"
            android:theme="@style/OnePixelActivityTheme"
            android:excludeFromRecents="true"
            android:taskAffinity="kim.hsl.keep_progress_alive.onepixel" />
Activity 在 AndroidManifest.xml 清单文件 中的 android:taskAffinity 亲和性设置 , 主要是设置该 Activity 的任务栈 ;
亲和性相同的 Activity 组件 , 放在同一个任务栈中 ;
应用的亲和性属性默认就是包名 , 如果不设置 , 默认是在同一个任务栈中的 ;
① 亲和性拉起 : 如果 Activity A 组件的 allowTaskReparenting 属性设置为 true , 该 Activity 组件进入后台 , 当有一个新的 Activity B 与 Activity A 组件有相同的亲和性 , 那么 Activity A 会被拉起 , 放入 Activity B 所在的任务栈 ;
② 创建新的任务栈 : 启动 Activity , 并且设置 Intent.FLAG_ACTIVITY_NEW_TASK 标志 , 会查询是否有相同的亲和性任务栈 , 如果有则将该 Activity 放入该任务栈 , 如果没有 , 则创建一个新的任务栈 ; ( 本博客示例中 , 就使用了这种用法 )
③ 加载 SingleTask Activity : 首先检查是否有相同亲和性的 Activity , 如果有则销毁已存在的 Activity 所在栈内的 Activity 以上的界面 , 调用该 Activity 的 onNewIntent 方法 ; 如果没有 , 则查询是否有该任务栈 , 有任务栈便入栈 , 没有任务栈就创建新的任务栈 ;
④ 加载 SingleInstance Activity : 首先检查是否有相同亲和性的 Activity ; 如果有则调用该 Activity 的 onNewIntent 方法 ; 如果没有创建新的 Activity 放入新的任务栈 ;
运行该应用 , 获取应用的进程 PID = 3891 3891 3891 , 在 Android Studio 中查看即可 ;
查看日志发现 , 广播接收者已经注册 ;
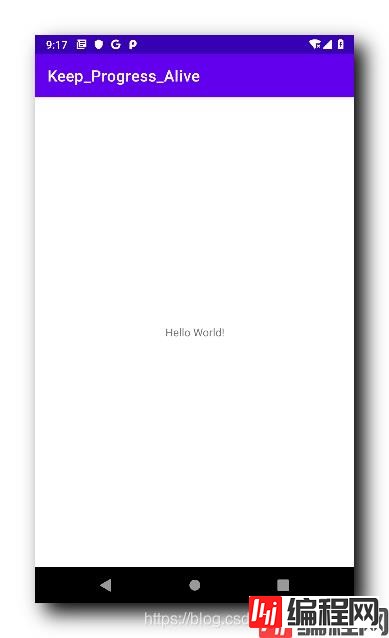
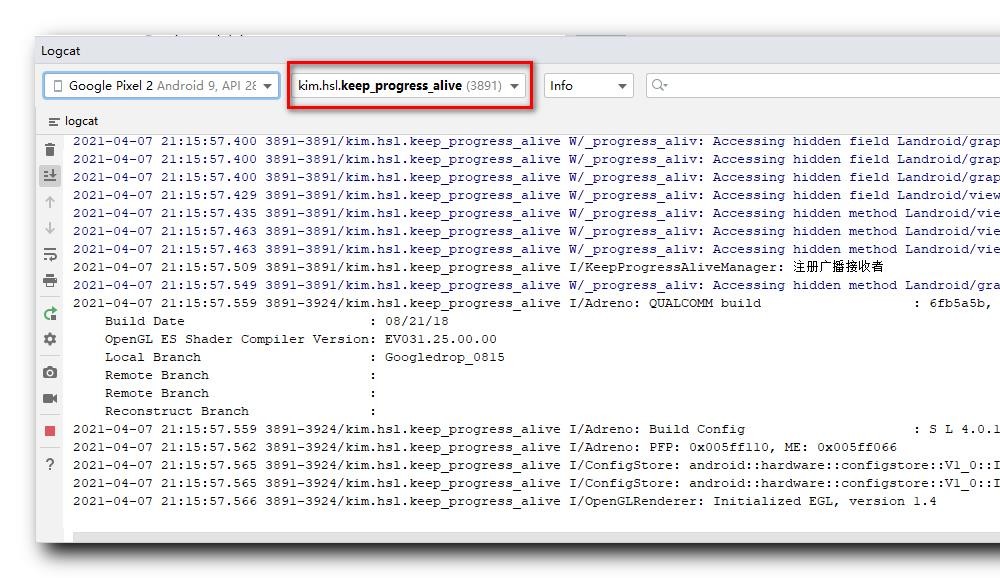
查询此时该应用的 oom_adj 值为 0 0 0 , 前台进程 ;
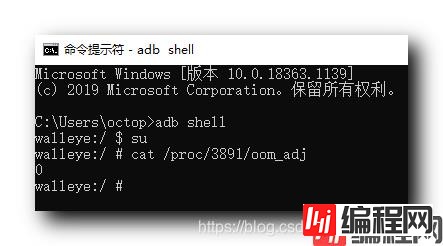
C:\Users\octop>adb shell
walleye:/ $ su
walleye:/ # cat /proc/3891/oom_adj
0
walleye:/ #
按下 Home 键 , 界面如下 , LoGCat 日志基本没有变化 ;
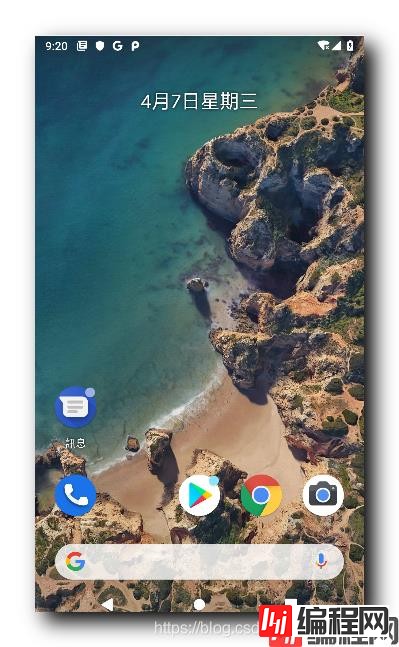
查询该 PID 对应的 oom_adj 值 12 12 12 , 后台进程 ;
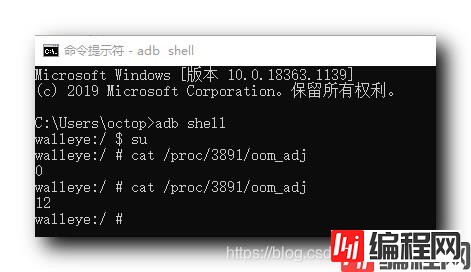
C:\Users\octop>adb shell
walleye:/ $ su
walleye:/ # cat /proc/3891/oom_adj
0
walleye:/ # cat /proc/3891/oom_adj
12
walleye:/ #
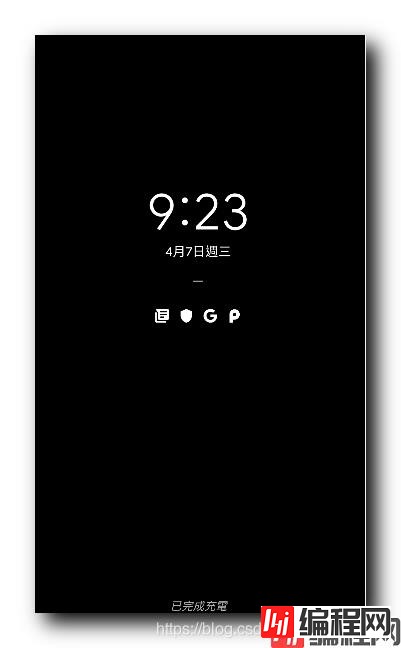
按下锁屏键 , 查询该 PID 对应的 oom_adj 值 ,
界面锁屏 ,
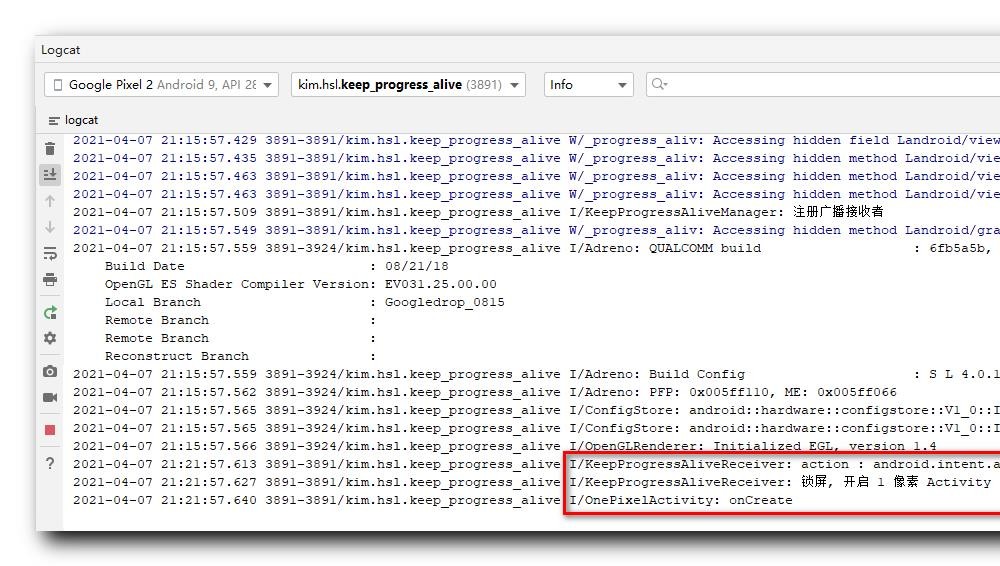
日志有更新 , 说明 1 像素 Activity 已经启动 ;
查询该 PID 对应的 oom_adj 值 0 0 0 , 前台进程 ;
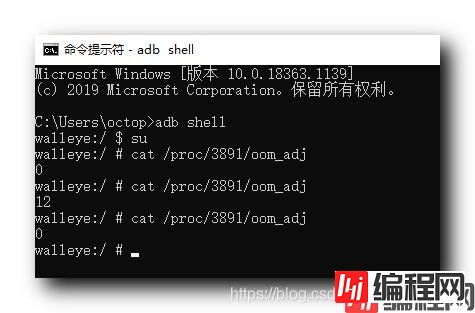
C:\Users\octop>adb shell
walleye:/ $ su
walleye:/ # cat /proc/3891/oom_adj
0
walleye:/ # cat /proc/3891/oom_adj
12
walleye:/ # cat /proc/3891/oom_adj
0
walleye:/ #
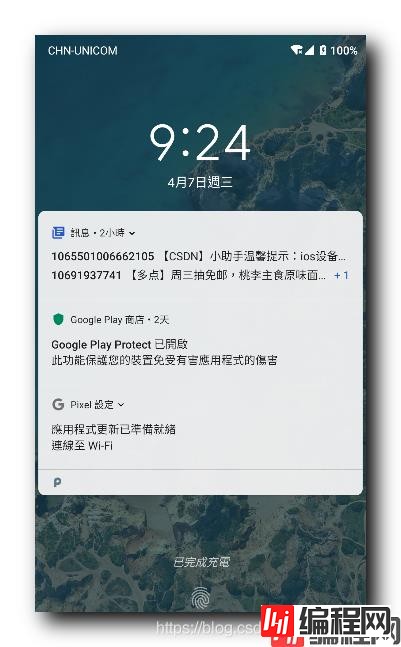
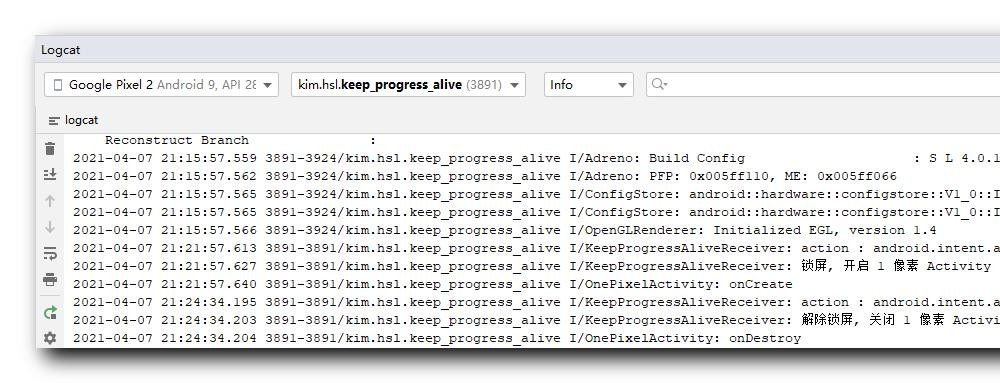
唤醒 , 查询该 PID 对应的 oom_adj 值 ,
日志信息中显示 , 唤醒时 , 1 像素 Activity 退出 , 此时解除锁屏 ;
查询该 PID 对应的 oom_adj 值 12 12 12 , 后台进程 ;
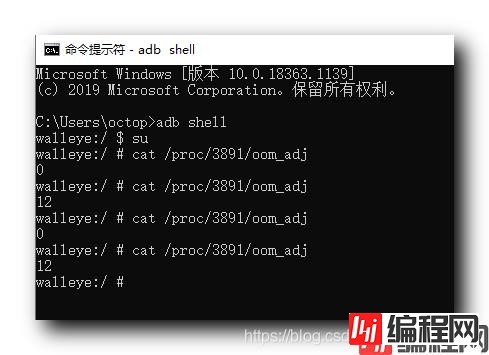
C:\Users\octop>adb shell
walleye:/ $ su
walleye:/ # cat /proc/3891/oom_adj
0
walleye:/ # cat /proc/3891/oom_adj
12
walleye:/ # cat /proc/3891/oom_adj
0
walleye:/ # cat /proc/3891/oom_adj
12
walleye:/ #
该案例实现了在锁屏时 , 进程没有被杀死 ;
以上就是Android进程保活之提升进程优先级的详细内容,更多关于Android提升进程优先级的资料请关注编程网其它相关文章!
--结束END--
本文标题: Android进程保活之提升进程优先级
本文链接: https://lsjlt.com/news/123173.html(转载时请注明来源链接)
有问题或投稿请发送至: 邮箱/279061341@qq.com QQ/279061341
2024-01-21
2023-10-28
2023-10-28
2023-10-27
2023-10-27
2023-10-27
2023-10-27
回答
回答
回答
回答
回答
回答
回答
回答
回答
回答
0